A Conex Half Box
The Kid has been staying in our teeny tiny Airstream again and let me tell you, NOBODY has patience for that anymore. It was one thing when he was three, four, and five. It’s a whole other story when he is almost 10. Poor thing he doesn’t fit on the couch without scrunching into a ball. When did he get to be so big? No, not old because that implies I too am older and I am not. I am still just in my …… Hmm, don’t even know what age to say. Ok then, moving on…

Having the Doubter’s trailer for just those few month meant for the first time in too long, the Kid has his own space. Wanting to have a space for the Kid and a space for the Doubter but not wanting to go the travel trailer route again, the Kid is getting his own box. Boxes in Fields has had since before we even left the Doubter and moved home. It was just hanging out on the trailer biding its time. The Kid’s Box is unlike any of other conex boxes. In fact, the only two things the same are 1) it’s a conex and 2) it’s a high cube. This, the fifth conex at Boxes in Fields, is a 20′ single use. What does that mean? Conex #5 has only crossed the great big blue one time and is as new as it’s going to get. No dents, dings, or replaced panels. No multi-mixed-matched shades of paint, only the original coating of light gray. Best of all, no rust.
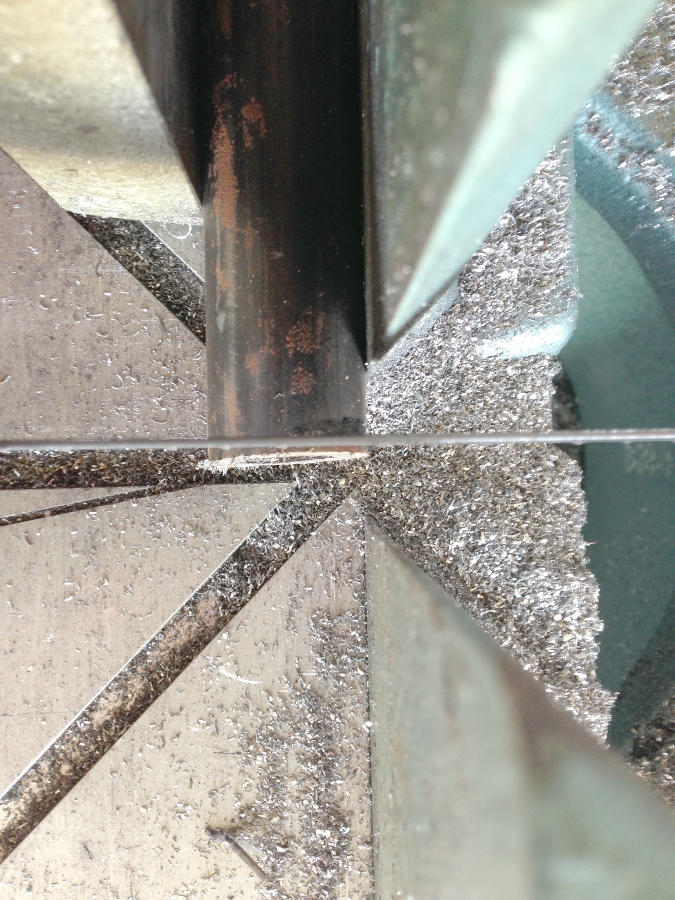
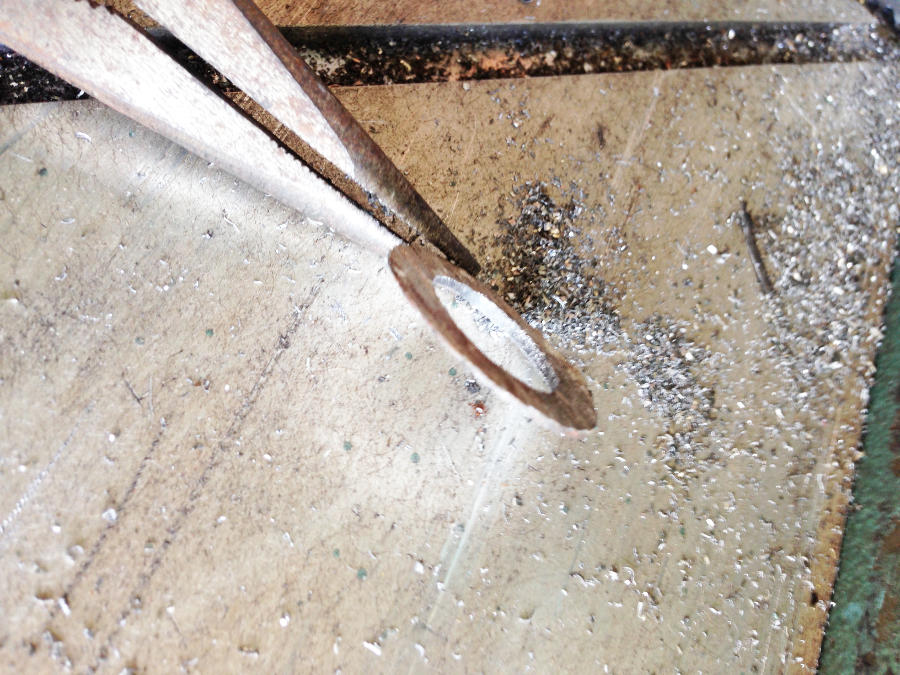
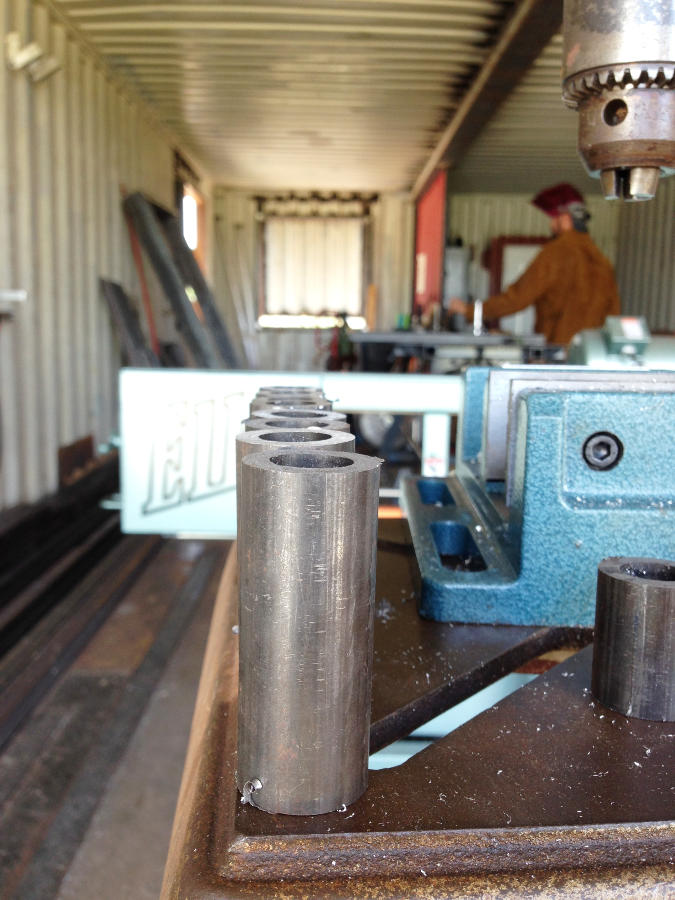
As with all the other boxes, window and door frames and hatches were made. I was in charge of the window prop supports. It was told to me to make the pipe flush before starting on my cuts. Apparently, one is supposed to cut off more than a hair’s width. Waste not, want not. Bragging is rude and all, but I have to say I was impressed with the thinness at which the bandsaw cut this pipe. I have mad skills, yo.
Seriously, mad skills. Just look at how even these cuts are. These are professional level. Think I’m gonna have to ask for a raise.
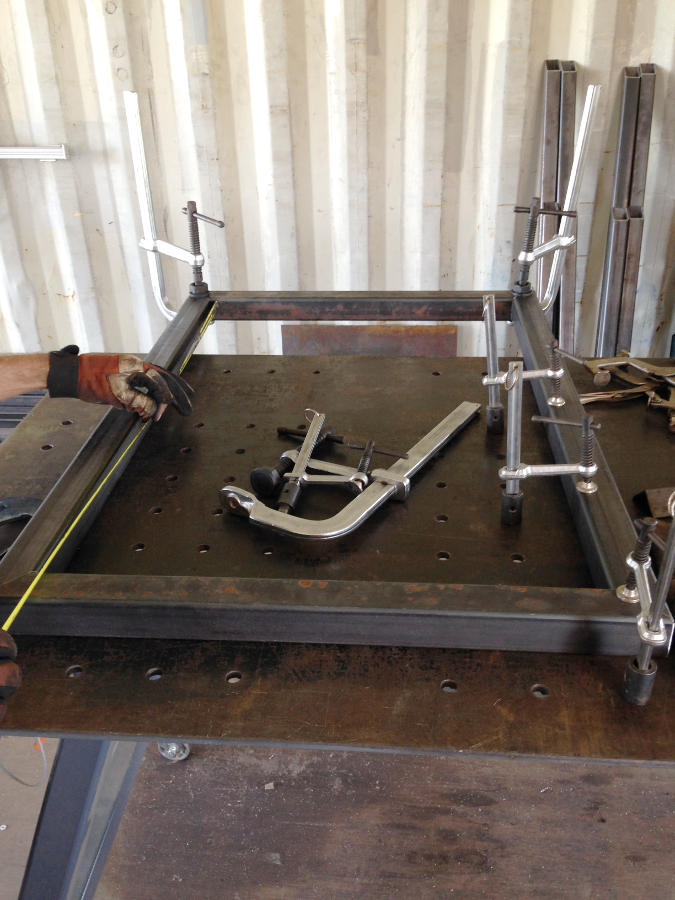
To be fair, making cuts straight is a lot easier than ensuring window, door, and hatch frames are square. Of course, if the Planner would ease up on the tolerances a smidgen, being a 1/32″ of an inch off wouldn’t matter. I’m just saying…
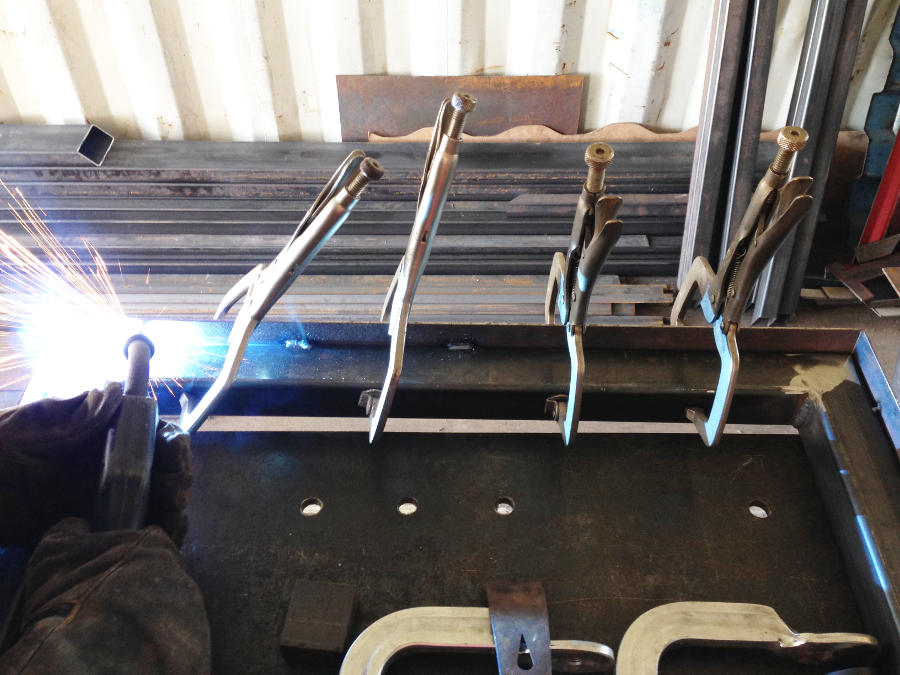
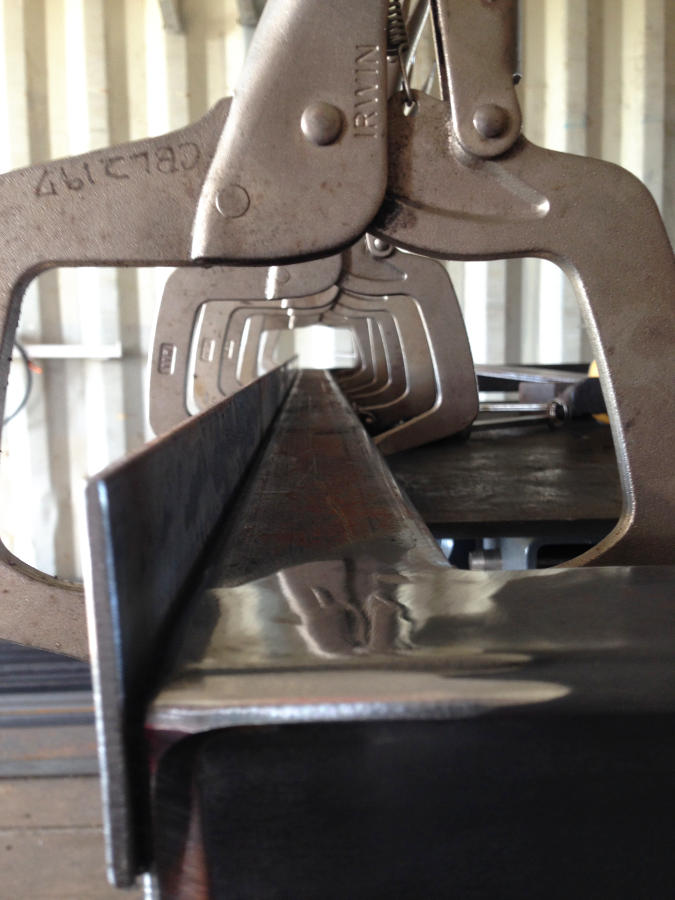
“May you be stricken mute,” he says. “Those words will not be spoken here,” he says. Jesh, I was only saying loosen up the tolerances to alleviate such strains. I mean, come on, look at all those C-clamps. Six to be exact. Six clamps in a little over a three-foot span.
This is a hatch, not art. Even artwork has fallacies. Guess not, as the second hatch had even more clamps. It did make for a really good picture. The photography teacher from way back in high school would be impressed. Black and white development. Maybe some overexposure. Yeah, that sounds perfect.
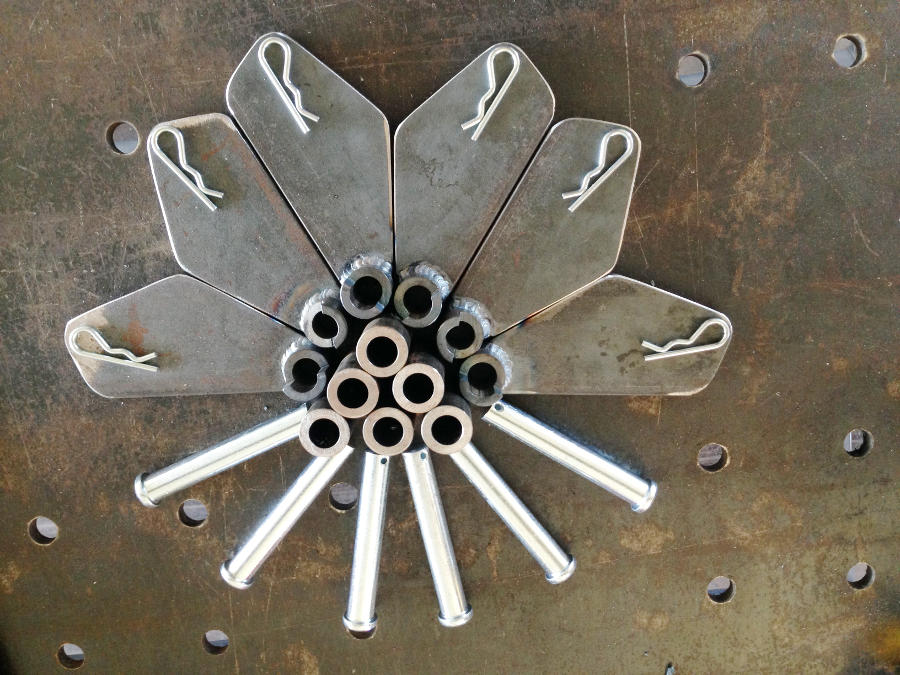
And I while may give grief that windows are work and not art, I really do know and understand metal work is a true art form and people pay a pretty penny for metal art and metal artwork. Should give this more thought as they say the best job is the job you love doing. I call this art piece Hatched. These are the major components for the window hatches. The only component missing is the hatch prop themselves. Unfortunately, I could not take an art picture of those. It just looked like blurry images. Maybe next time.

On a side note, do you have any idea how hot welding is? I’m talking thermal heat not physical heat. Well let me tell you, it is hot as lava. 545° F hot, give or take a few hundred degrees or so. Some readings were as high as 720°, others were as low as 495°. Guess it depends on the moment in welding time. That’s hot, hot, hot.
You know what else is hot? Standing at the local big box home store debating lighting. The lights are so bright one must wear sunglasses to debate the choices. Then the longer you stand there debating choices and reviewing on your phone, it starts to get hot. As in physically hot. Sure we have all wandered down this aisle and looked at lighting, but standing there for more than 30 minutes. I think not. The Shop Box and storage box do not have lights but this is not really an option for the Kids’ box as he has school work and LEGOS to build. Needs lots of lighting for LEGO building. The simple desk light is not going cut it.
Lighting purchase is a big deal as these lights may be temporary in location and will need to be movable when the insulation and drywall are installed later. We are treating the Kids’ box as trial and error lesson for the home boxes. It is easier to outfit a 20′ box and not like it than two 40′ boxes. There are going to be lots of trial and error risks taken on this box and the lighting is just an easy example.
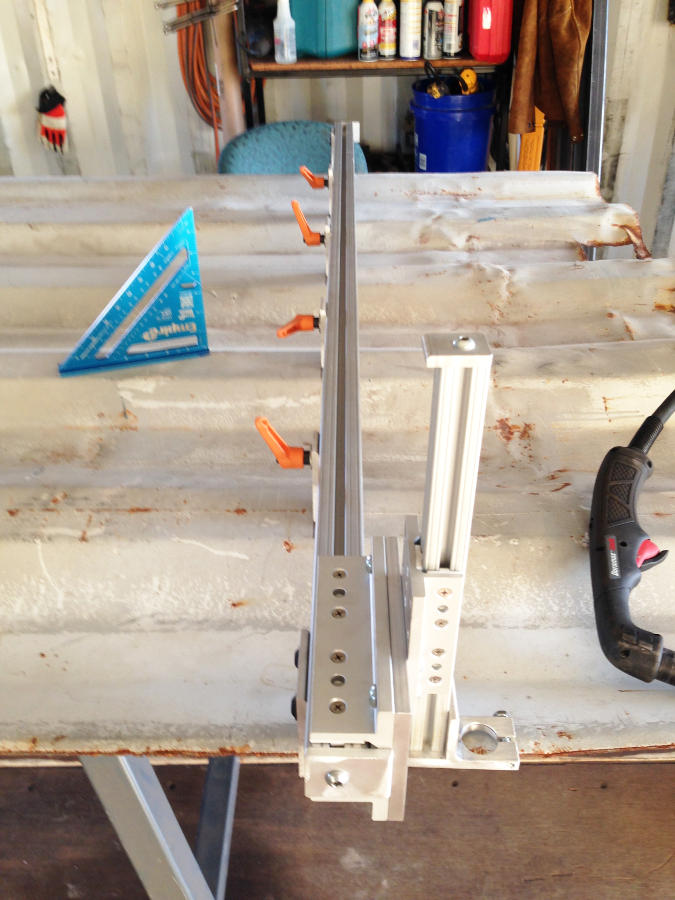
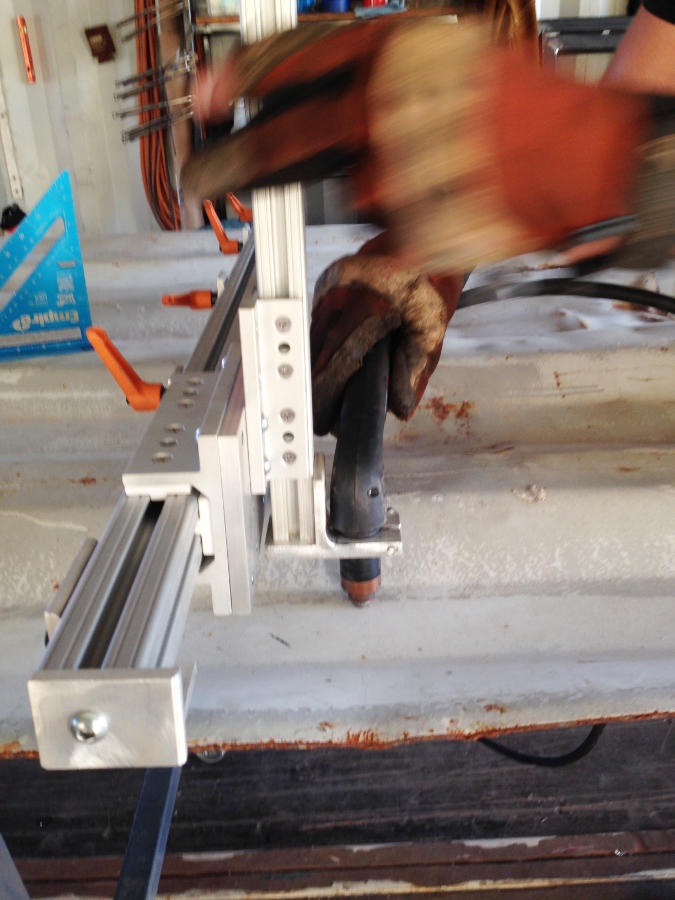
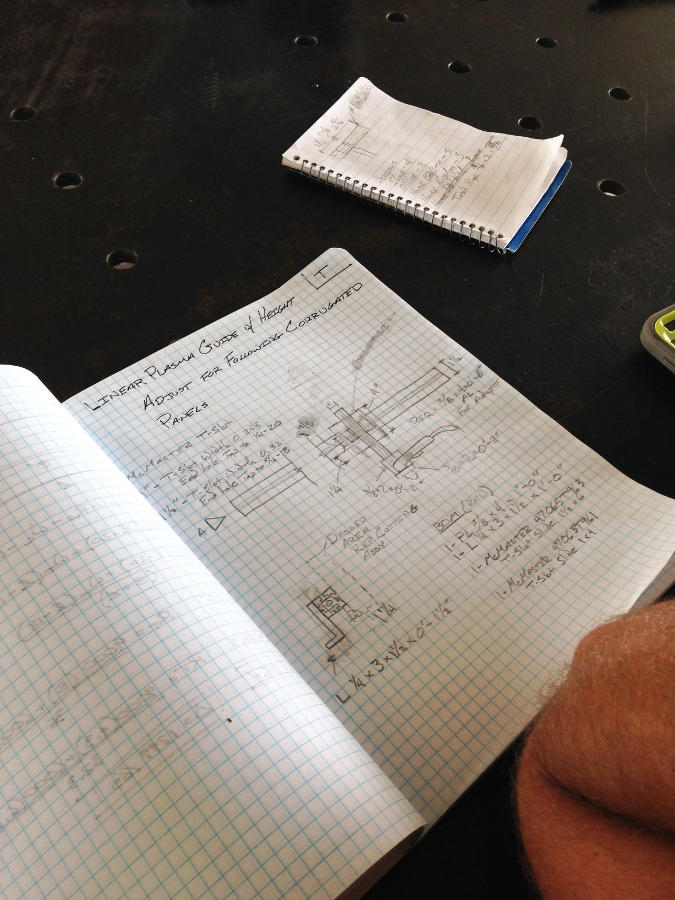
This specially designed panel plasma cutter is another of the many trial and error risks. For the Shop Box, the Planner made a magnetic fence to run the plasma cutter alongside for guidance. It did work well for the cuts down the panel, but there is always room for modifications. The magnetic fence was not strong enough to support pushing against when cutting across the panels. Extrusion aluminum rods with free-floating plasma gun holder was the new model. Kinda of a big jump from an aluminum strip to an extruded rod, but hey, this is the Planner we are discussing. Have to say it was pretty fantastic to watch.
The initial test cut went better than expected, I can already see the Planner making modifications. Of course, he has plenty of time to prepare for the home boxes. One cannot rush modifications, they must be planned out.
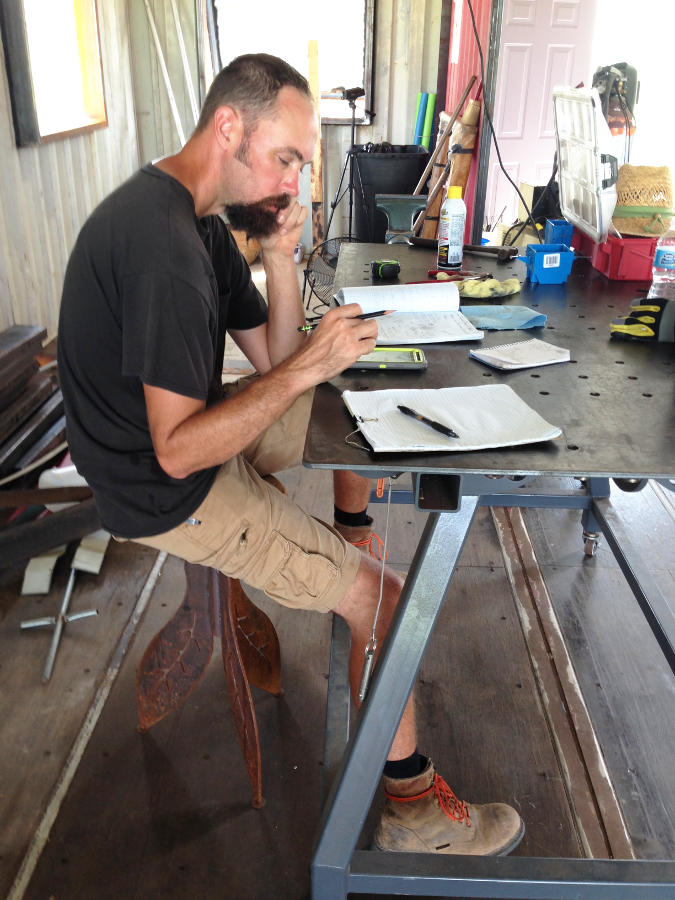
Yes, you read correctly. This statement for the same man who made rash decisions during the Conex Shuffle. Yet here he is planning for this cutter. Weeks he spent working on this design. Weeks!
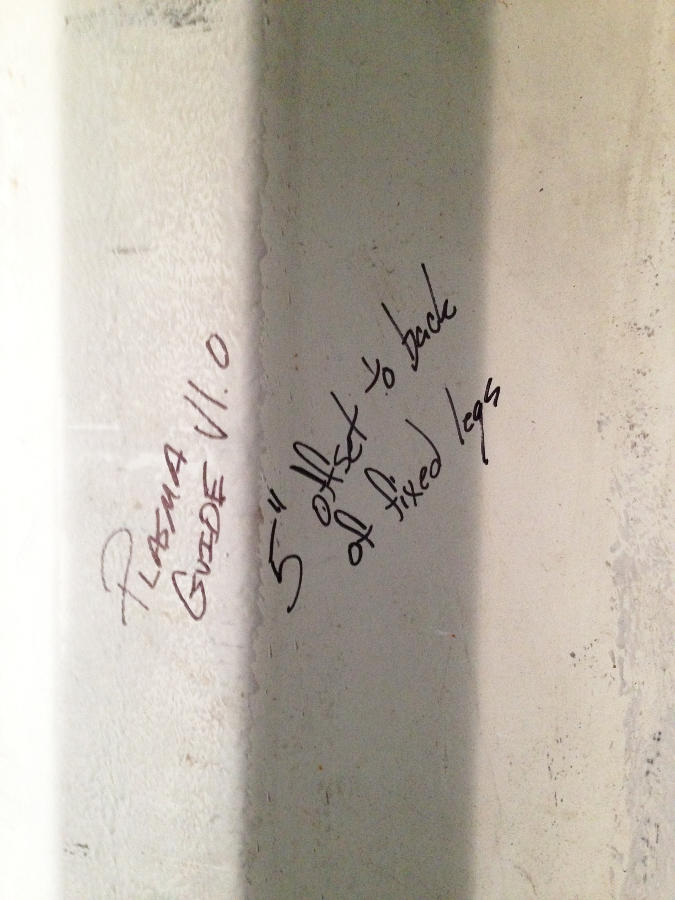
And when using any new tools sometimes it helps to write down notes for future usage. Normally, these would go in a handy-dandy notebook. What’s the fun in that? The book could be lost, ruined, or become illegible. That is why notes should be taken on the shop wall. Never to be lost or ruined.
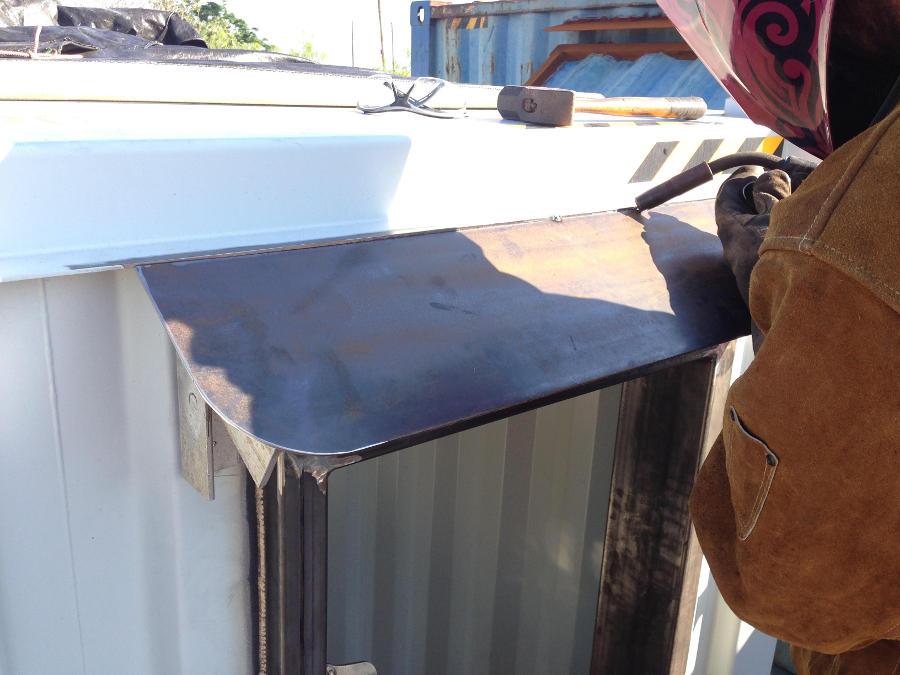
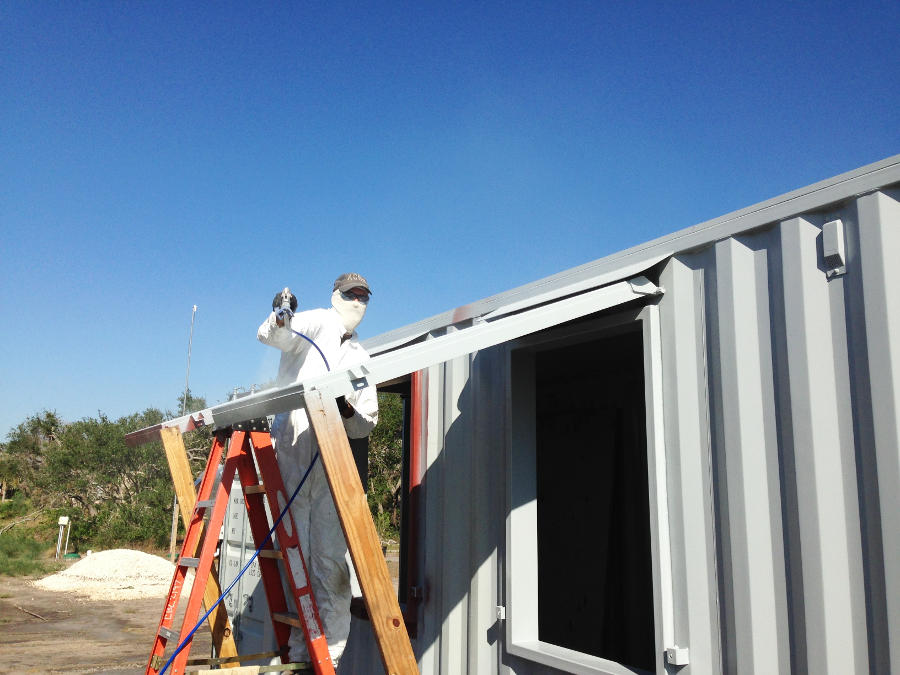
Window and door frames and hatches were installed. Eyebrows were installed using another specially made tool. See the aluminum angle? It holds the brow in place at directly the correct angle. Makes for easy installation.
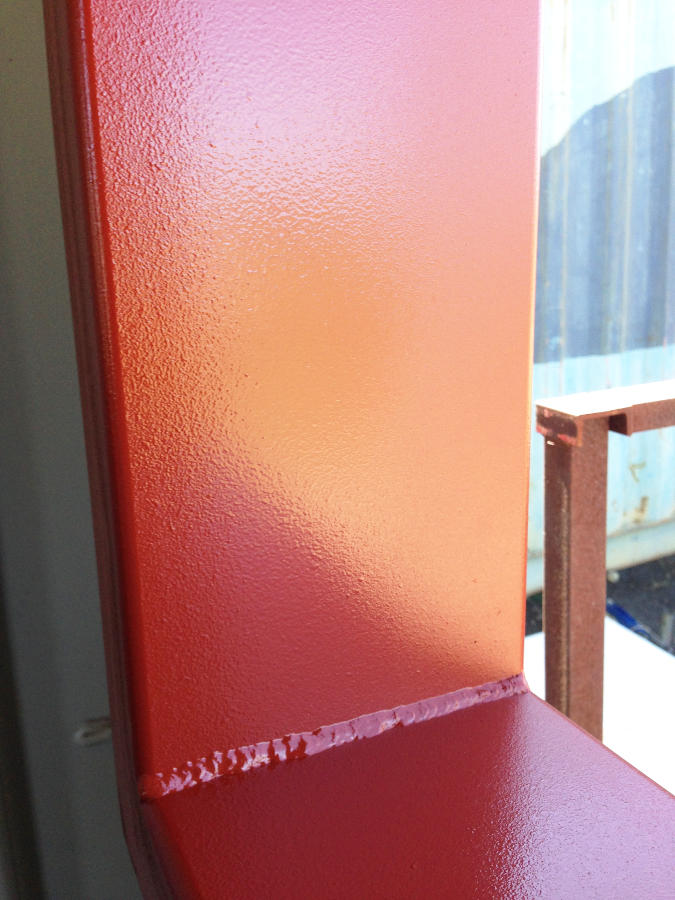
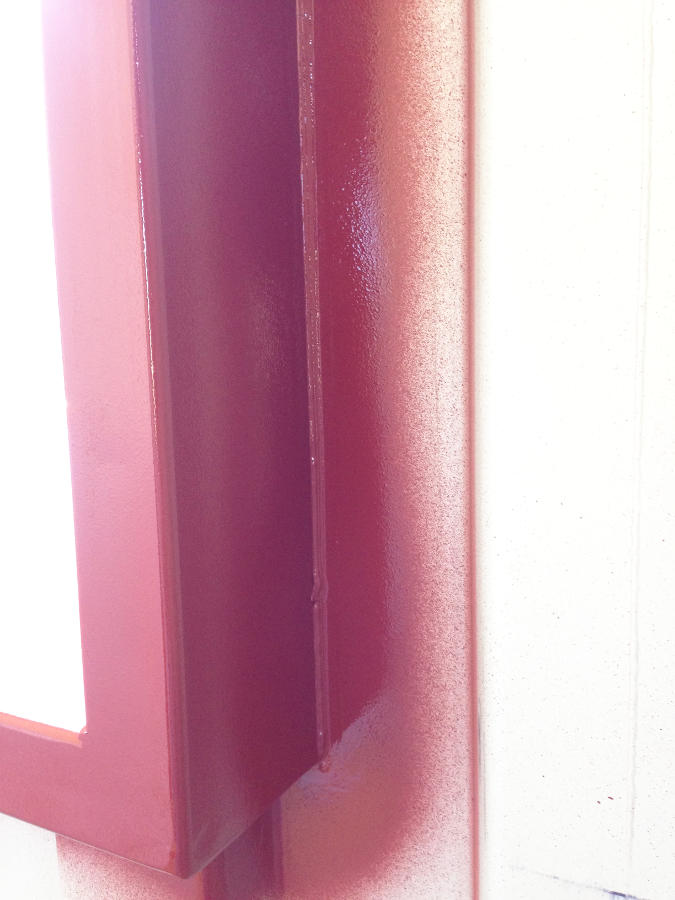
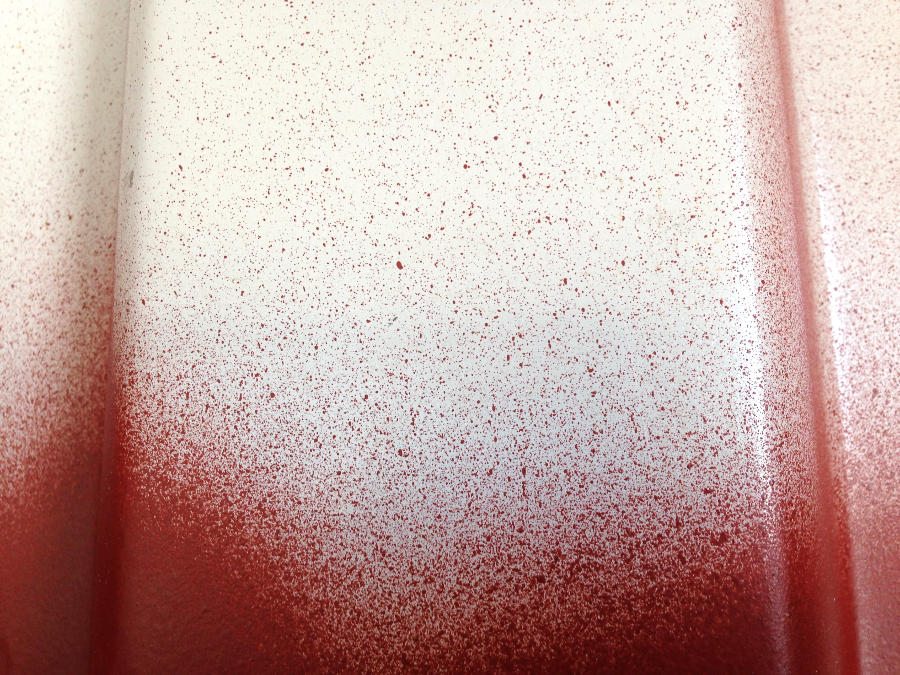
Frames and hatches were painted primer red. Some were rolled (the left one), some were spray painted (the right one). Some were both. The texture created from rolling was awesome but laid down too thick to ever dry in this humid environment.
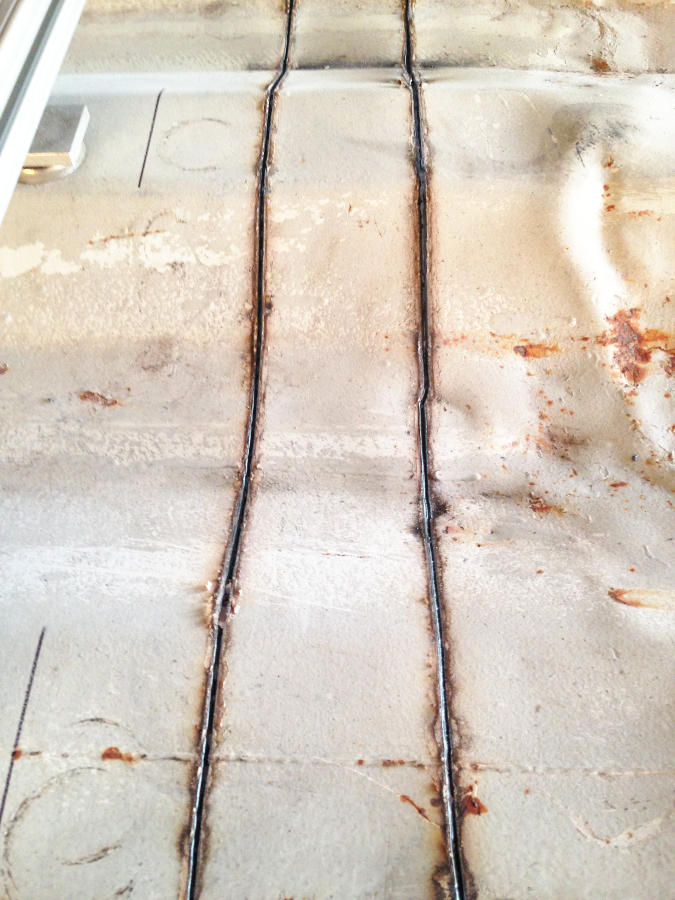
Every spot that was welded or tacked or scrapped, primer was installed. Not having done this procedure immediately on the Shop Box lead to this life learned lesson. When the day does comes to paint the Shop Box the prep work will be most excruciating. Rust from before and after Harvey is catching up to our lack of diligence.
A saving grace is having a family member with a sand blaster unit, we can make quick work of the larger areas. Unfortunately, blasting cannot happen until there is ABSOLUTELY no rain in the forecast and would be nice if the humidity was low. That is hard to accomplish here. Fortunately, the use of a spray painter eases the tedious work of painting and makes for great artwork? If I could cut out this piece of the panel out I would frame it in old wood and hang it on the wall. It is fantastic.

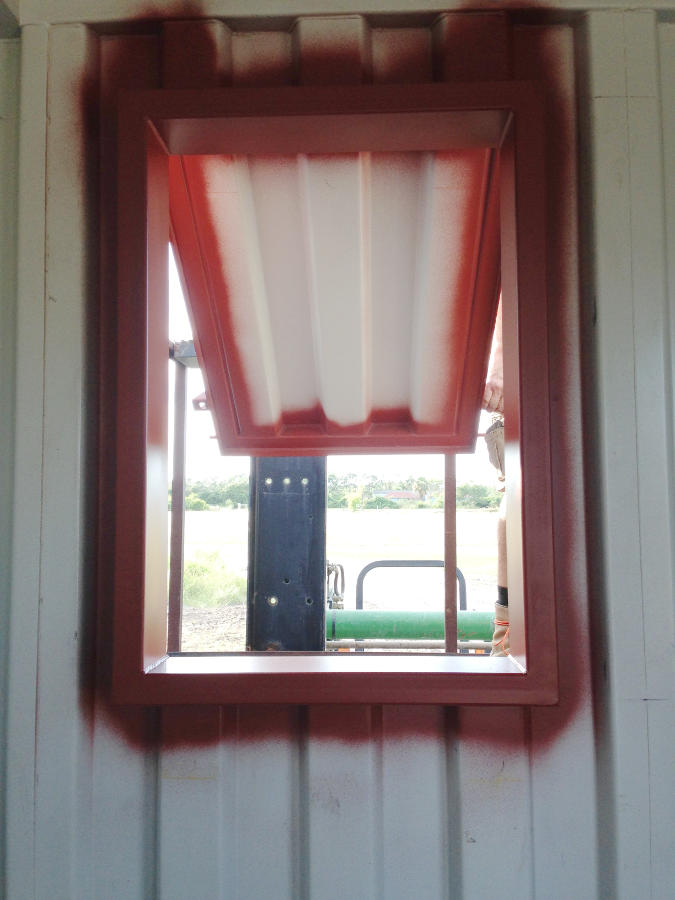
Also unlike the Shop Box, this conex half box had all of its prep work done on the trailer making it both easier and more difficult. It was nice to be out of the sand and windblown sand dust, but always having to use the tractor was challenging. Especially for the hatches. Yes, the hatches for the Shop Box were installed in the air but for some reason, these three were patience trying. The Kid Box has two 36″x36″ windows, a little bathroom window, and a door.
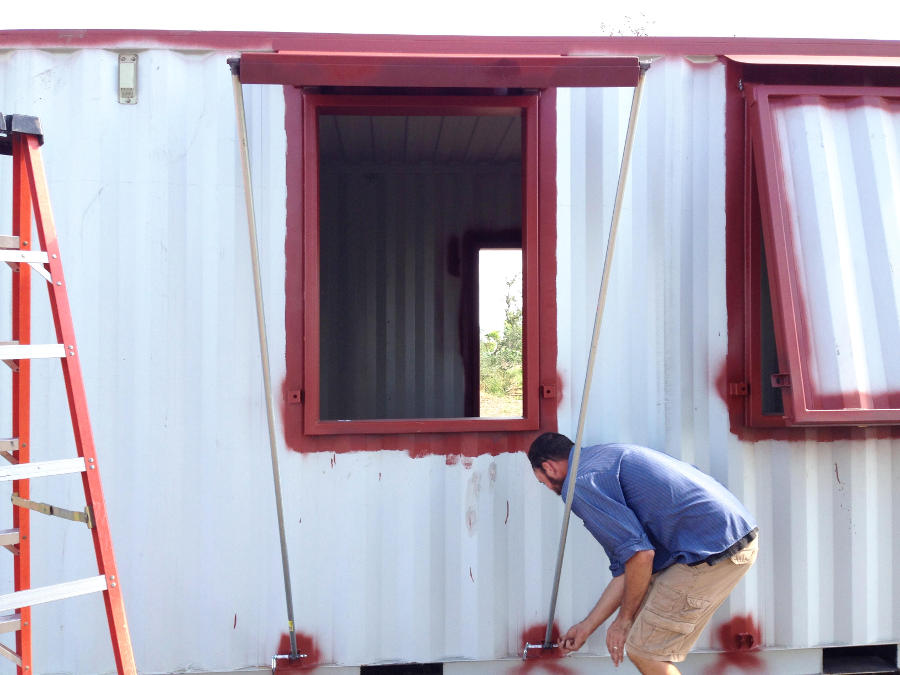
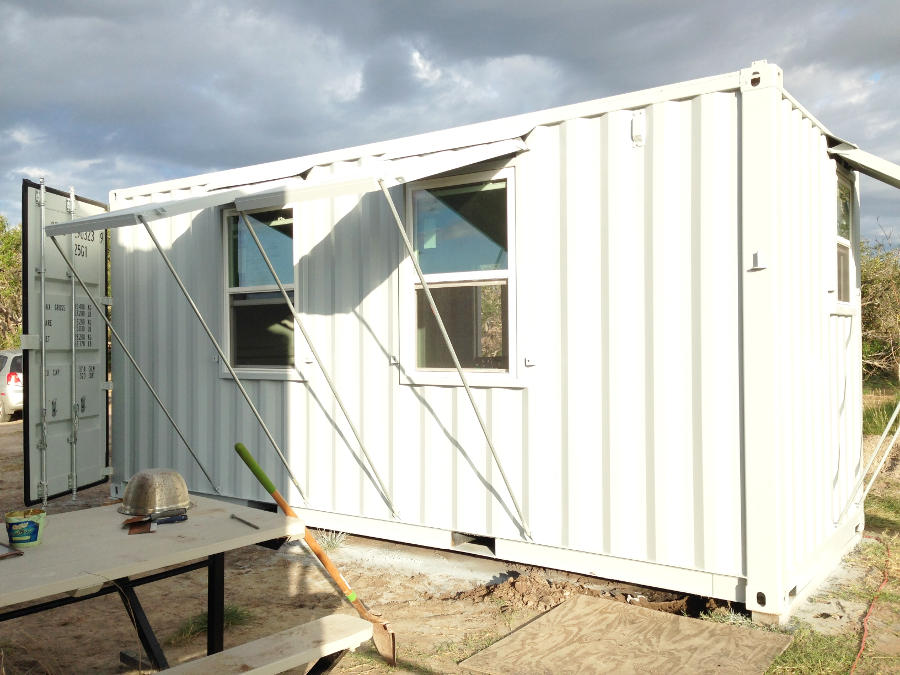
Window props were installed once the box was set on the ground. The Airstream was moved across the way to where it was more or less before Harvey and the Kid Box was placed in its location. Why here in front to the Shop Box I cannot tell you but I am sure there was a reason for this. It has just been too long with too much going on to remember. Hatches on the ground are so much easier to install.
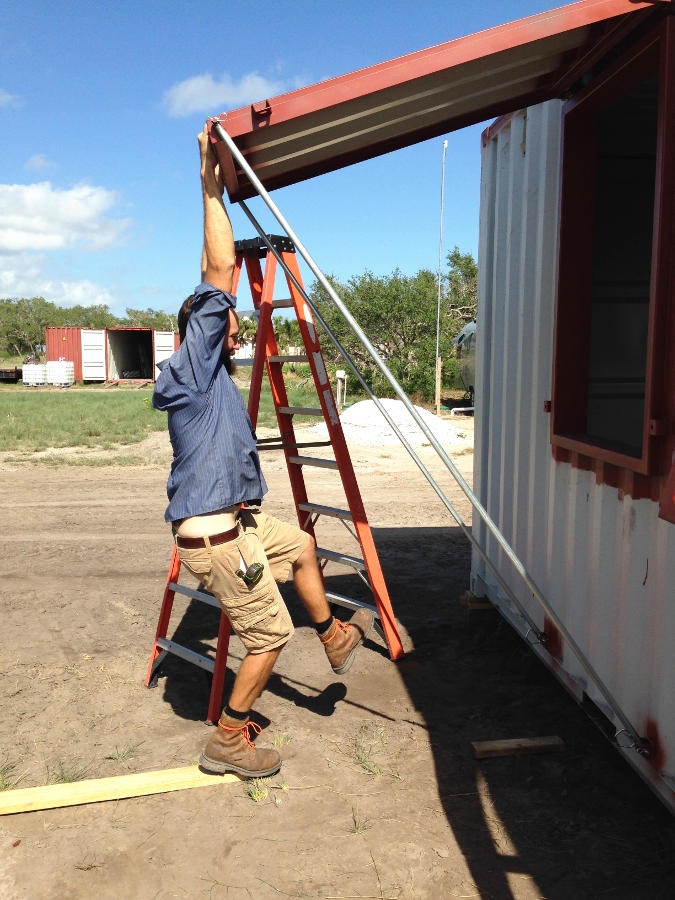
To test for wind uplift as these window hatches will remain open year round, the Planner tested by hanging and bouncing on them like a monkey. I can already foresee the future….. One day I am going to look outside and the Kid will have figured out how to climb the hatch and will be standing on the roof. You mark my words, it is coming.
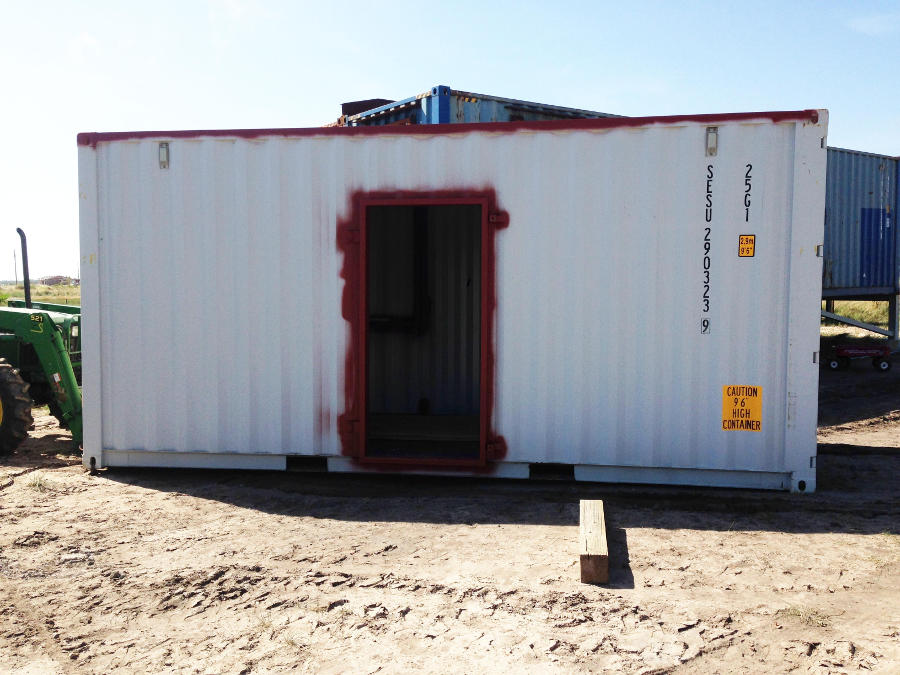
From the front side, the box looks like a prison. Really, it’s not as there is gobs and gobs of light when the hatches are open. It has a nice open feel with the amount of window light and door light. Oh wait, I forgot to tell you. The conex half is getting REAL windows. Real double hung windows. I am so excited I cannot even begin to describe. REAL WINDOWS. It makes me feels almost normal. Almost.
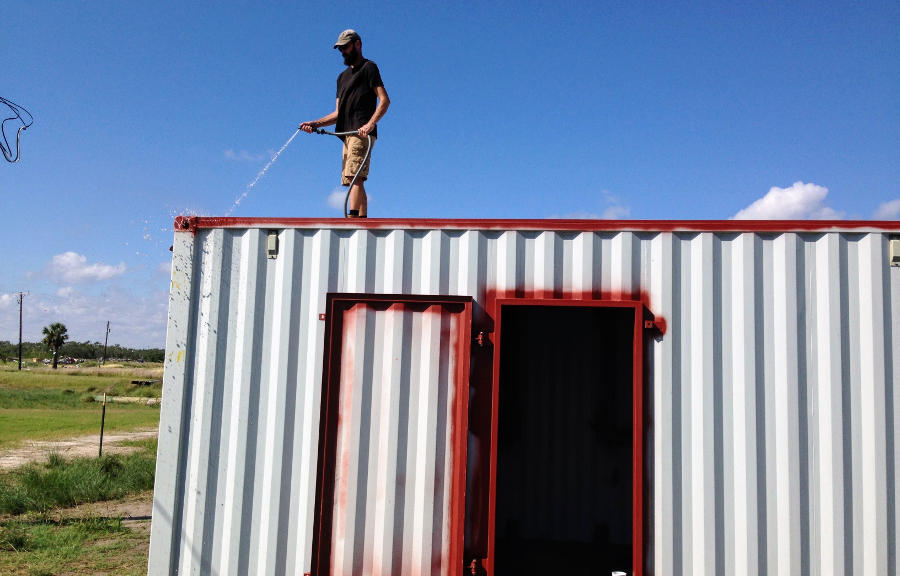
In efforts to maintain our diligence on rust prevention, the box was immediately repainted in the original light gray. Being October and all, the paint should dry in a few days and will take a few weeks to completely set.
Not having time to wait for the paint to completely set due to a sudden cold front coming, the REAL windows were installed. Having REAL windows makes it look less like a prison or metal cube and more like a home. Oh, how I cannot wait for our home box.
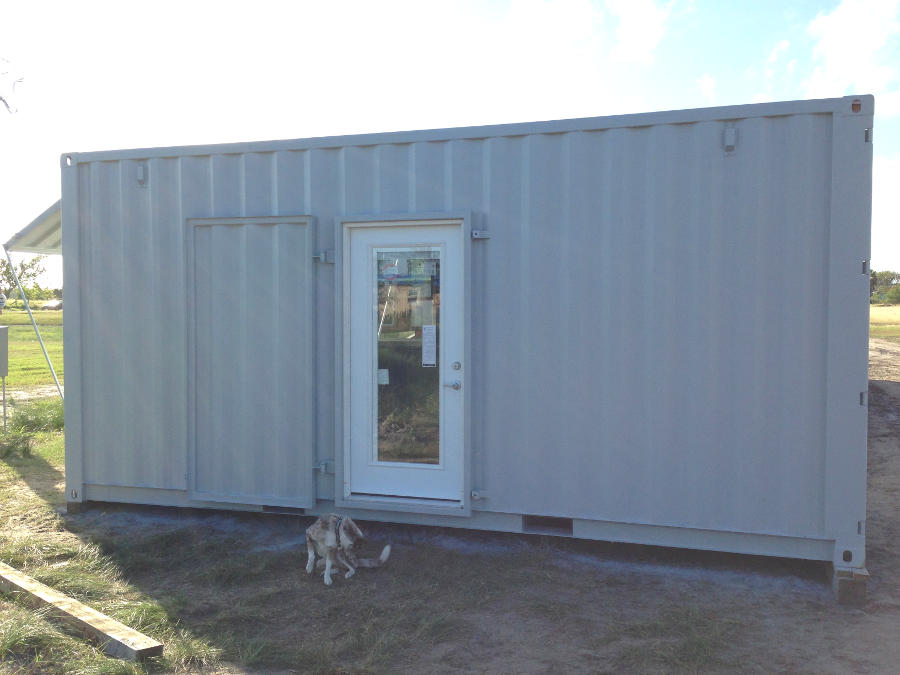
The REAL door was installed and viola one completed sealed, painted, and livable conex box. A conex half box. It was such a nice change to the last few months. Now to find a bed, desk, and cabinet.