
Bathroom Doors, Drawers, and More
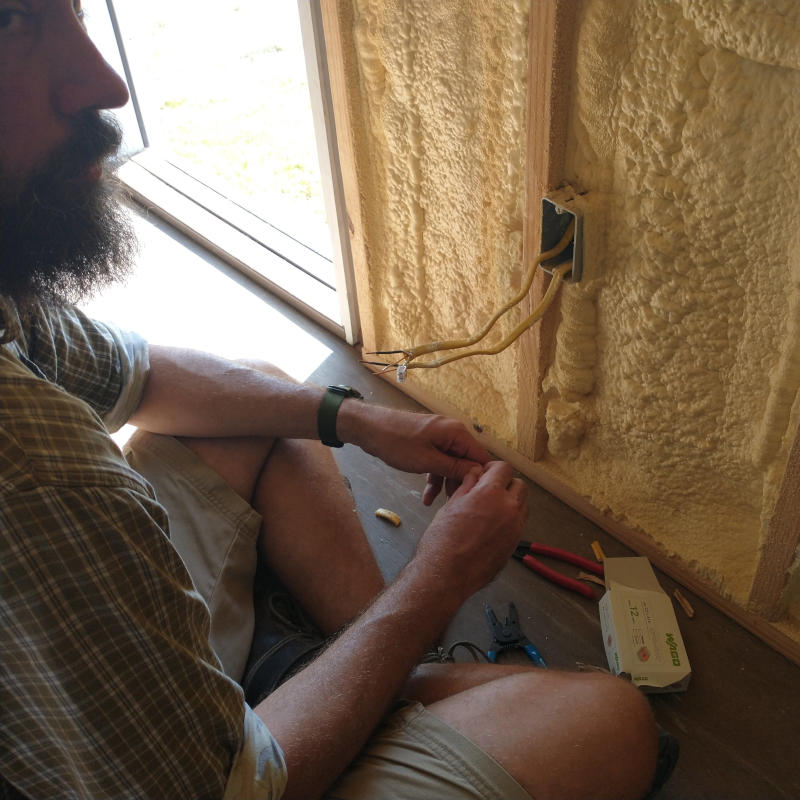
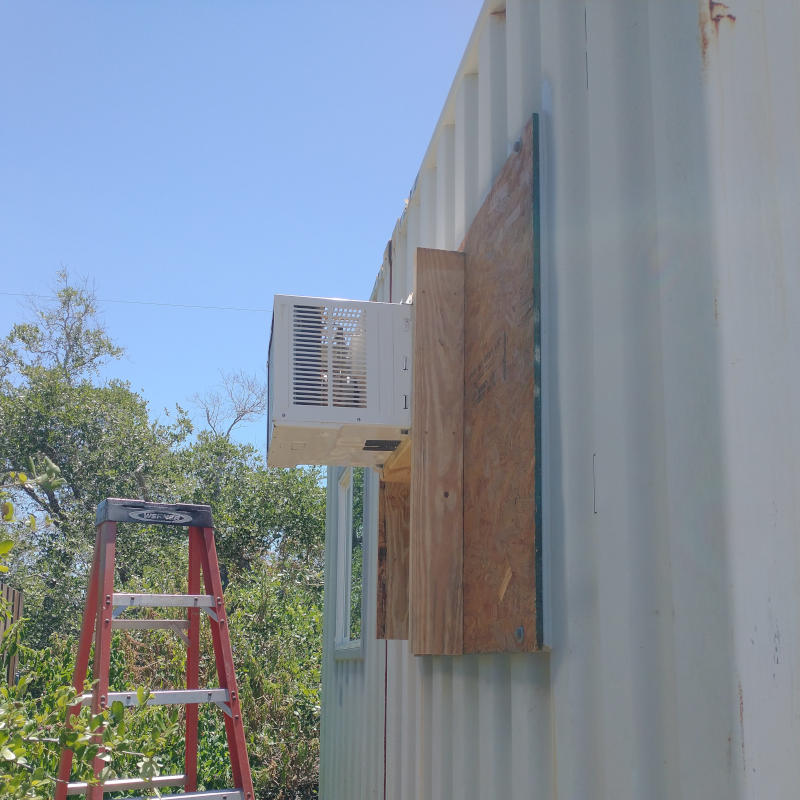
Hot, hot, hot. There is no other way to describe the dog days of summer. There are no clouds, no wind, no break from the heat of day even at the dark of night. It is hot before the sun comes up and is still hot when the sun goes down. With the Doubter coming to help in the bathroom I decided it was too hot for him to work in these conditions. He would work without complaint but he would get more done if he didn’t have the heat slowing him down. And when he gets more done everyone is happier. Besides, there are windows that close and a fully powered building, no extension cord needed. What better reason do we need to install a Hurricane Harvey salvaged air conditioner that has been sitting in storage since 2017.

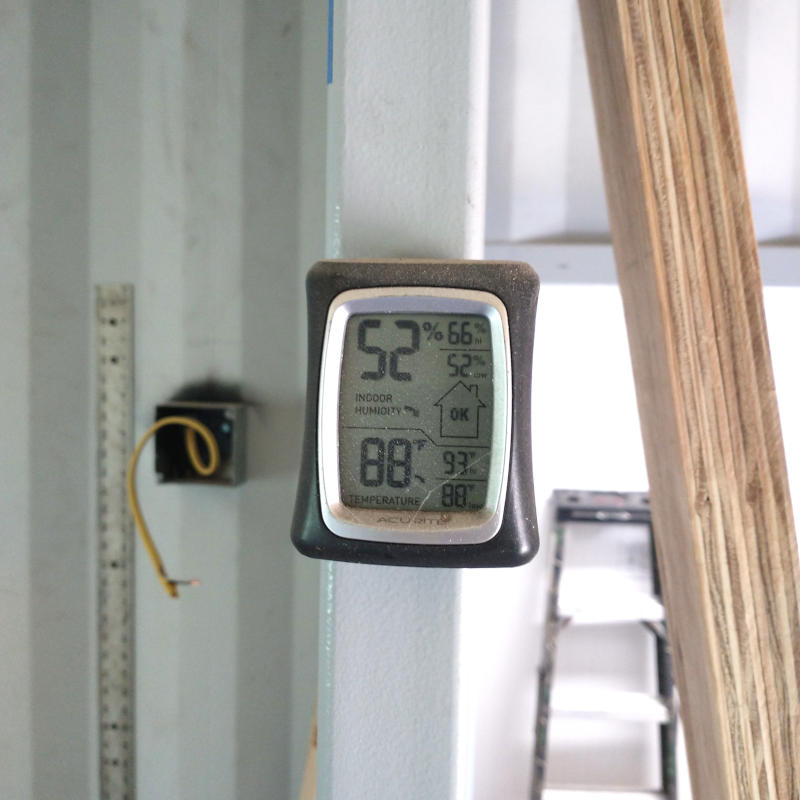
Less than hour after shutting the front door, never have those words had to be stated, the humidity already had dropped 20%. To coastal residents, this is equivalent to a warm winter day. It was freaking fabulous! If this little one room air conditioner can do this, I can’t wait to see what room sized mini splits will accomplish. This is a historic moment on this here the first Thursday in August. Air conditioning.
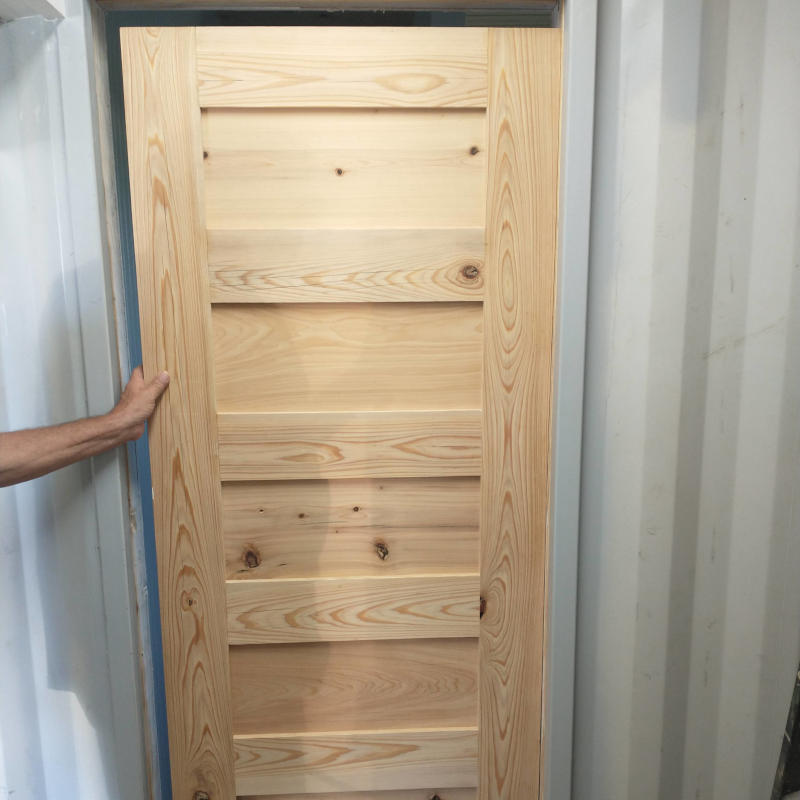
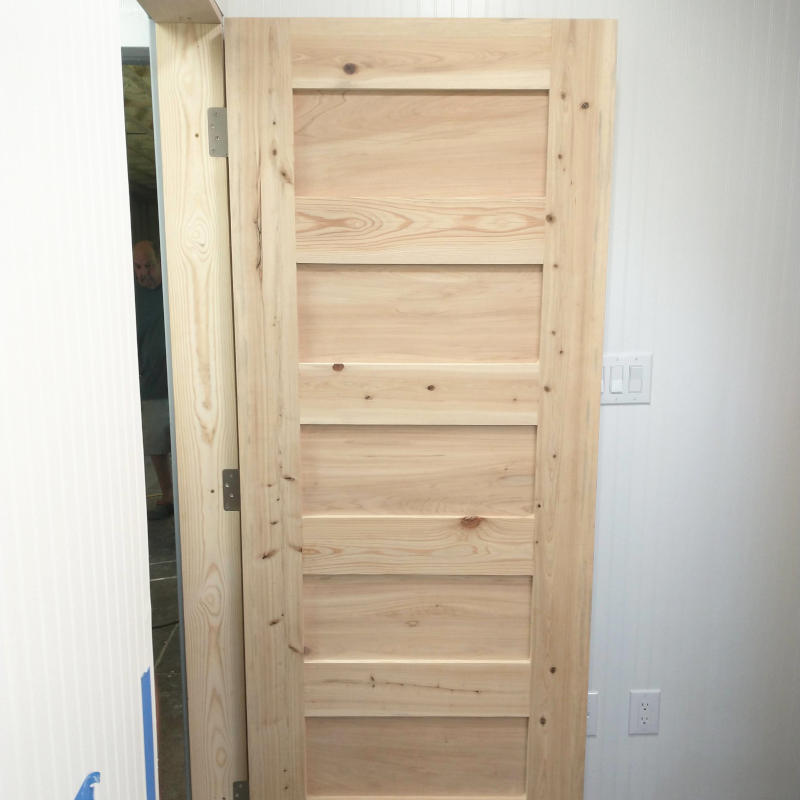
Good grief, the front door hasn’t even been closed for an hour and I am already yelling to “shut the front door”. Lawd, this child o mine. Shut the front door and I’m sure “open the bathroom door” will be next. In preparation for the upcoming week worth of work, the Doubter came with work ready to install in the form of matching bedroom and bathroom doors. Made from cypress planks, which the Doubter has almost a limitless supply, the doors are classic five panel shaker format. Faux hanging the door and already a problem. The design for the door was not updated after the finalized plan was confirmed. The doors are two inches too short. This gap the bottom is causing some serious grumblings. I was called to view if I liked the door unbeknown to the tense conversations that had taken place. Upon walking in I simply confirmed I loved the door, not that there was ever any concern on my end, and this mistake was forgotten. Perfect the Doubter said, let the rest of the door work commence. It wasn’t until hours later that the Planner informed me of the concern about the door. I hadn’t even notied.
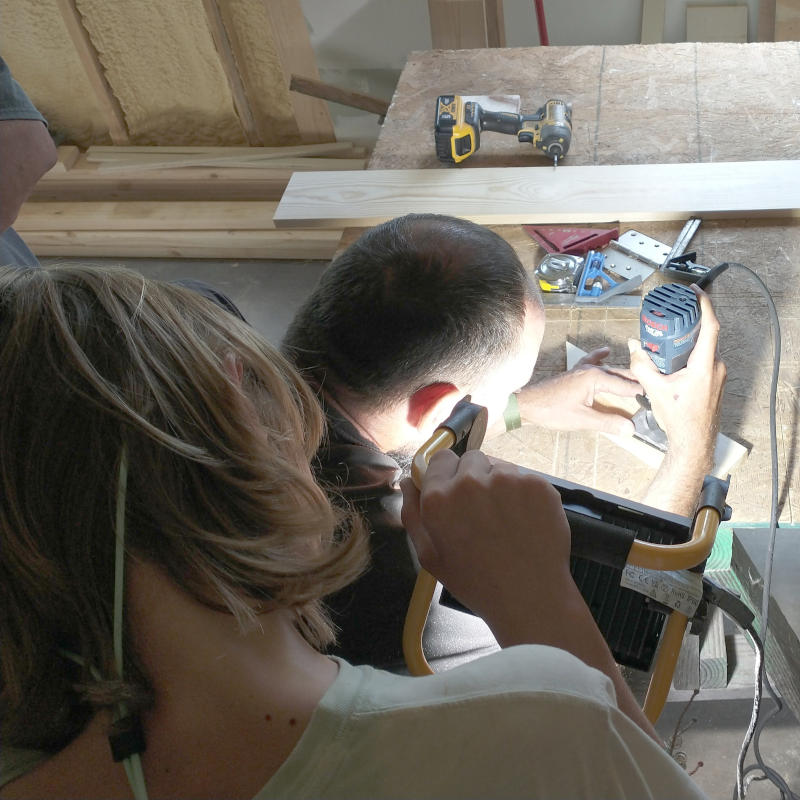

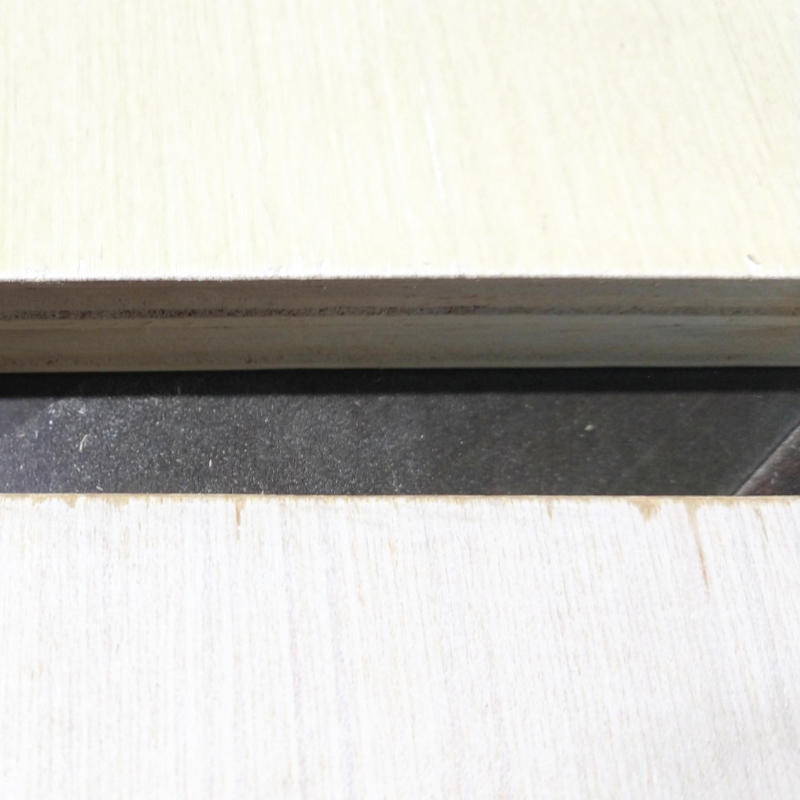
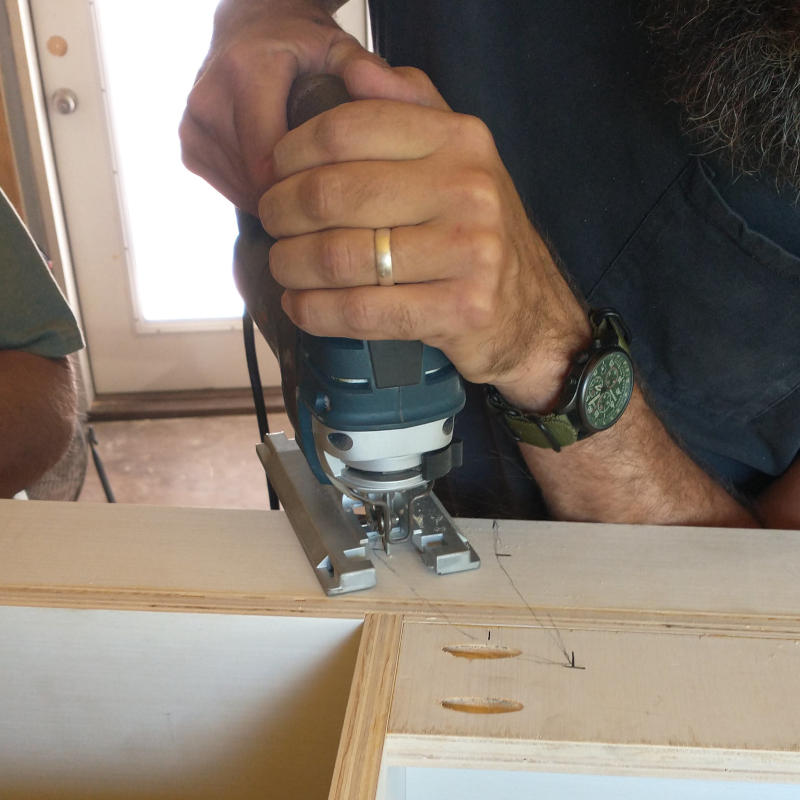
Having been a really long time since the Planner has installed a door from scratch, he decided it would be best to practice with all the tools. While squinting at the router, it became immediately clear how much closing the front door affected our day to day work light. Once again, with an extension cord in hand, the Kid propped up a floor work light enabling the Planner to see better. Switching with the Planner, the Kid switched to use the chisel to finish out the door hinge cleaning.
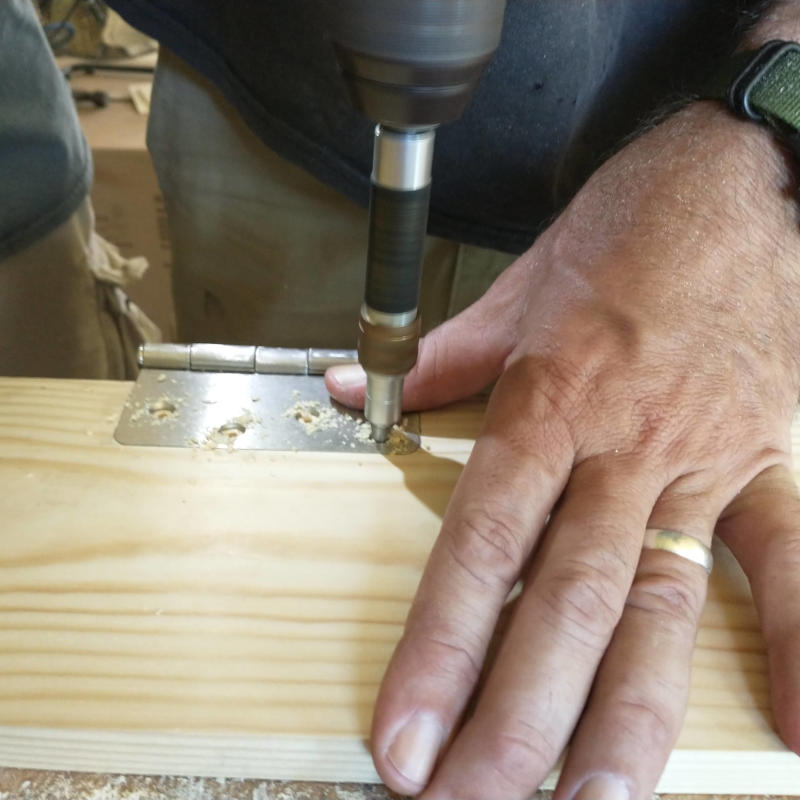
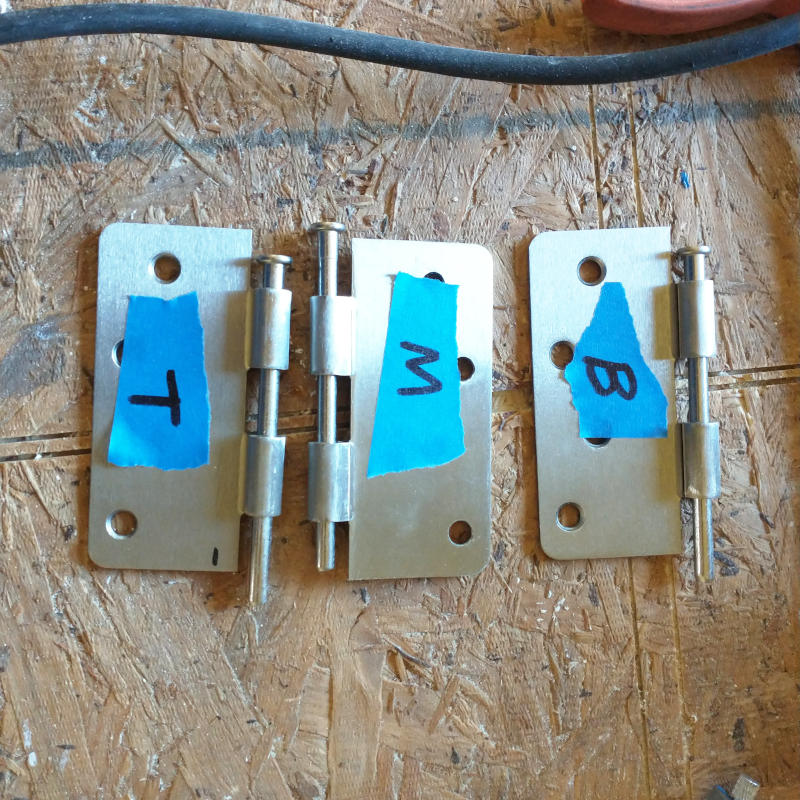
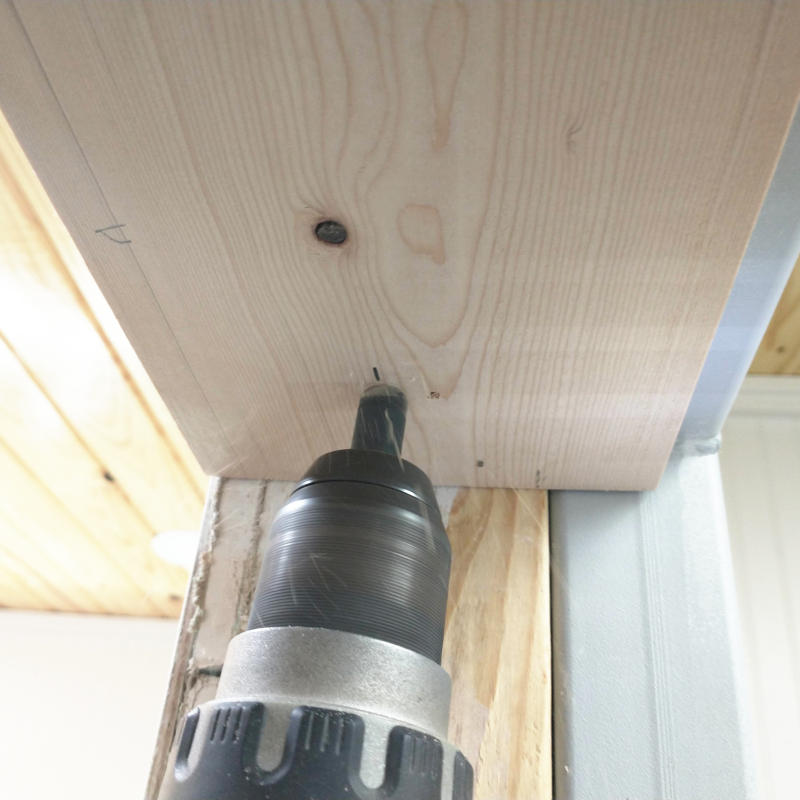
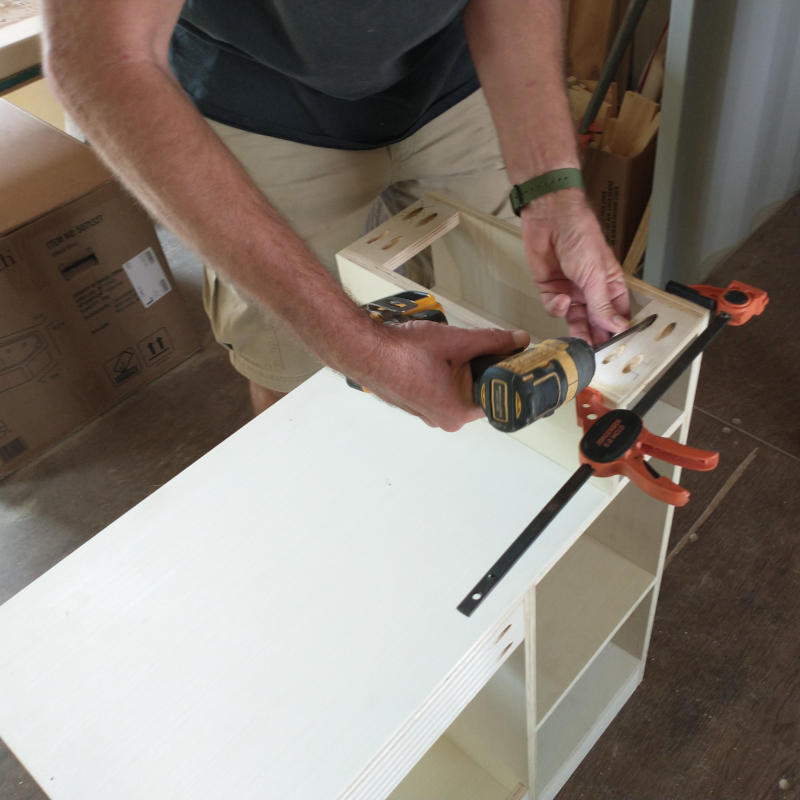
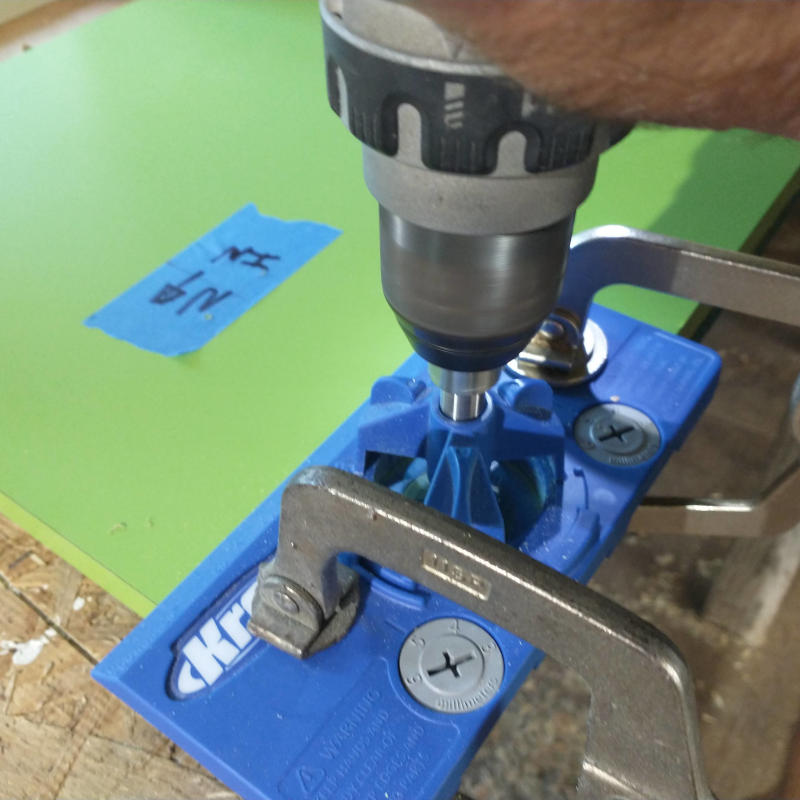
Along with the doors, the Doubter brought a new tool he discovered while building a cabinet at home. A self centering drill and driver hinge bit. This handy dandy tool ensured the drill was centered correctly when predrilling the hinge screw hole. No more offside screw resulting in non flat screwheads on door jambs. This man must really know me and how much little things like offside, slightly off centered screw heads bother me. Once the door hinges were routed and fitted into place, the door hinges were marked ensuring placement when handing a very, very door was fast and easy.
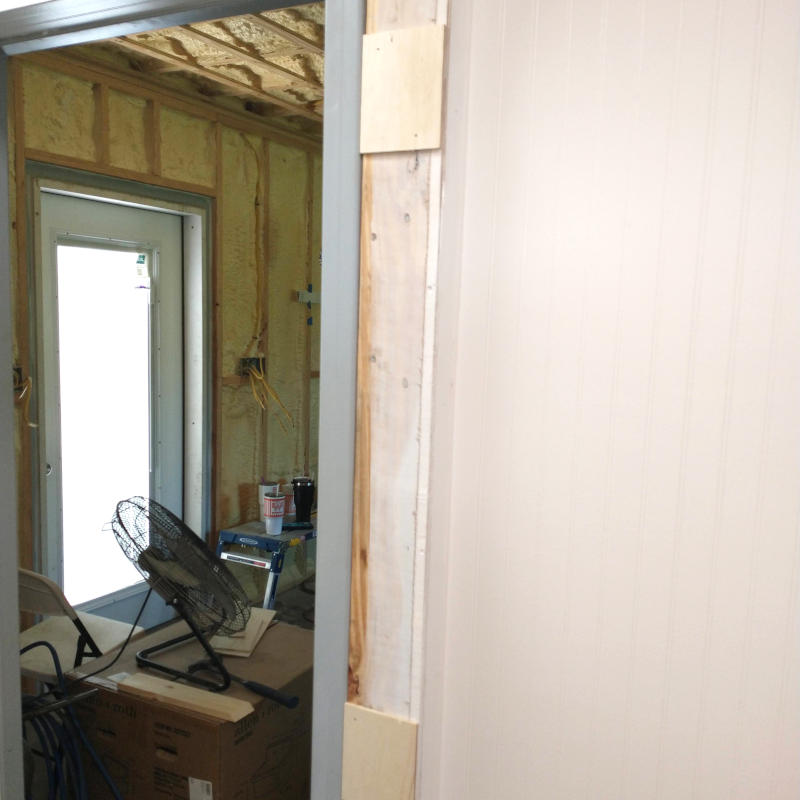
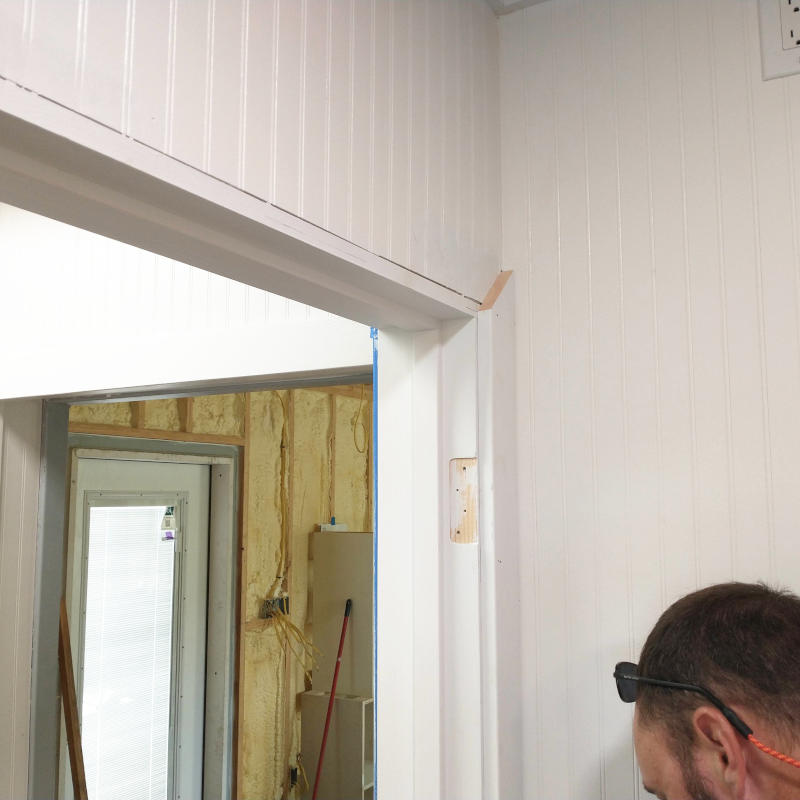
Needing the spacing between the door jamb and the bathroom wall to be even, wedges were placed. This also helped give sturdy backing to the woodscrews holding the door jamb in place. Backer pads in place, door jambs were installed starting at the top. Screw holes were predrilled and then countersunk.
One ridiculously heavy door was test hung once again. Ensuring the door closed correctly leaving the appropriate amount of spacing was better done now than afterwards when the walls and jambs were painted. Deciding the gap at the bottom would just have to be, a design flaw not foreseen by the Planner, the heavy door was once again removed. Trust me when I say I am NOT complaining about the weight of this door. Long before this door arrived, I special ordered a shaker door from the local box store only to arrive cheaply made and damaged. This, three times the cost of a floor available door, was not any better in quality as the insides were particle board and foam. Don’t know where the “real” wood was other than than what was used when printing off the thousand dollars in bills to pay for the door. Cheap junk.
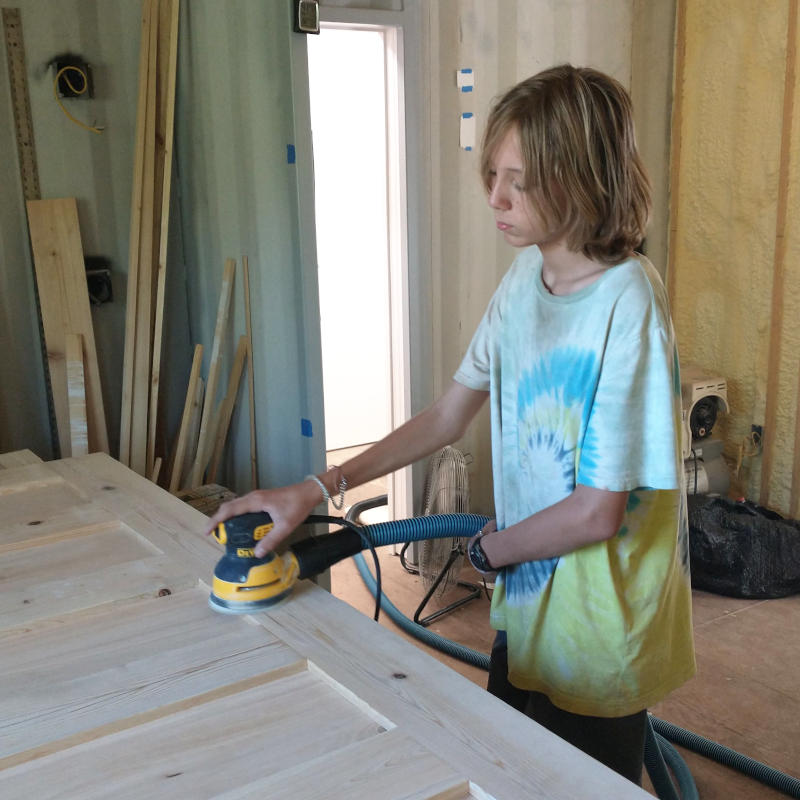
Let me state for the record this post is not being recorded directly as a day by day accountment. Everything in this post happened in the month of August but as all of the projects were unable to be completed in their entirety before another was started there were no less than a half dozens projects going at once. Once it was decided the door would work, the Planner started and completed the door jamb and trim on the second Thursday in August before the Kid had even started the initial sanding on the door the second Saturday in August.

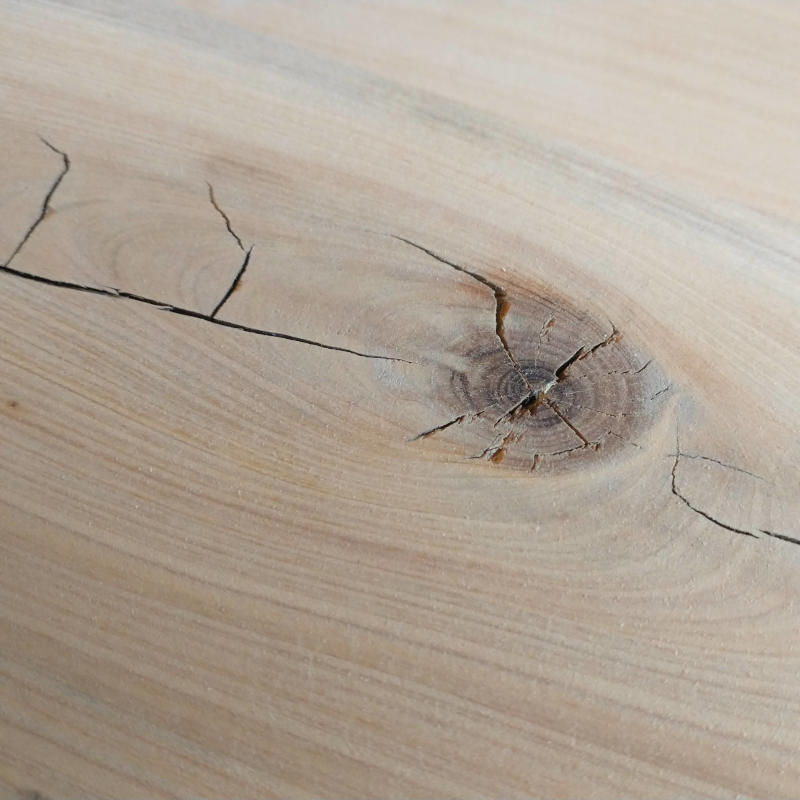
As stated on the previous post, BIF’s rant for the year, this home will be functional not fashionable. Take these doors. Solid, sturdy, and will last longer than my lifeline if taken care of correctly. They are not works of art built by a craftsman. Instead by a seasoned woodworker with materials and tools not always designed for the job at hand. The cypress planks given to the Doubter were tossed aside because they were flawed. Flawed planks are not desirable in multi million dollar McMansions. Flawed planks are perfect for BIF. They tell a story, offer character to the room, and mean when the door is dented after having crashed into it with a sander the dent will not deter from its beauty but only add to its overall charm. Door not even installed and already was damaged. Functional furniture.
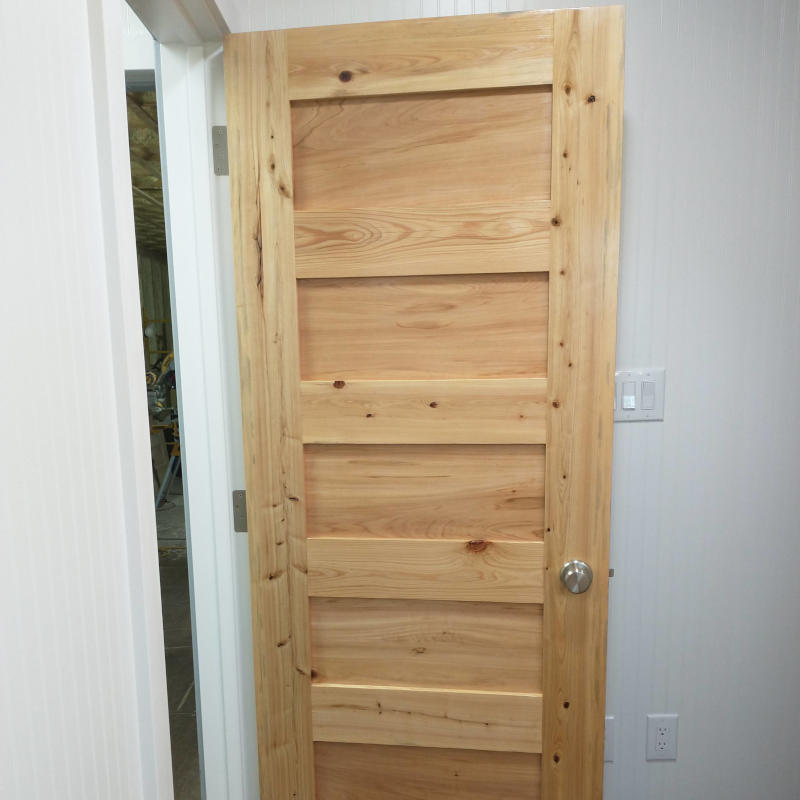
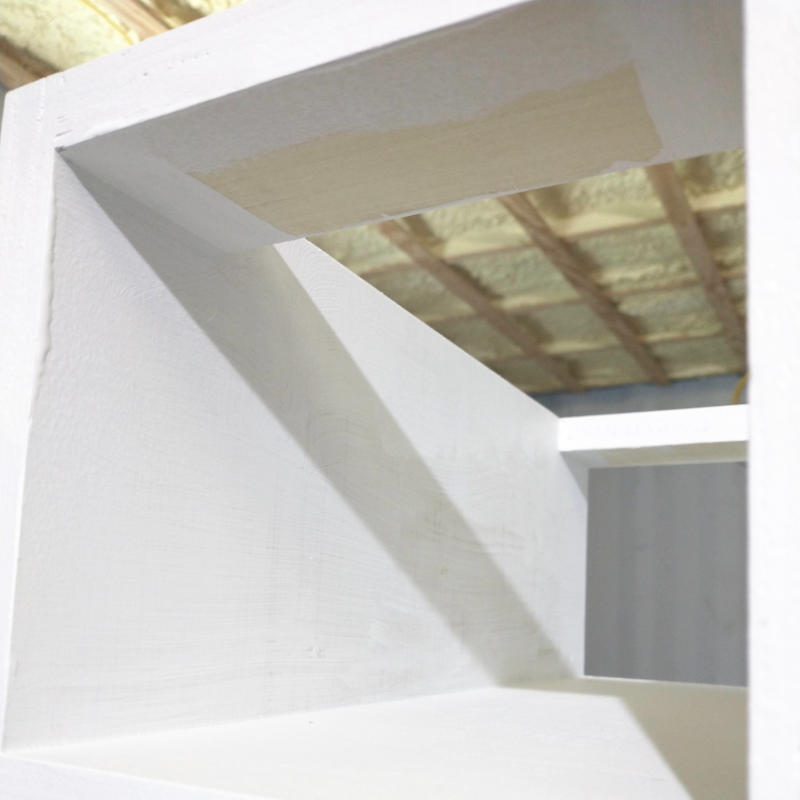
Nine days since it arrival, three different grits of sanding, and five layers of shellac with 220 sanding in between each and every layer later, the door is shiny and smooth, warm and pleasant to the touch, and hung for its final time. Using a naturel wood door was the perfect segue from the wood celling to the wood floor. The eye follows the flow and the energy within the room is evenly spread. Shaker panels keep in line with the ceiling tongue and groove and the wall beadboard. Now that the door is hung I am absolutely certain a solid paneled door would have been cold, harsh, and boring. Thank you, Doubter. You are hired for further functional furniture.
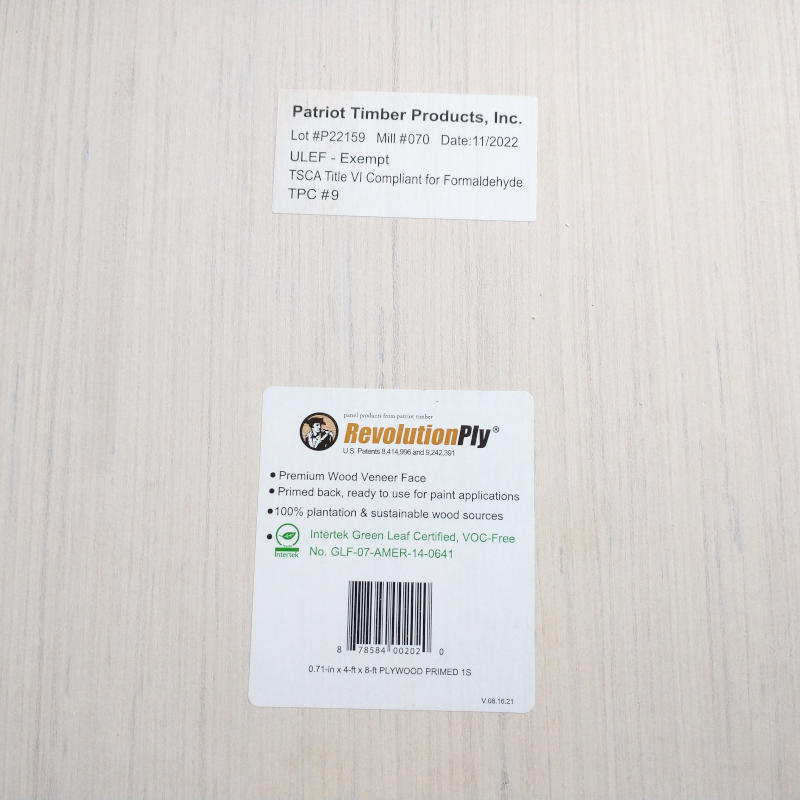
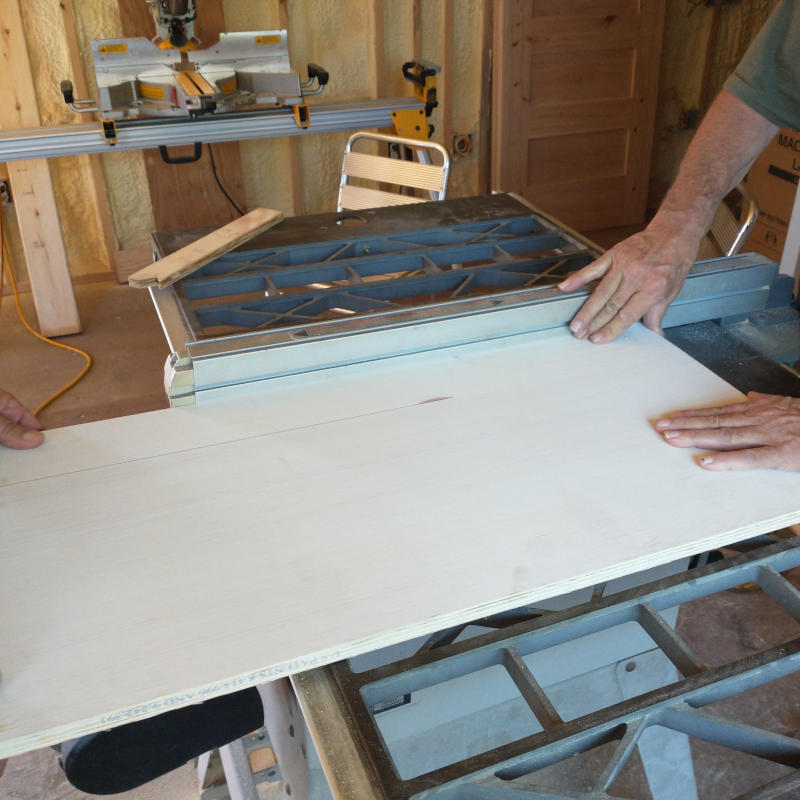
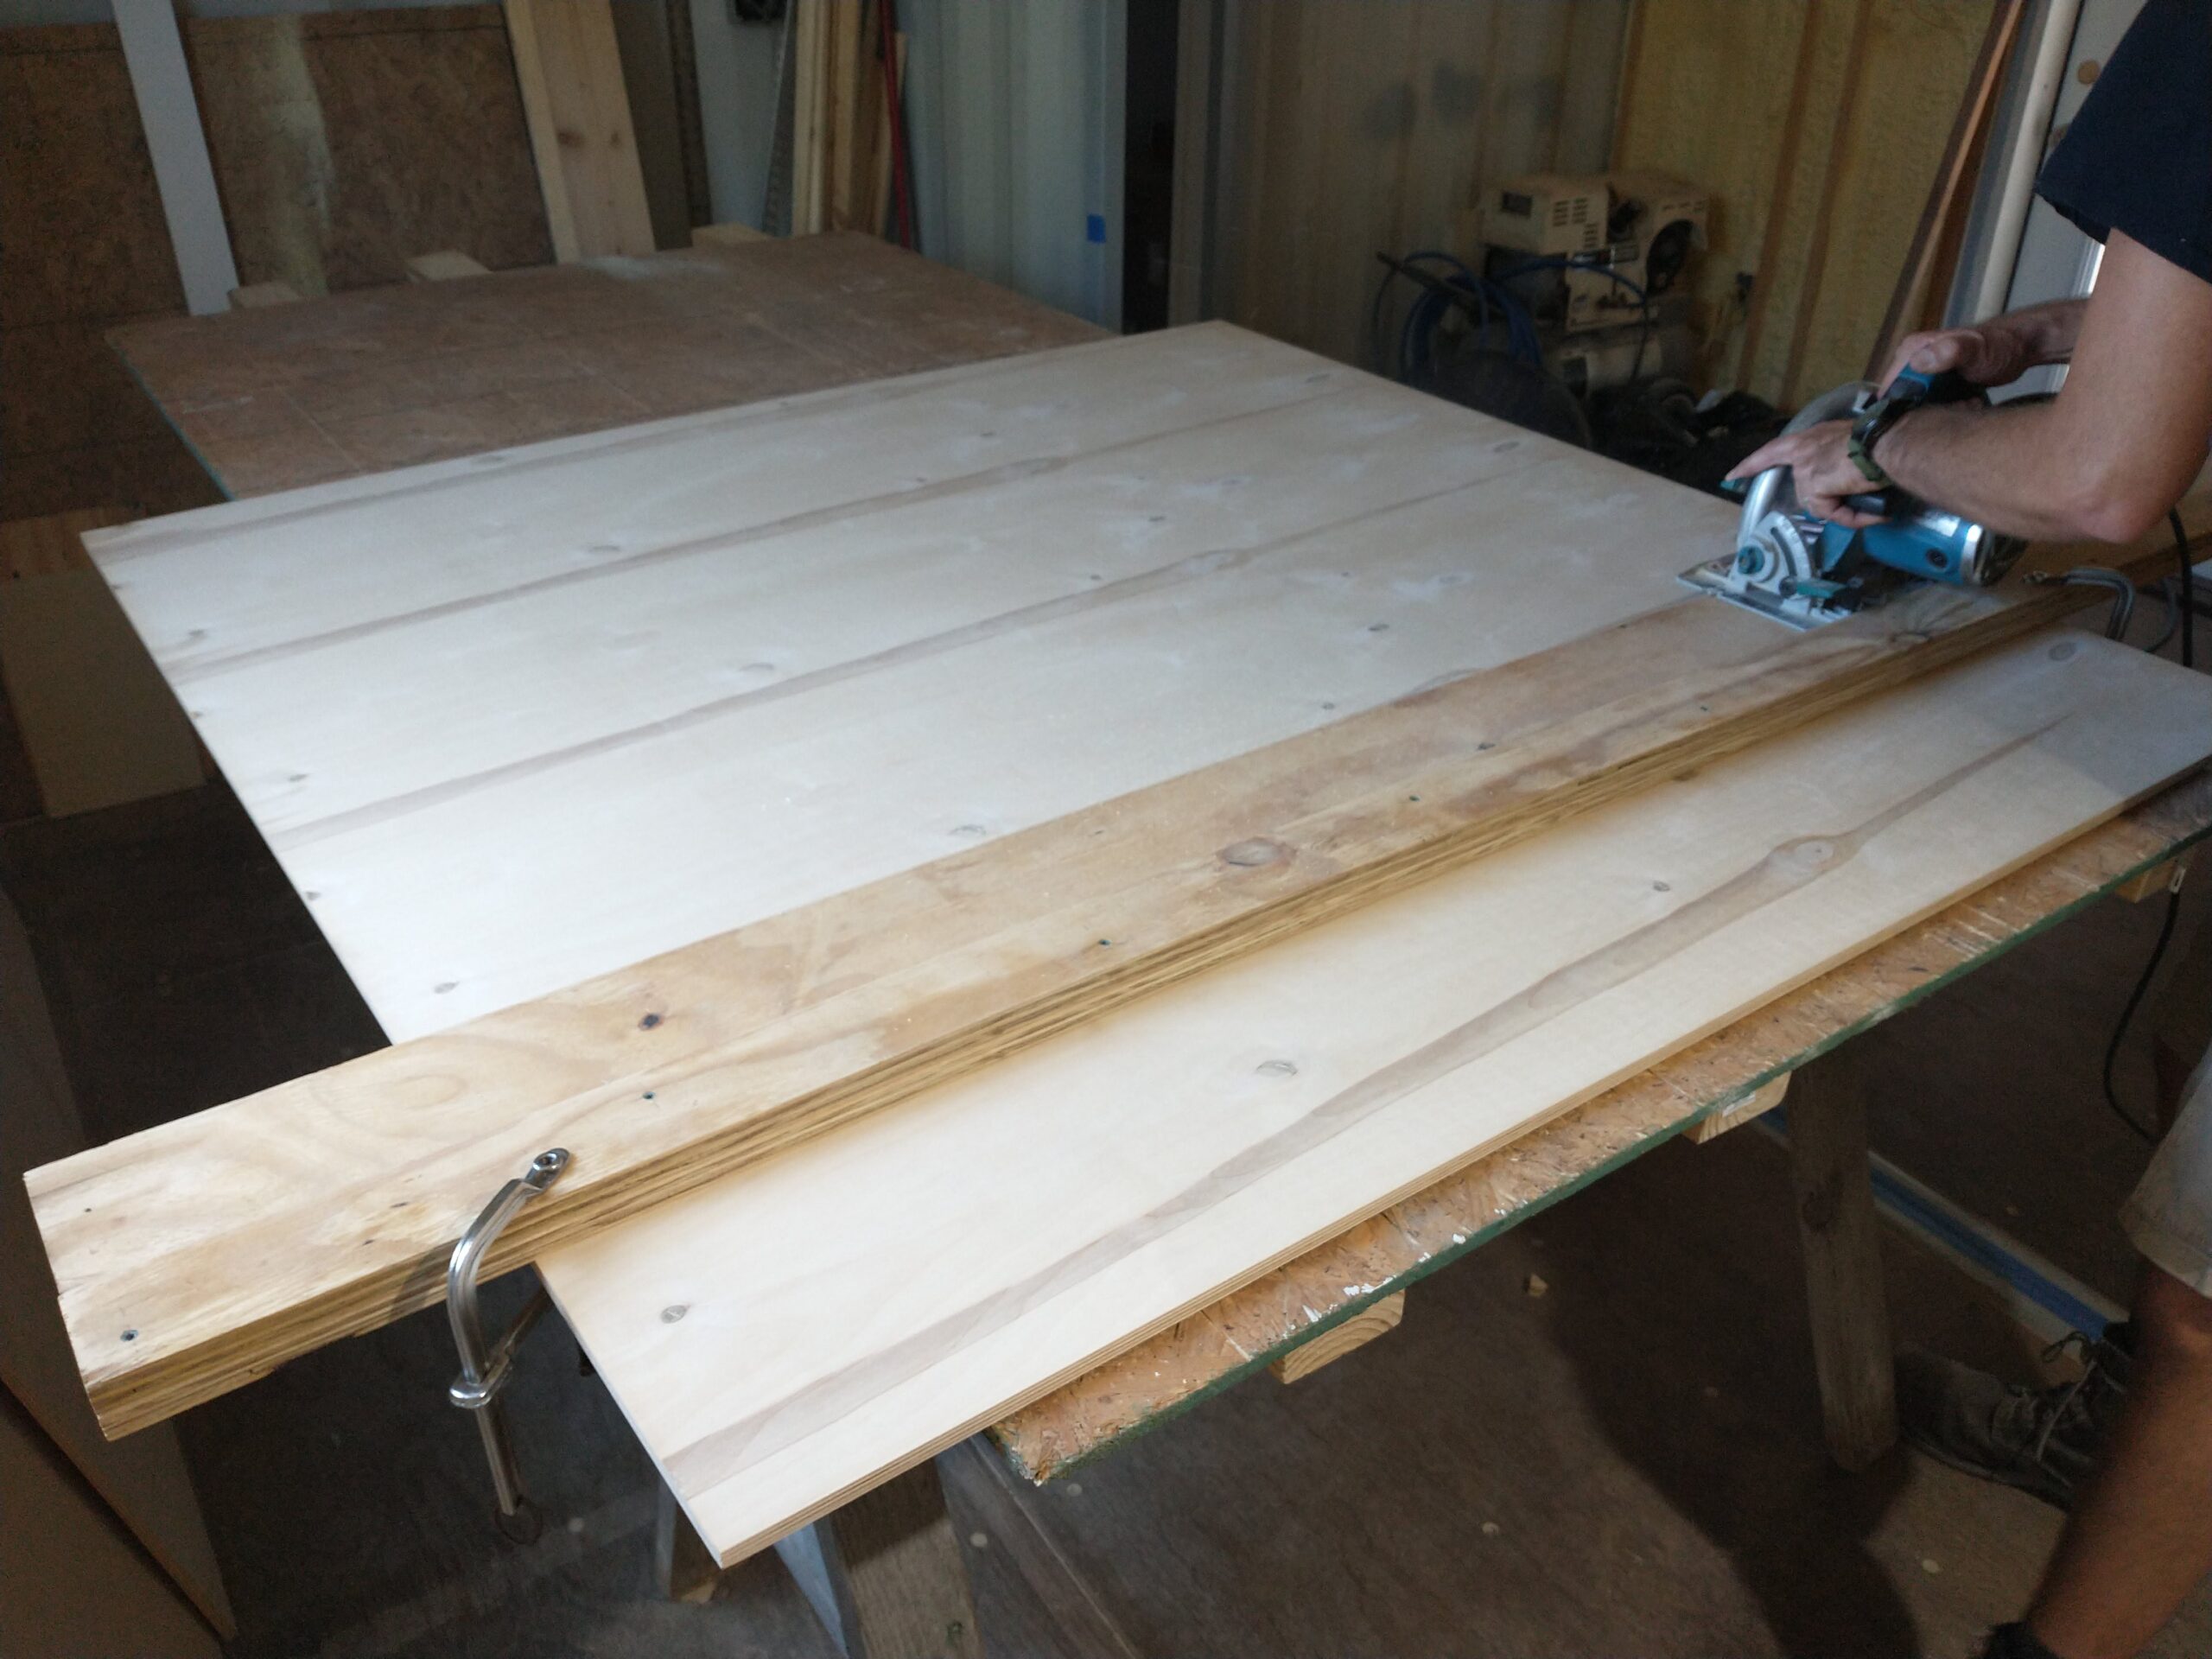
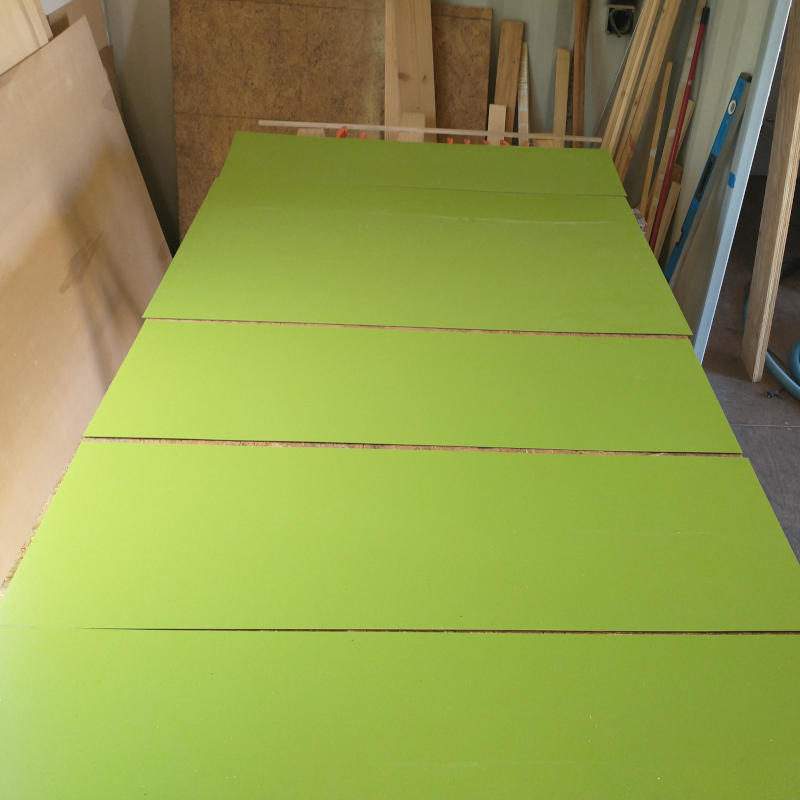
The same day the bathroom was door was brought, the Planner and the Doubter started cutting out the panels for the bathroom cabinets. Not wanting standard big box store plywood, the Planner decided upon this locally supplied specialty lumber store plywood as it was already primed and ready for painting.
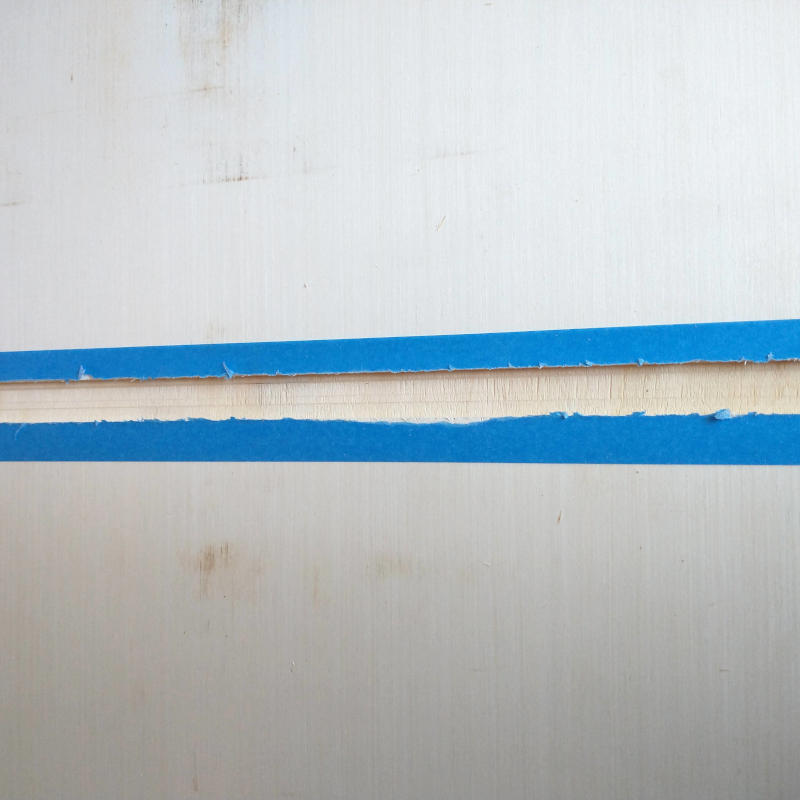
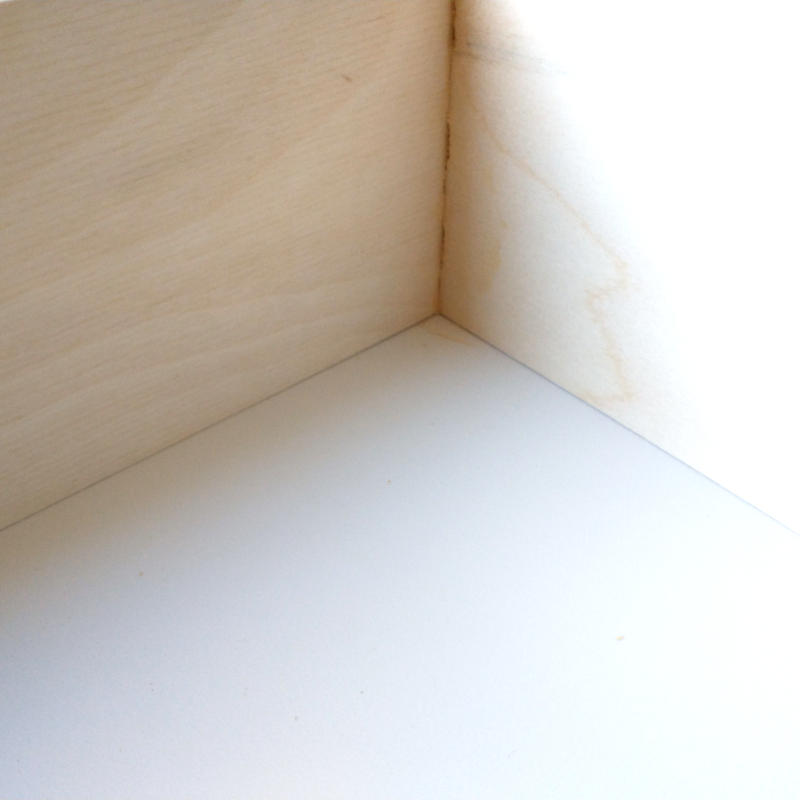
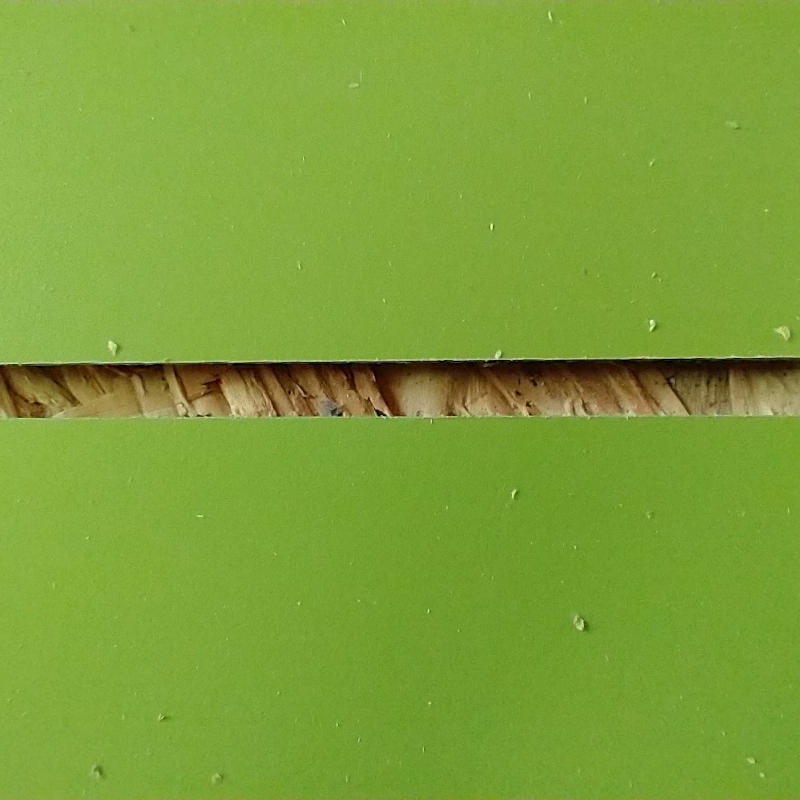
Sadly, this plywood was not all it was sold as. The wood shredded when cut, even after a brand new, better brand blade was purchased. Even after the wood was taped on either side with two layers. Neither the Planner nor the Doubter was happy with the plywood but it was my insistence that the A) the cabinet is for the bathroom, not the first seen when walking into the kitchen and B) functional furniture. Do I like the rips and tears, No. Not even after the edges are sanded which then caused more tears. But I do not want to wait for different plywood. Besides, the only place the tears will be seen are on the inside of the cabinet. And to those people are looking on the inside of my bathroom cabinet, you can just close the front door behind you as they leave. Seriously.
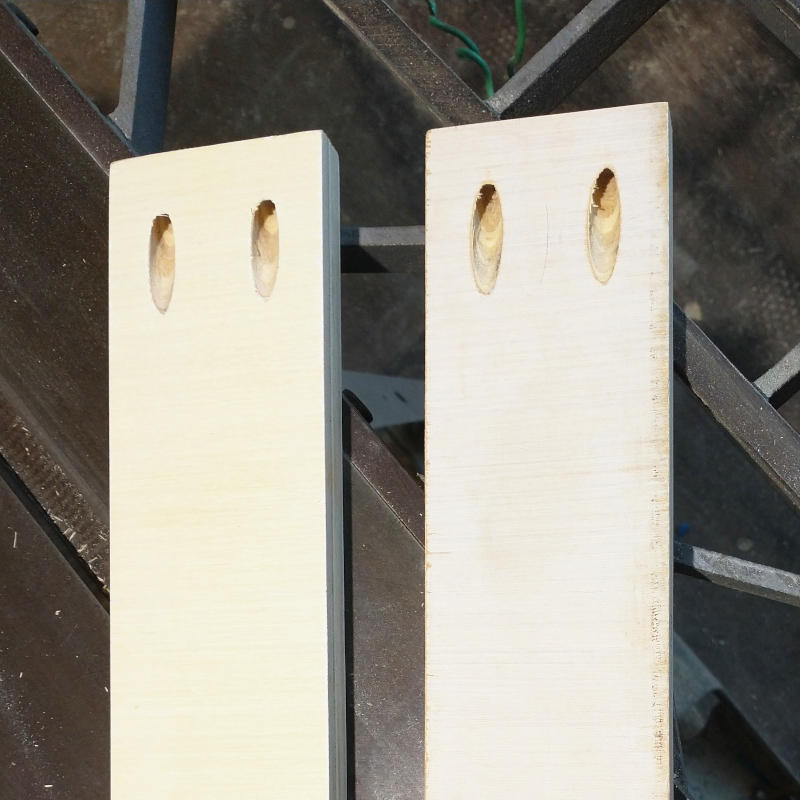
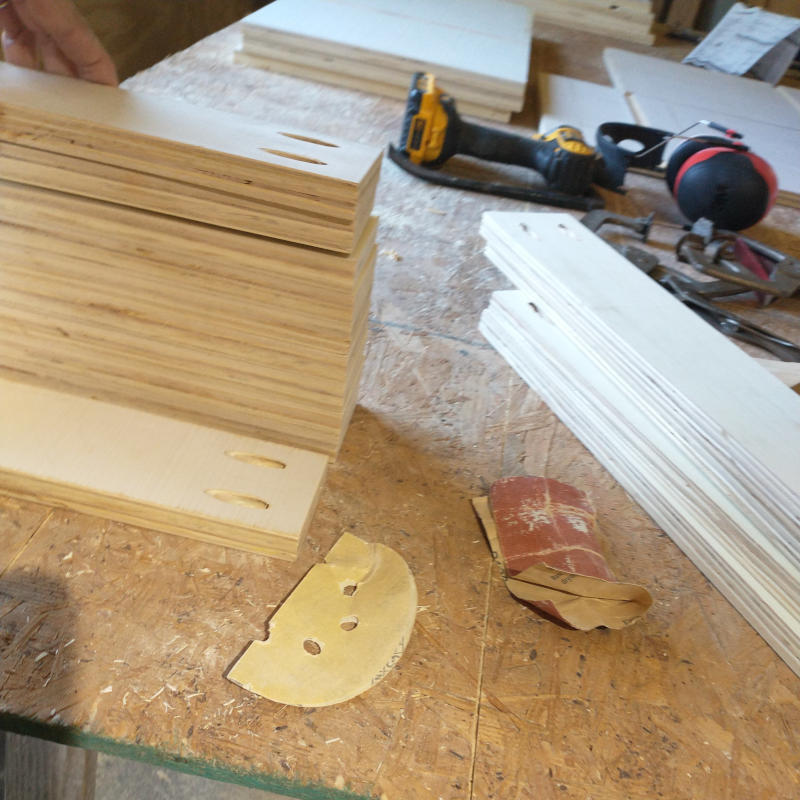
Kreg pocket hole jigs are great. Well, in case of this unexperienced woodworker, I think they are great. Easy to use, easy to clean up, easy to store. The only problem I had after completing all these pockets were once again the plywood splintering. Using old discarded scraps of sandpaper, each and every hole was cleaned of strips and sanded smooth.
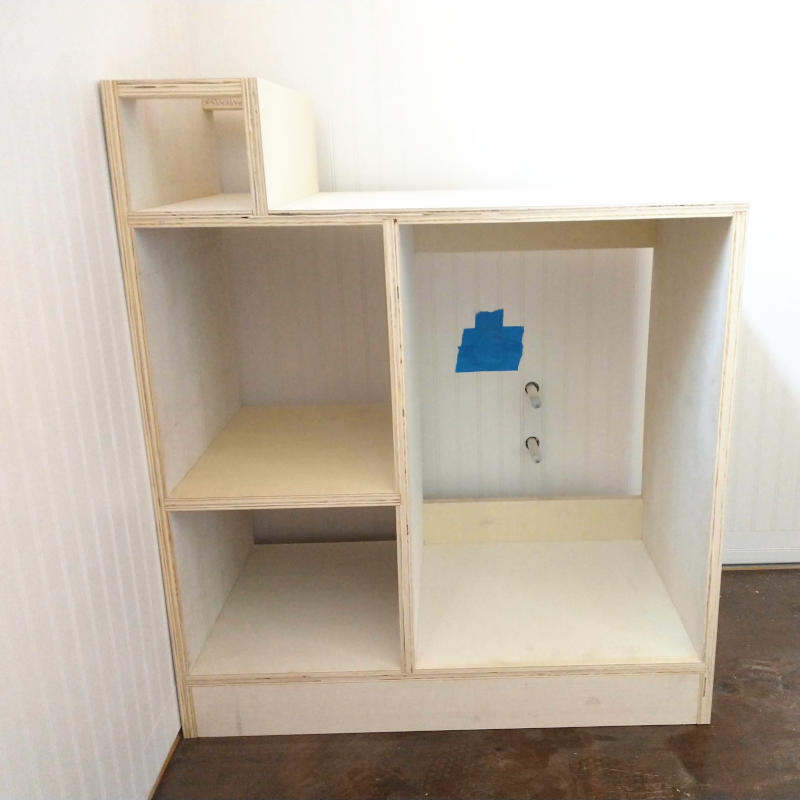
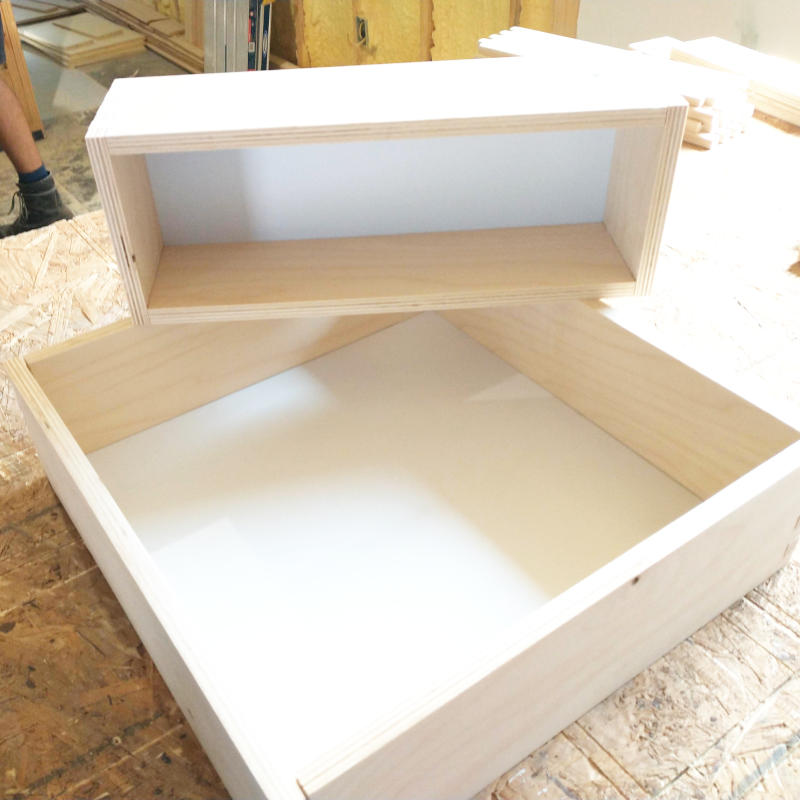
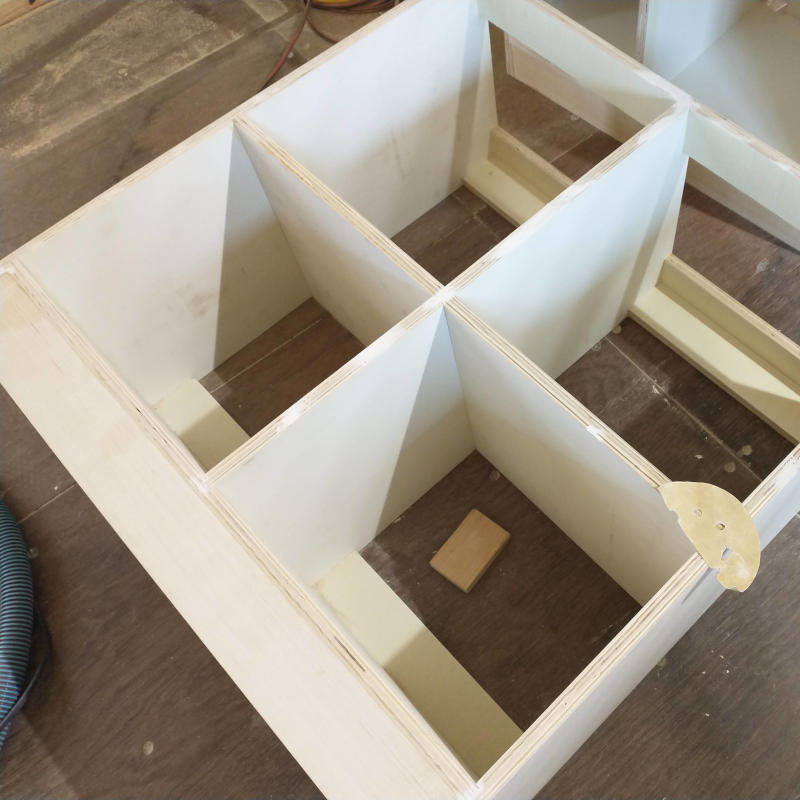
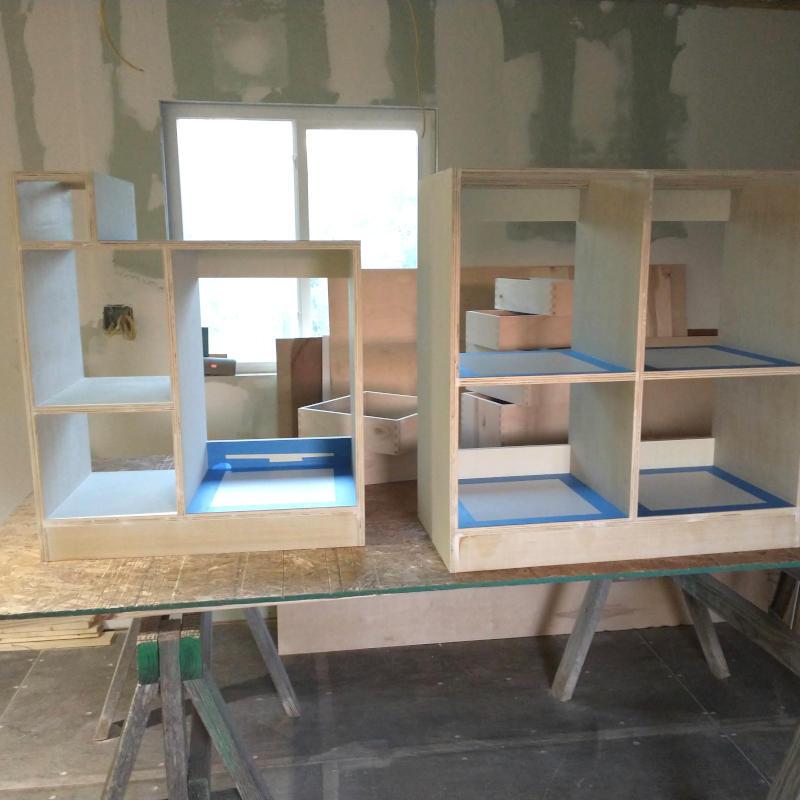
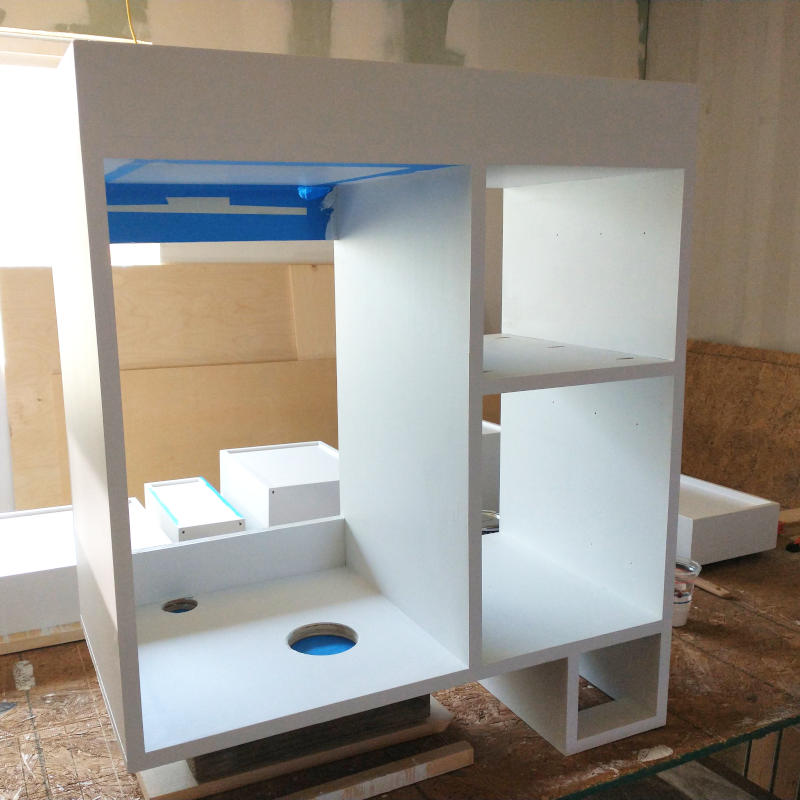
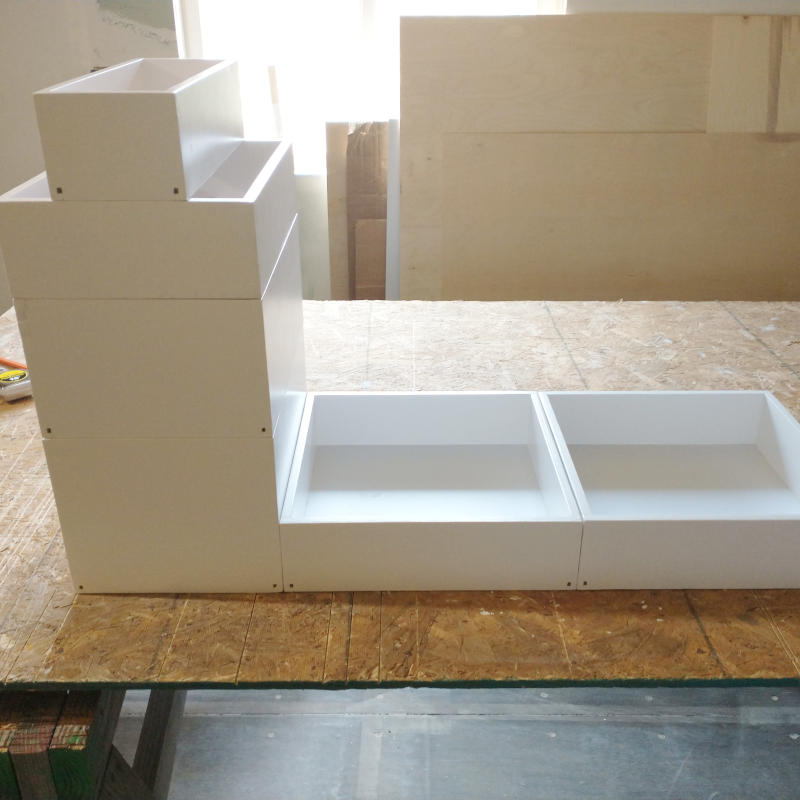
Bathroom cabinet one test fit. Do I like the height of the counter, the width between the edge of the cabinet and the shower? Visualize, the Planner says. Visualize? If could visualize then a test fit wouldn’t be needed in the first place. Do I think there will be enough room between the shower and the edge of the counter? Probably not when the entire room is less than seven feet wide to begin with. As with all other spacing confinements, it will be what it will be. Do I think the counter height is fine. Sure but then neither of us are five foot two. It is the perfect height for me to sit on while I wait for the laundry to be done. Stop over thinking. Let’s go.
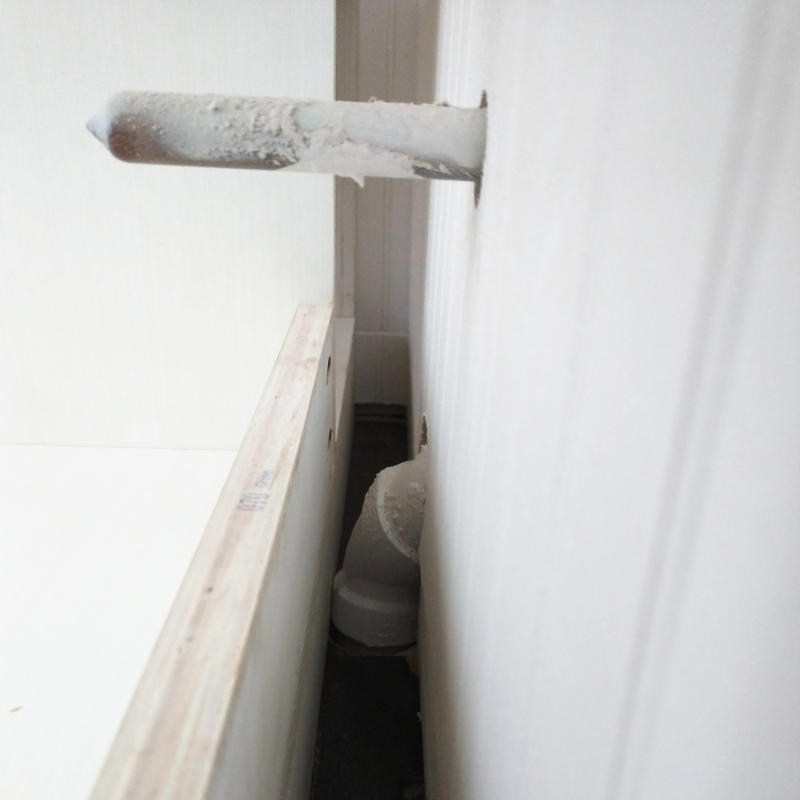
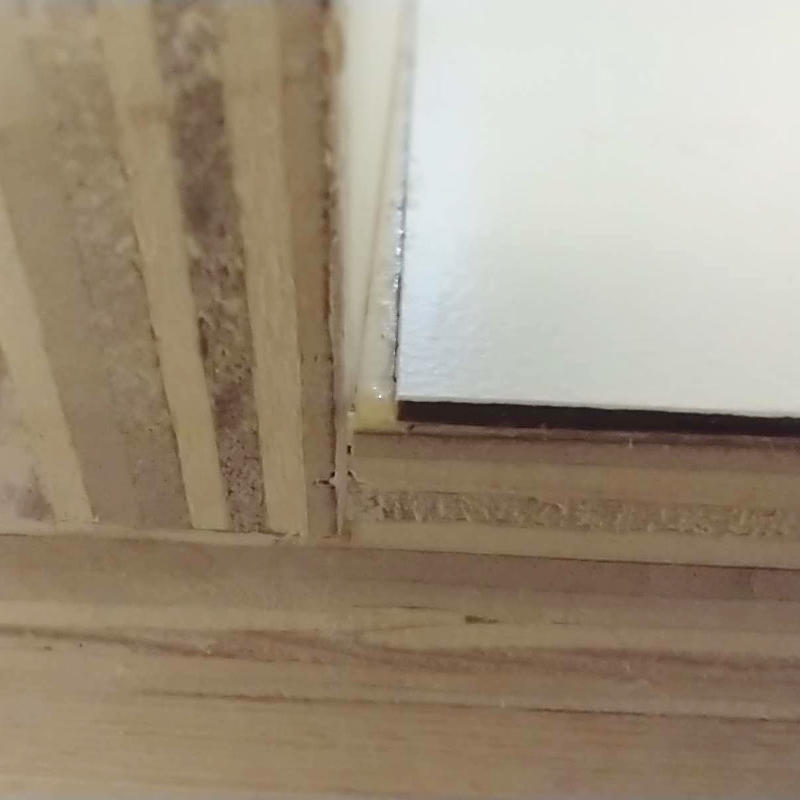
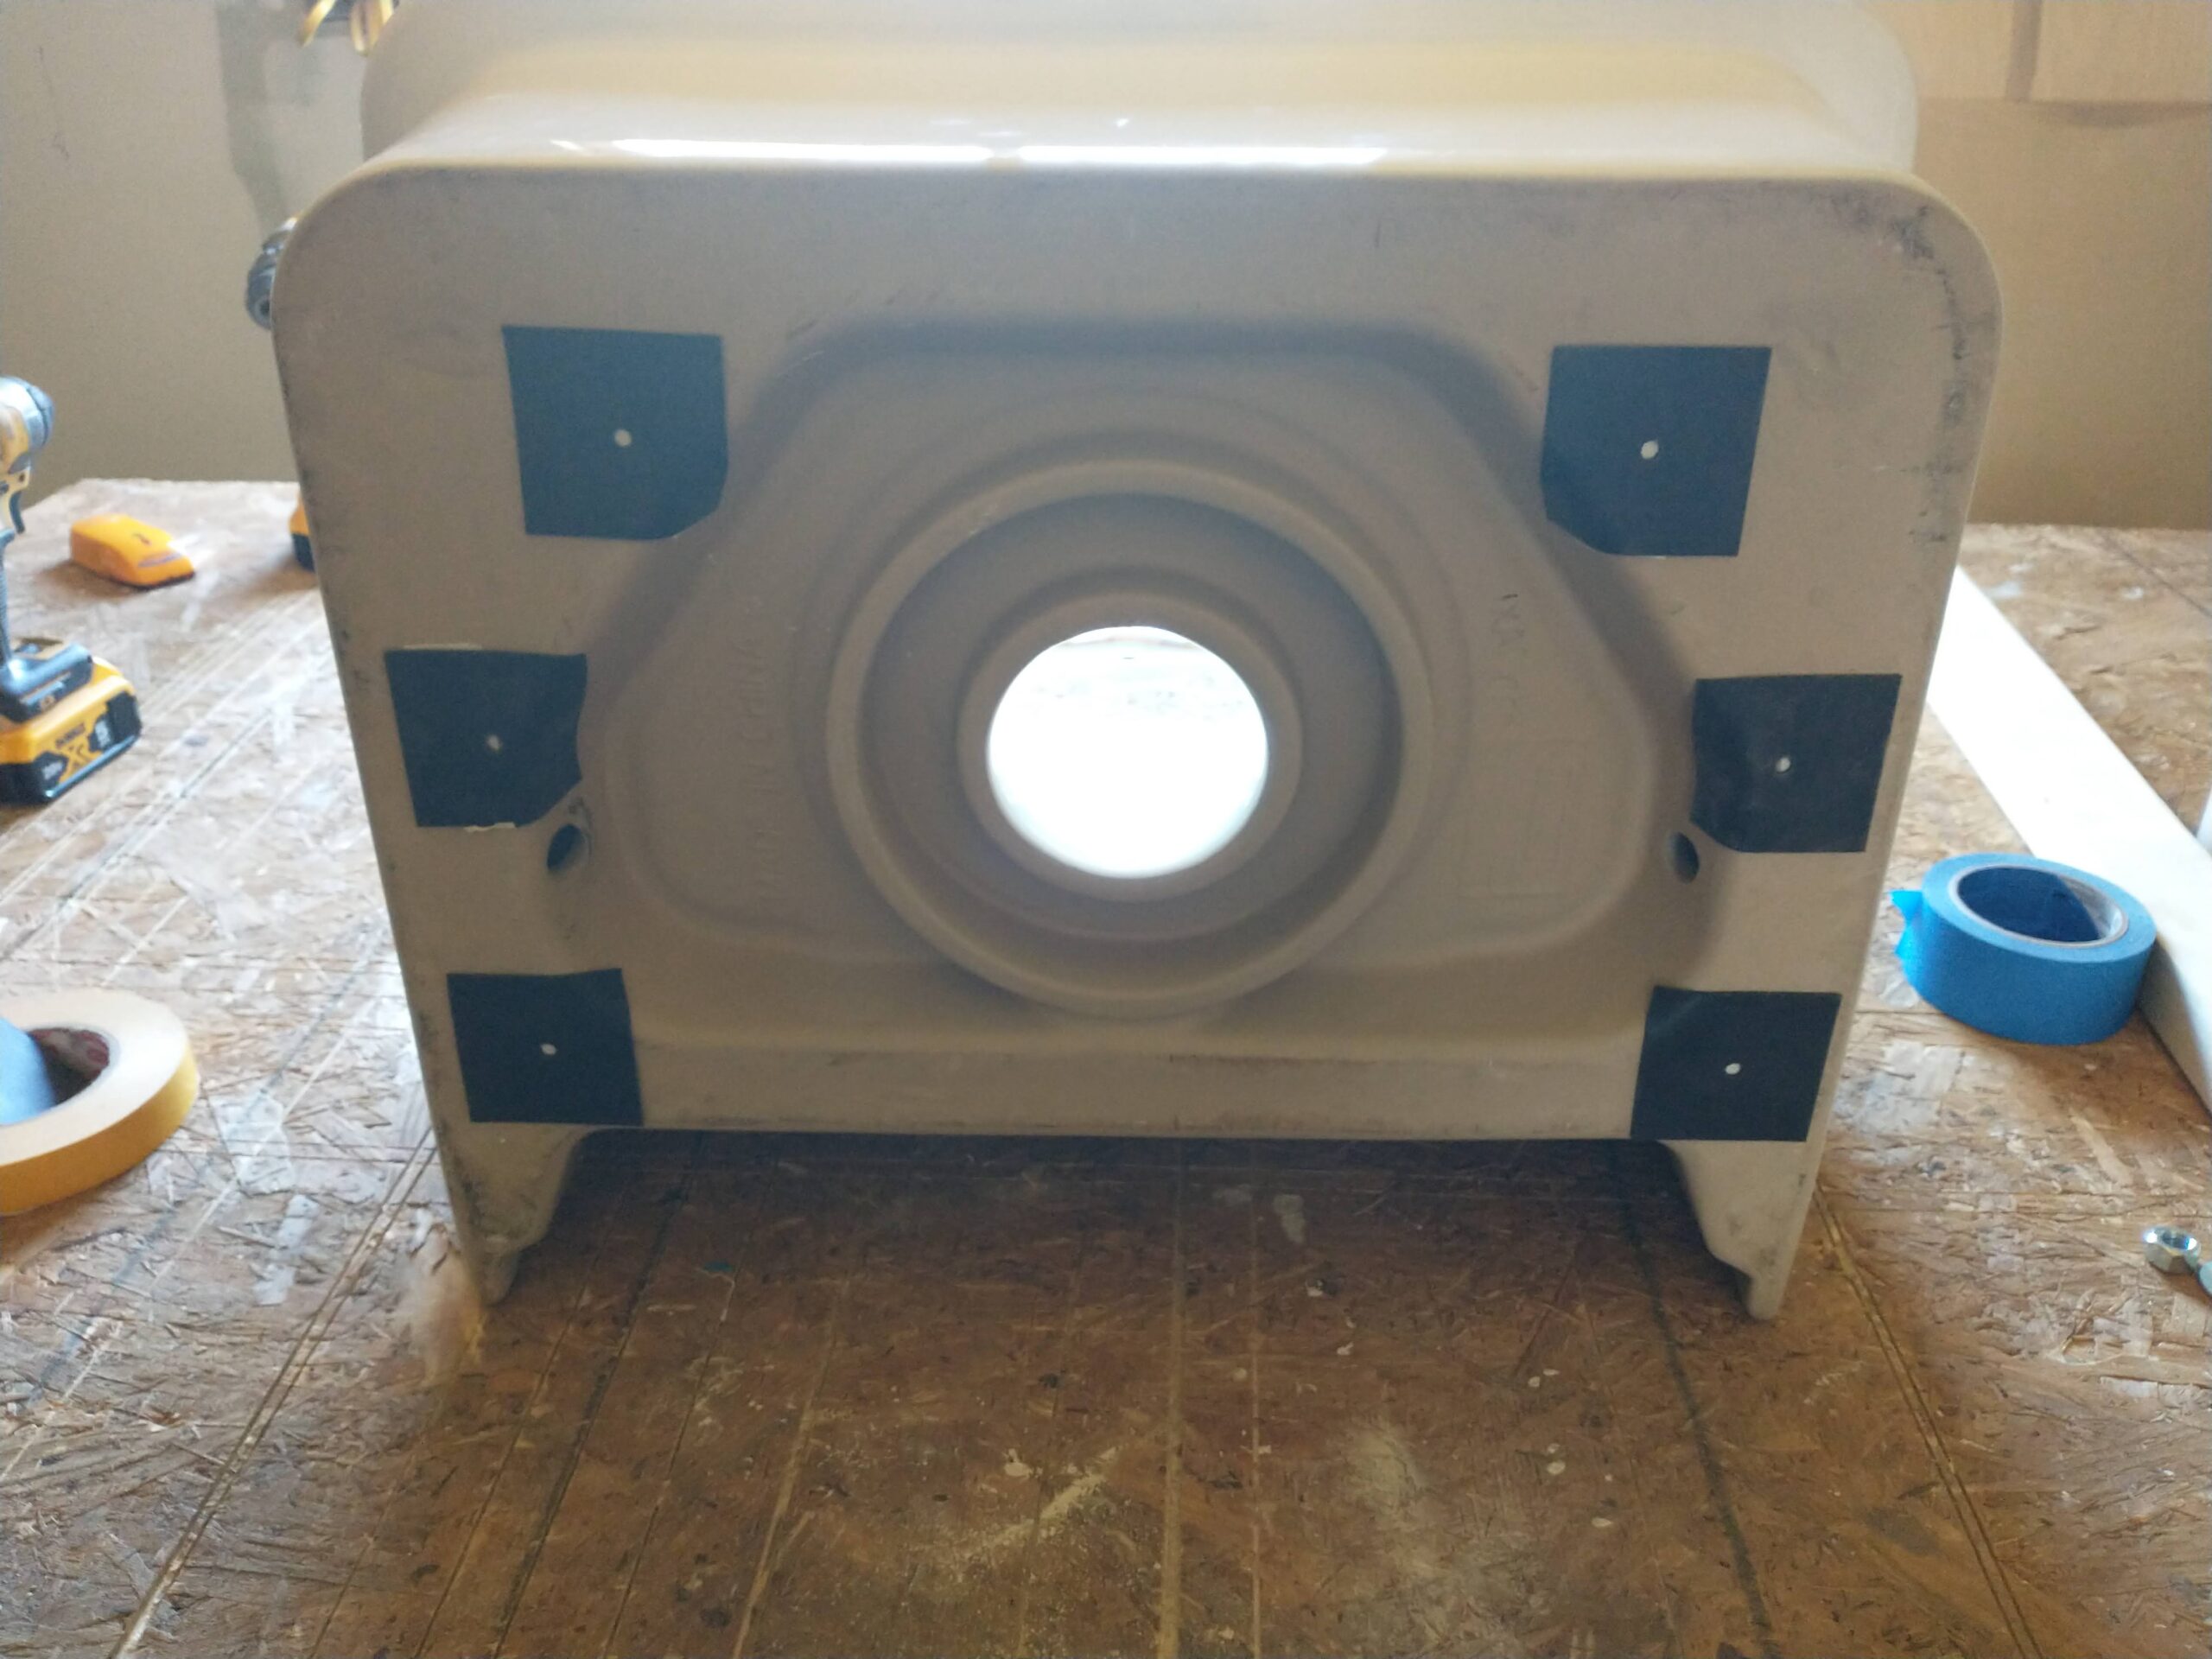
Test fit one would be have the one and only test fit except there was a teensy tiny plumbing issue. One that a normal stick frame house would not have had to deal with as the septic drain drain between the sheetrock inside the frames. If there had not been shipping container substructure framework directly underneath, the drain would have ran straight down, too. Instead the drain had to joggle to offset the metal framework that could not be removed as well as the supporting edge of the box itself. Ah, design constraints.

Luckily the drain cutout will not affect the integrity of the cabinet itself. It even managed to miss the corner pocket screw. What I can tell you is that the above picture and the section above picture both contain very phallic images. None of which were intentional.
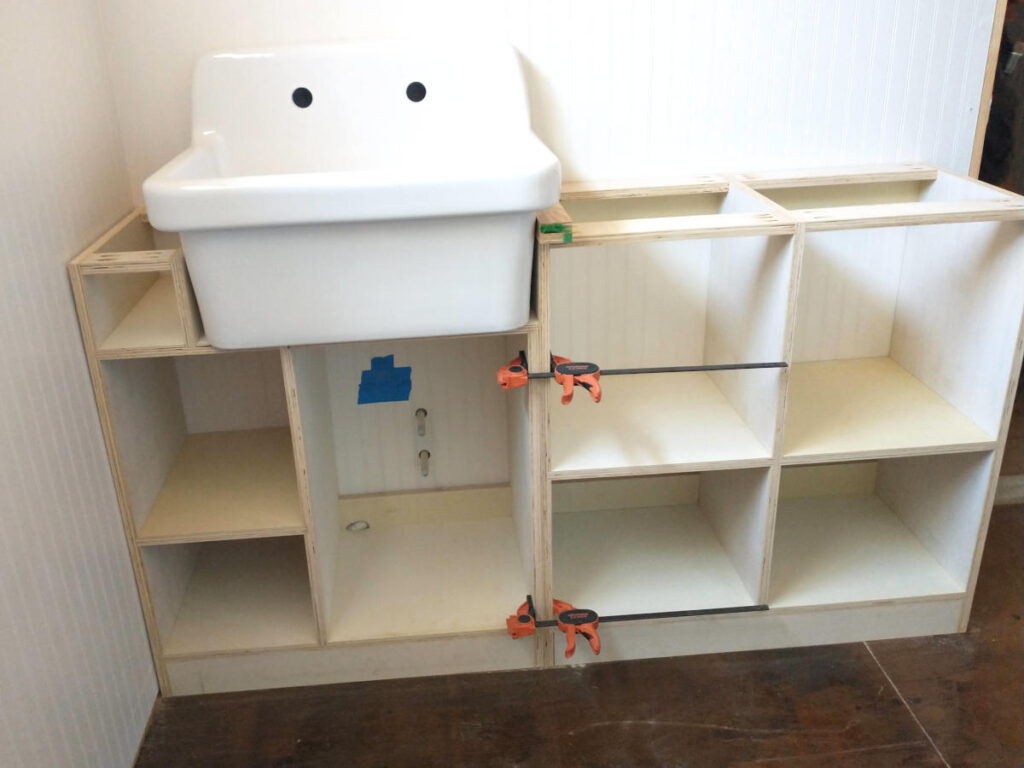
Before the Doubter left at the end of the first weekend in August he got to see the second bathroom cabinet placed and test fitted along. Adding the laundry sink, the Doubter took some measurements to made countertops. White sink, soft yellow wood (cypress or pine), dark red brown floors. It’s gonna be great. After the Doubter returned home, the Planner completed installing the floor and ceiling trim that has been sitting in the corner waiting for five weeks for its chance to reenter the project phase.
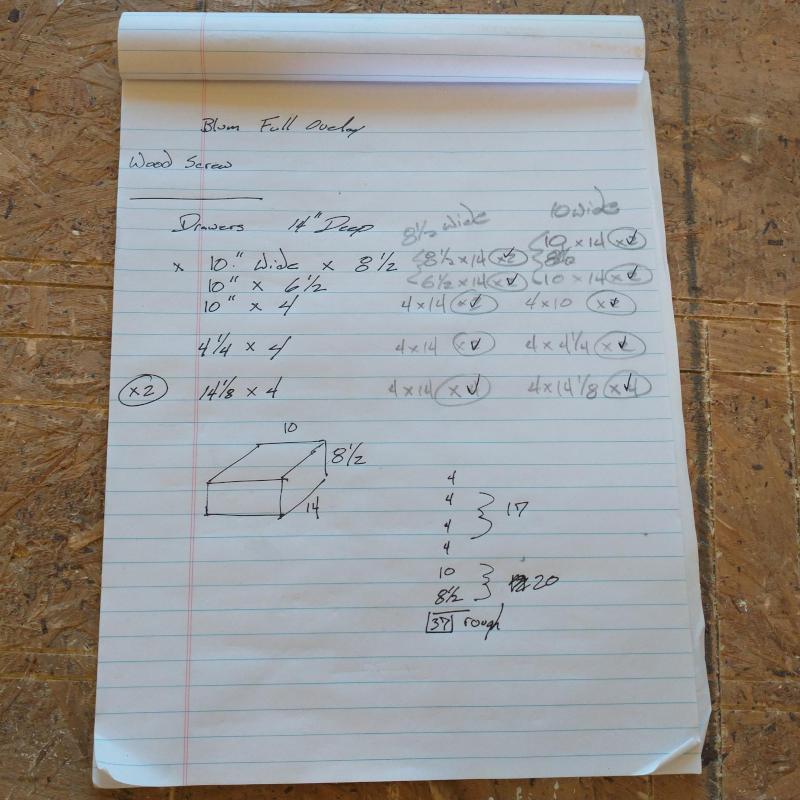
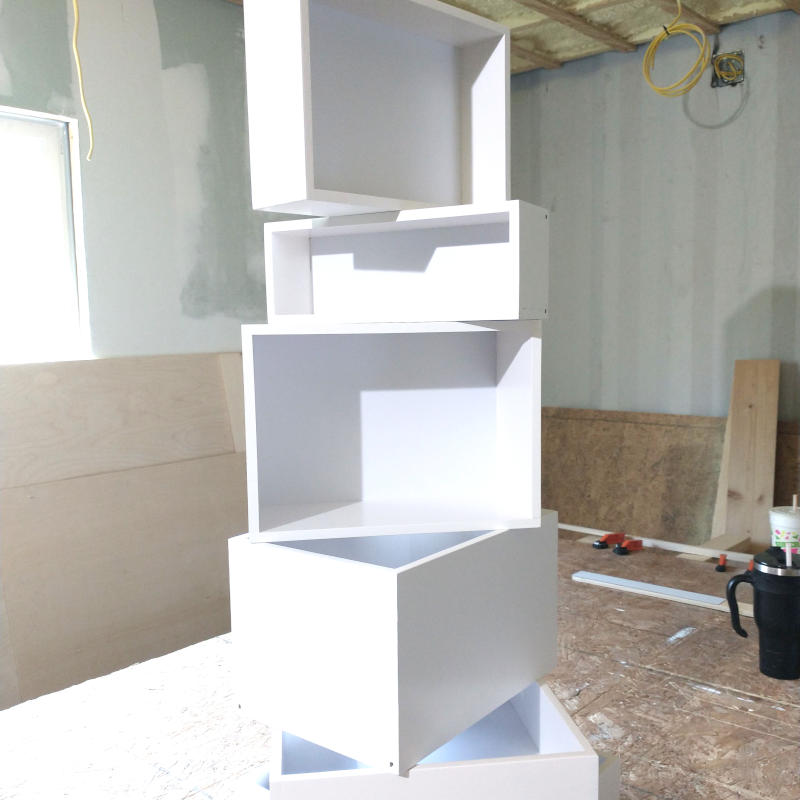
The third week of August was spent making bathroom cabinet drawers and doors. Four drawer on the left side of the lefthand cabinet along with one door. Two drawers across the top on the righthand cabinet along with two doors.

At the same time the cabinet case plywood was purchased, the Planner purchased traditional Baltic Burch cabinet grade plywood. Oh, the difference the few pennies bought in quality of wood. I will take this needs to be primed wood before painting over the made ready stuff any day of the week. So smooooooth, so clean when cut, so much less sanding.
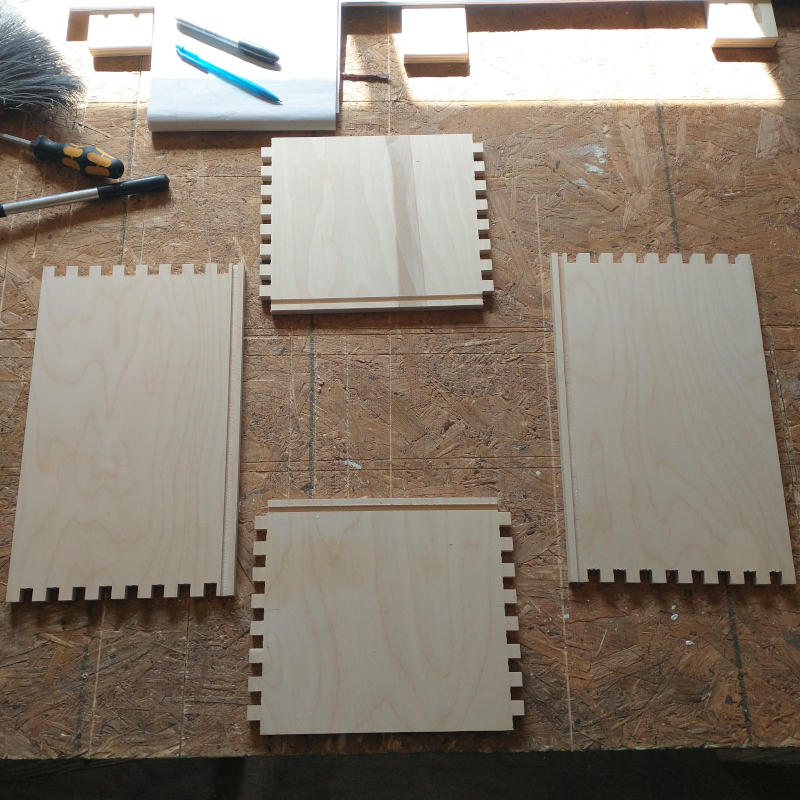
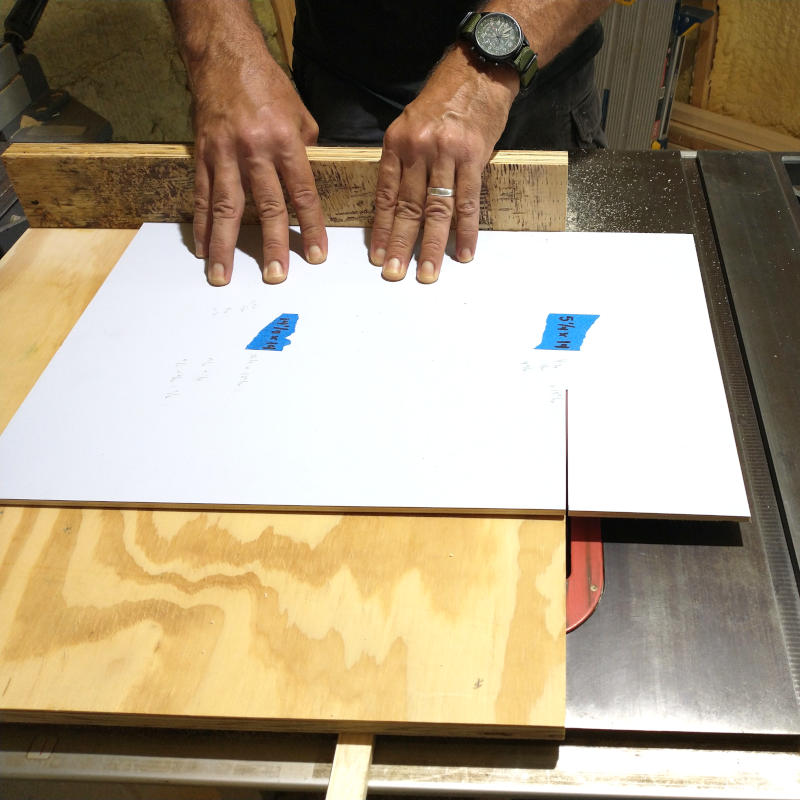
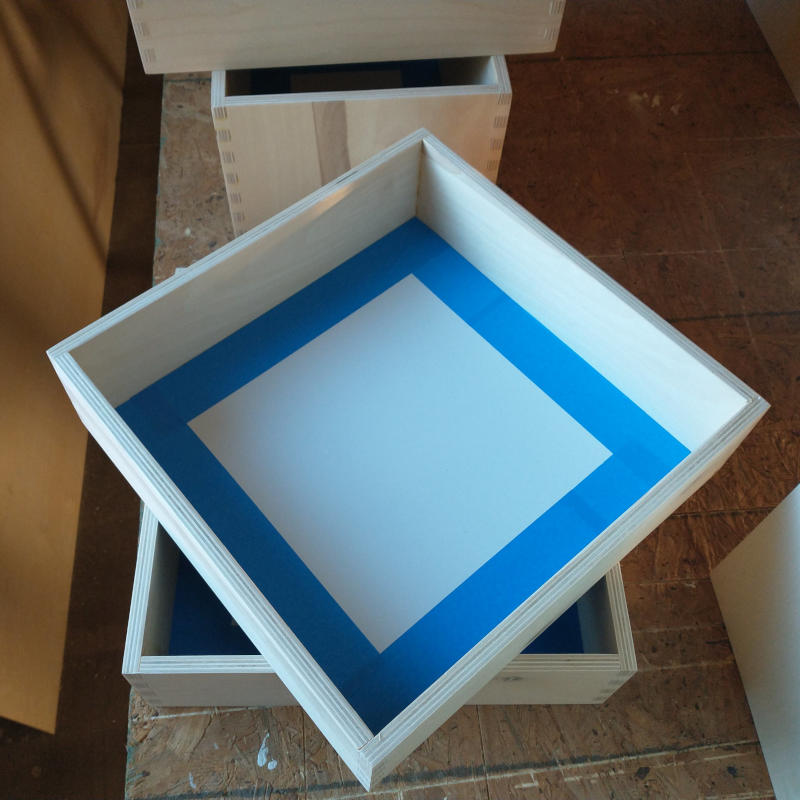
Drawers were cut out and edges sanded. Then the table saw had a jig customed built to allow the Planner to easily cut the box joint edges on the drawers. Finally, all four sides of the boxes had a slot cut to allow the drawer base a place to rest. The base will not be glued into place allowing the drawer space for movement. Living in our excessively humid environment means the wood will shrink and grow. With drawers cut, edges boxed and bottoms ready, the next exciting step was finally upon us. Laminate!
Oh, how I can hear and see you cringe with that one simple word. Laminate. Laminate. Laminate. Oh, how I love laminate. Loved it on my grandmother’s kitchen table with the aluminum edging. Loved it on the walls, the cabinets both inside and out, and the countertop with its aluminum edging in the Rainstream. Love it. Love it. Love it. I have always known the cabinets, all of them, would be covered in laminate. Yes, all of them. Bathroom, pantry, kitchen. It was just deciding what color I was going to use. The Rainstream has foggy mist (light gray) on the walls and the outsides of the cabinets. On the insides of the cabinets was bright white. The countertop both in the bathroom and kitchen was a light blue gray with multicolored boomerangs. Very retro. Very fun. Very practical. Very functional.
Living in less than 100 square feet with two adults, one half size kid causing more damage than the two full sized adults, and one hairy, sandy four legged doggo, the laminate held up strong and true. In the ten too long years we lived in the 100 square foot, only one laminate corner was damaged. One corner less than 2 square inches in size. Impressive stuff.
Okay, that is not true. The 16×16 square where breakfast, lunch, dinner was prepped, where the dishes were stored to dry, where the cookies were set to rest, to biscuits rolled to perfection was loosing its coloring. Ten years later, day in and day out. Bet that 16×16 square was washed and scrubbed no less than 50K times. Not exaggeration, either. Laminate is excellent stuff.

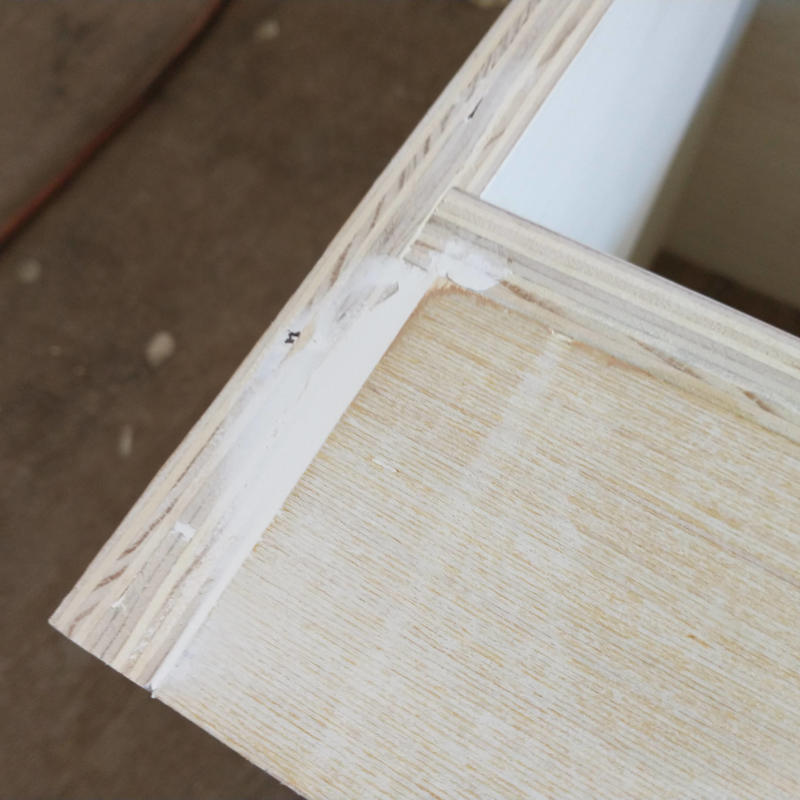
With the bases of the cabinets laminated, the bases were cut to size, and the drawers assembled and glued into place around the bases. Afterwards the drawers filled with wood putty and once again sanded smooth. Word to the wise, less glue is better than more glue. Glue is difficult to sand off evenly.
Glue inside box corners is next to impossible to remove even when swiped at immediately with a warm wet rag. Wipe, wipe, wipe. Yet a residue remains and when dry leaves a yellow ting on the white laminate and box corner. I am hoping the paint will cover the yellow tint on the box corner but there will be nothing to cover the stain on the laminate. Good thing these will be filled with erroneous bathroom crap making the edges difficult to see.
Laminate was also applied to the bottom of the inside cabinet shelves. Bathroom cabinets are known for their leakage. Sink drips, nail polish explosions, and busted triple antibiotic bottles. Now all of these will easy to clean with just a warm wet sponge. No harm, no foul. Once the laminate was applied to the cabinet shelves, the base edges were filled wood putty and sanded smooth. Again.
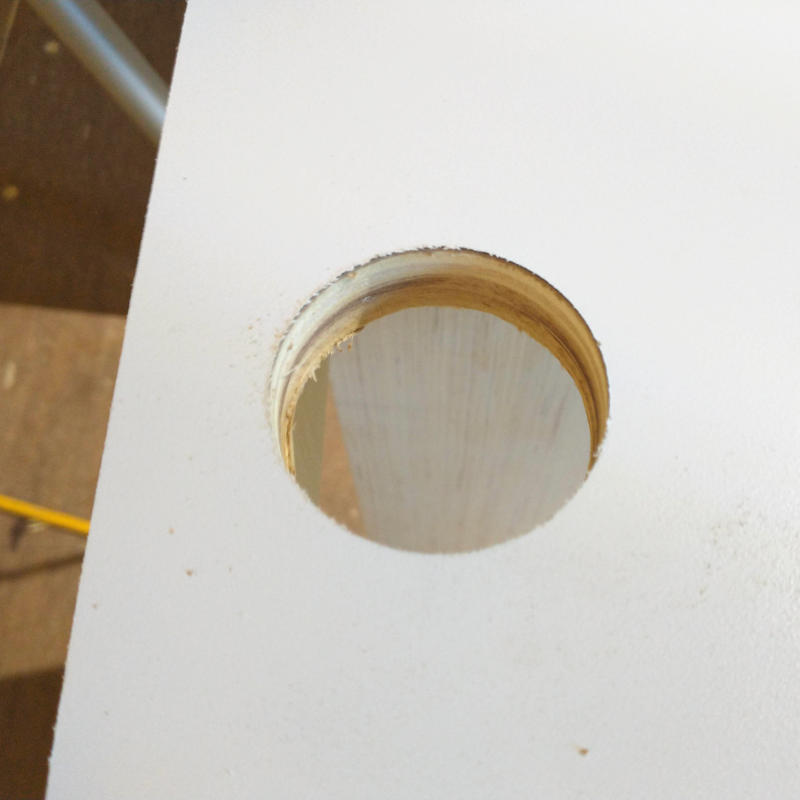
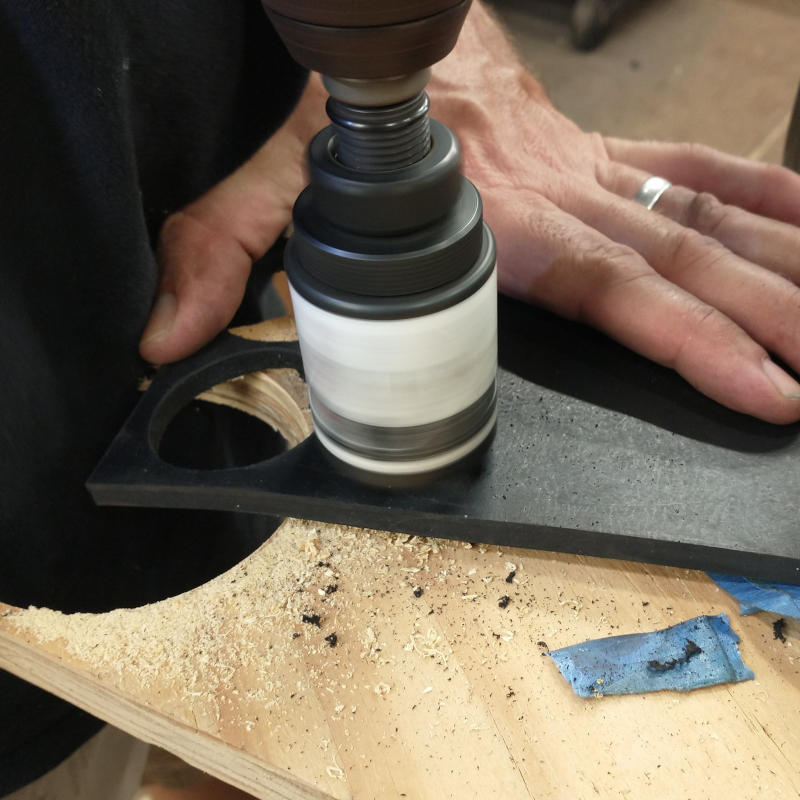
Finally, the laminate was applied to the top of the cabinet ledge where the sink will sit. Not knowing the best way to ensure the laminate hole was centered correctly, the laminate was applied and the hole was removed afterwards. It did make for the edge of the laminate to be jagged as hole saws are not the best cutters but a few swipes of a 110 grit sand paper and the sink hole was good to go. Laminate is not for everyone but it is for me. The only thing I wished I had done differently was to have made the decision to apply laminate to the shelves before the shelves were built. Instead I was left trying to apply laminate within a confined cubby and the results were less than stellar. Measure, measure, measure and the laminate is still not square. Or the boxes themselves are not square. Let’s not even think about that….
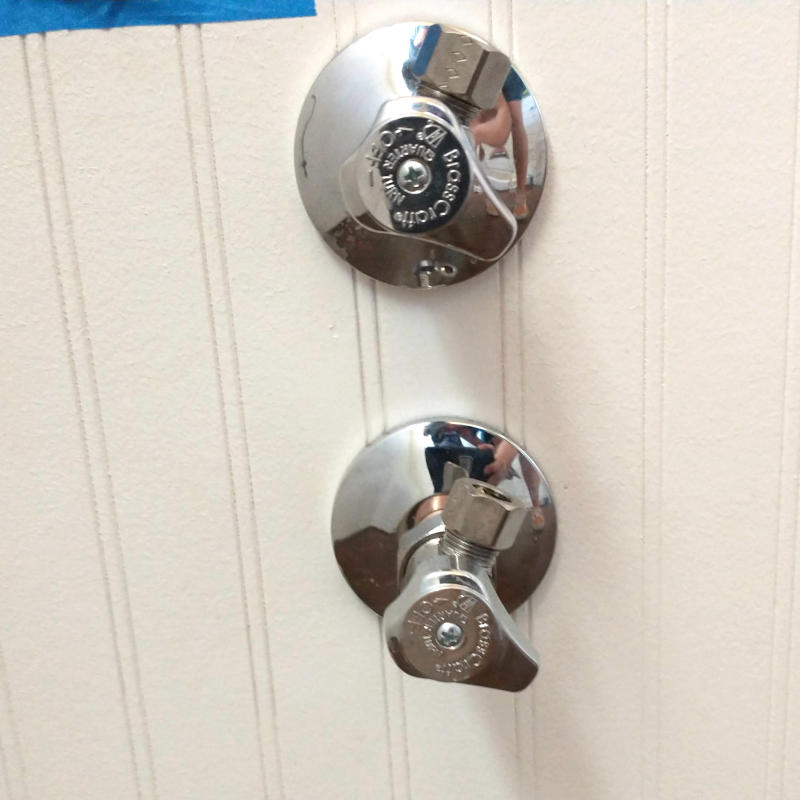
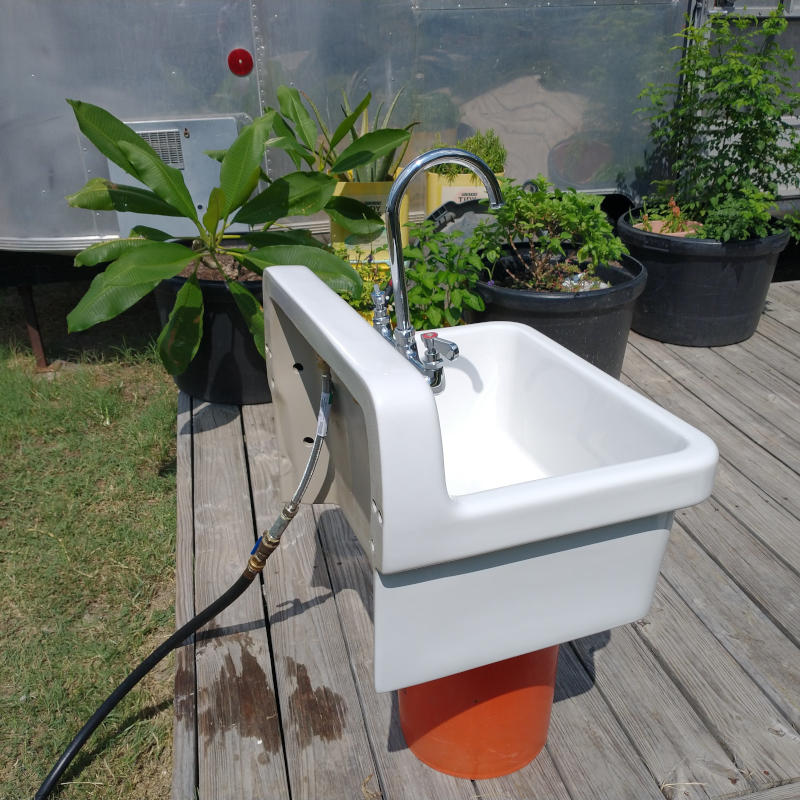
Somewhere during the last two weeks, both the toilet and the sink water lines were completed. Running water was so exciting, even if it did make a giant mess on the floor. Mess aside, totally my fault as I was not giving the job my full attention, running water to the bathroom was a major step forward to homesteading! Running water provided by a garden hose as there are still no connected water lines from the outside world to the dwelling but still. Running water.
Thursday of the third week in August had all the prep work for painting done and completed. Sanding, wiping, dusting, wiping. Vacuuming, wiping, taping, wiping. It was at this point in the month that projects were starting to be completed instead of just started. The bathroom door, the trim, the water lines, the toilet fixture in the floor (more on that later).
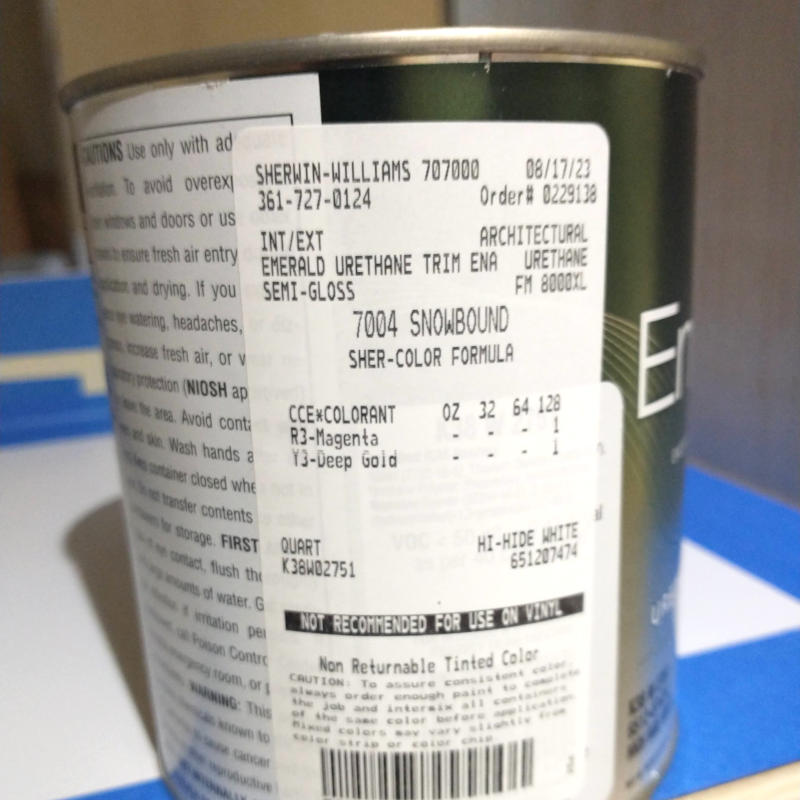
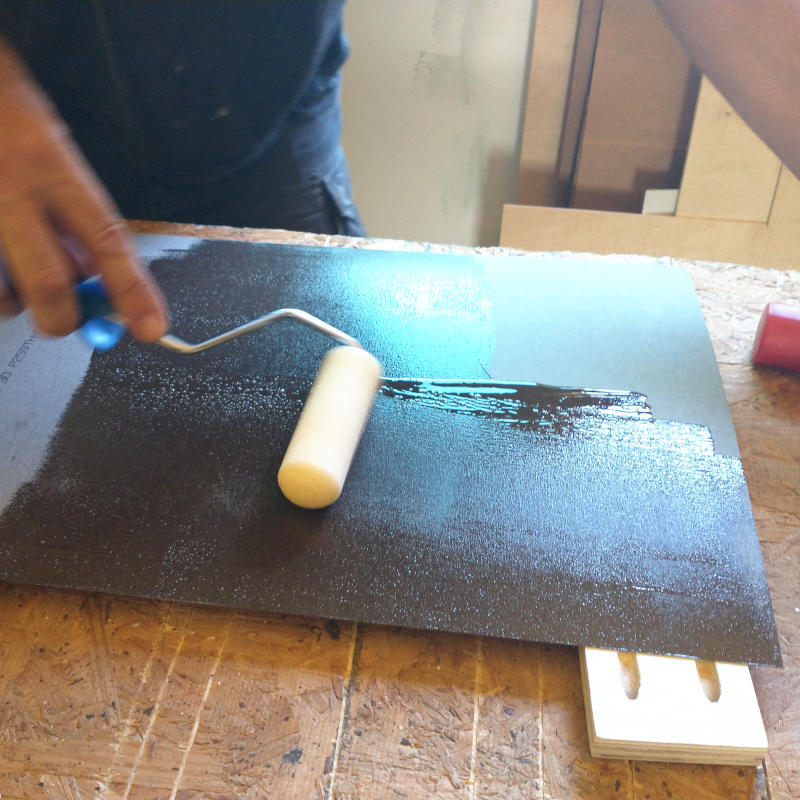
Paint. This is one those modern inventions that I have yet to decide if I like or not. Pros: Paint can be painted over if the color doesn’t suit your needs. Paints can be washed when dirty finger prints appear. Paints are cheaper and easier to install than laminate or tile. Cons: Not all paints can be painted on top. Oil based vs water based one can go on top the other can’t. Certain paints can tolerate some washing others none at all. If paints require multiple coats and/or primer coats the costs are not always the cheapest option. Cheap paint is cheap paint and good paint is expensive.

Paints that are all in one primers and paints are not always a one and done. They will still need two or three coats depending upon the material being painted. This pre-primmed painted plywood soaked up the expensive one and done paint like a drop of water in the dessert. Paints do not hide imperfections instead they exacerbate the error. Cheap plywood the bubbles when wet, paint shines like neon lights to the poor craftsmanship. Luckily the bubbled plywood was on the inside of the cabinet. Don’t look and you won’t see.
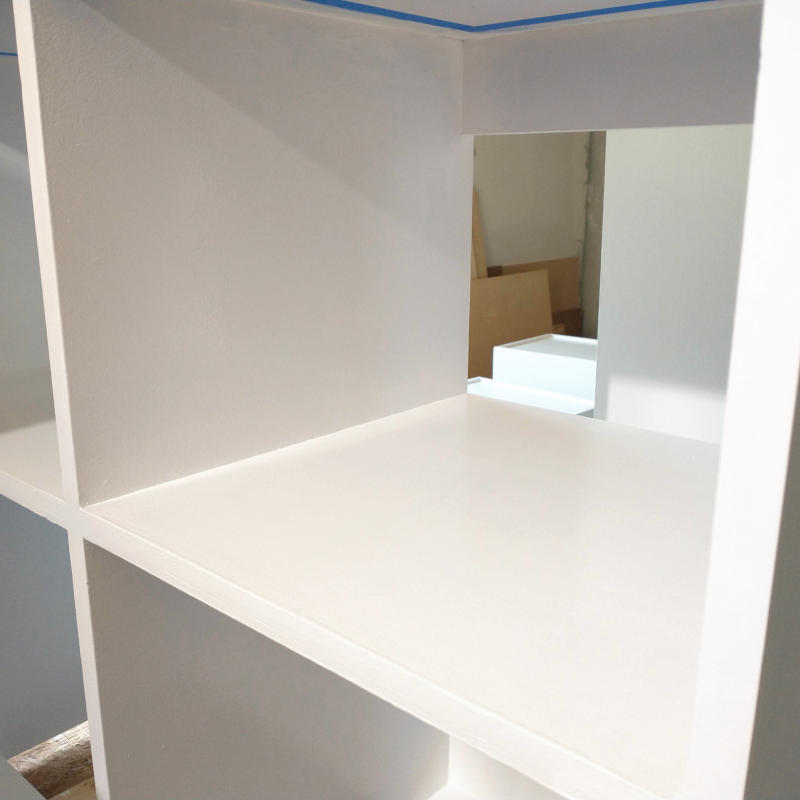
Three coats later, the cabinet bases looked pretty good for non craftsmanship workers. The paint was tough while smooth, shined yet wasn’t shiny, and took a beating very well. Using high grade paint now makes me wish better quality base cabinet wood was used. Live and learn.

Painting the inside plys of the plywood and not getting paint on the laminate turned out to be easier than expected. I was prepared to have to remove paint from the topside of the sink platform but since the paint was high quality, it did not run in between the tape and the laminate. And it did create a nice thick layer on the exposed plys themselves.
Where the paint really showed its true ability was on the Birch drawers. Beauties. These drawers were things of beauty. When comparing the bases to the drawers, one would think two different builders were used as the final product is so vastly different. Pictures, not mine anyways, do not give you the reader the true beauty of this paint.
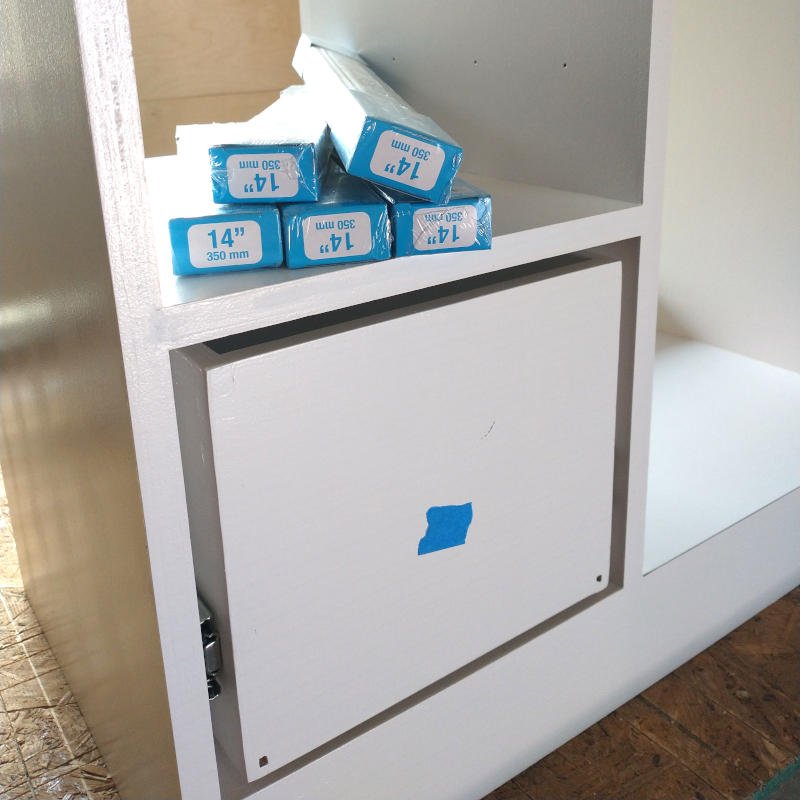
In the Rainstream, high quality drawer slides were used as the drawers were going to carry high loads over long time lines. Those drawer slides were slick as snot and as smooth as butter. These drawer slides purchased at the local box store at 1/10 the cost are sticky and clunky. These poor cabinets are a mesh of cheap and costly, professional and hobby. Good thing they are in the bathroom.
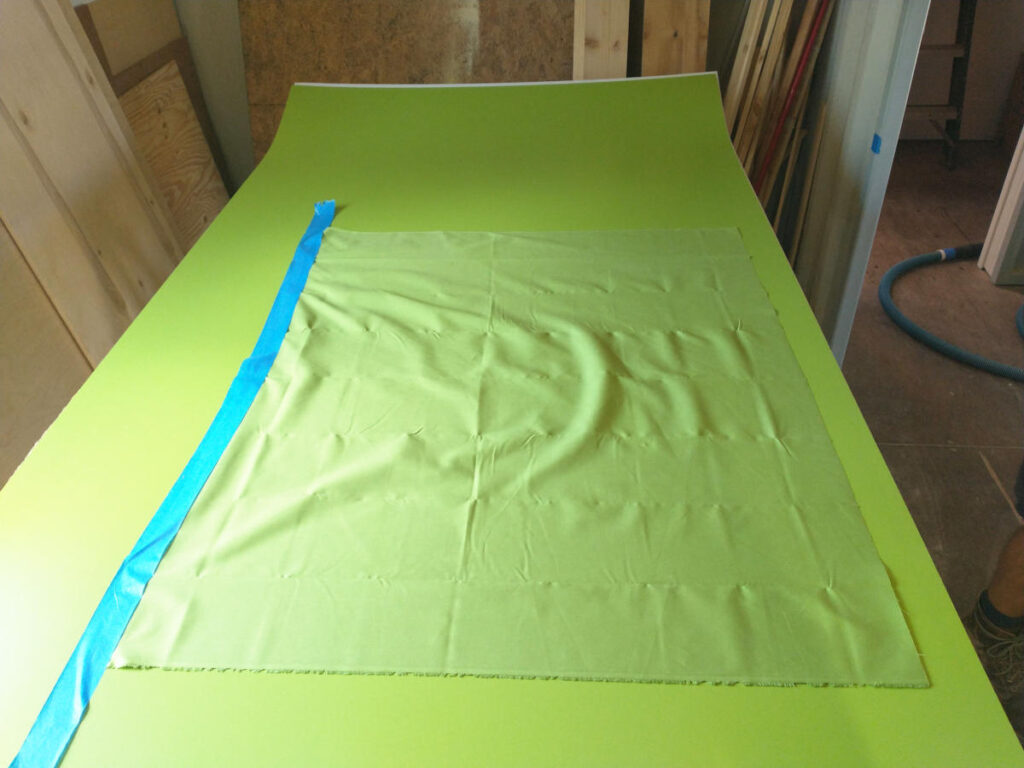
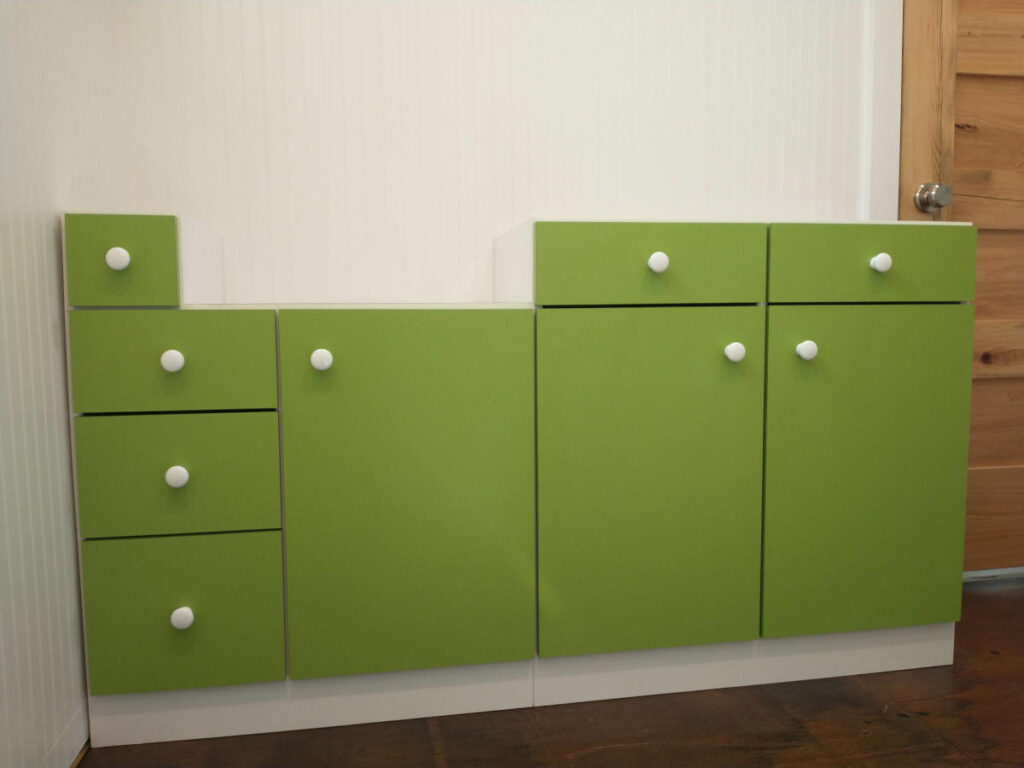
Ah, laminate. After months of debating colors, going back to the local laminate supplier and exchanging colors, I went against everything normal, safe, and boring. Green. Not lime green or forest green. Not pea green or pine green. Just about a Crayola green as green could be. Depending upon the light, naturel vs LED, it is brighter or darker but never harsh or overbearing. Wilsonart calls is Cucumber Juice.
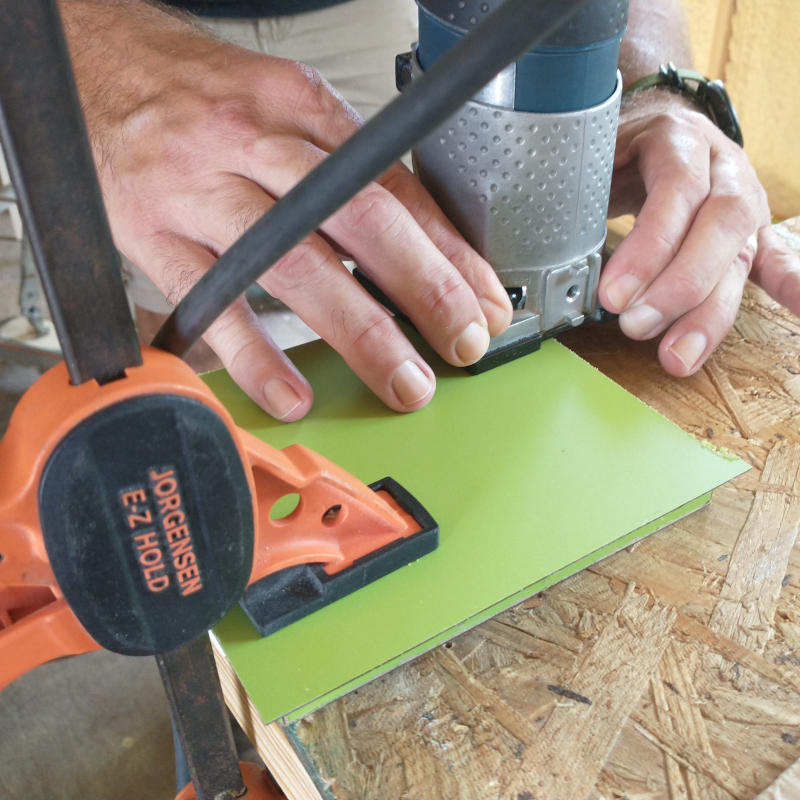
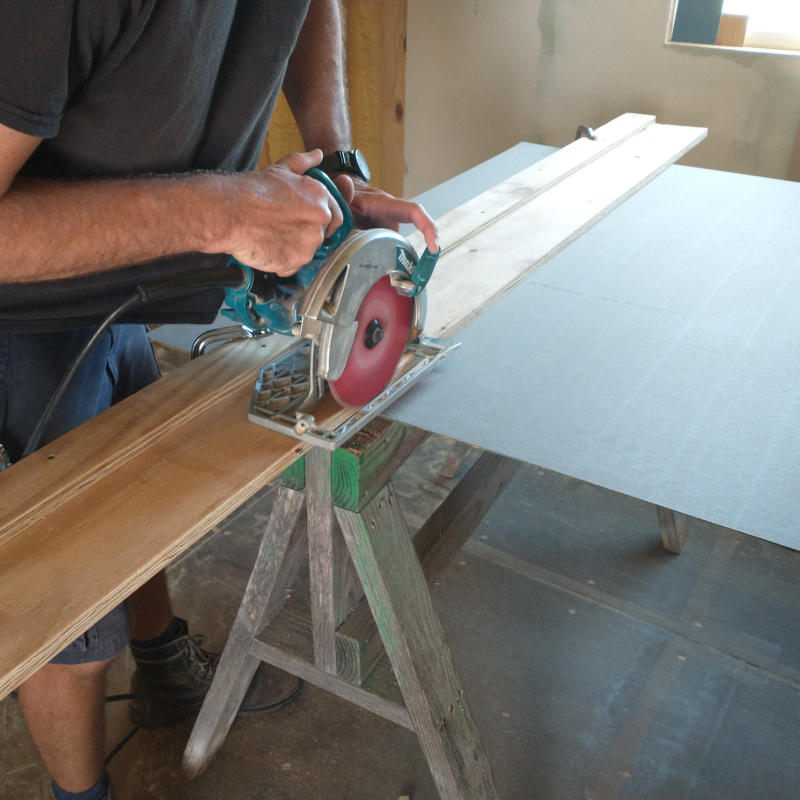
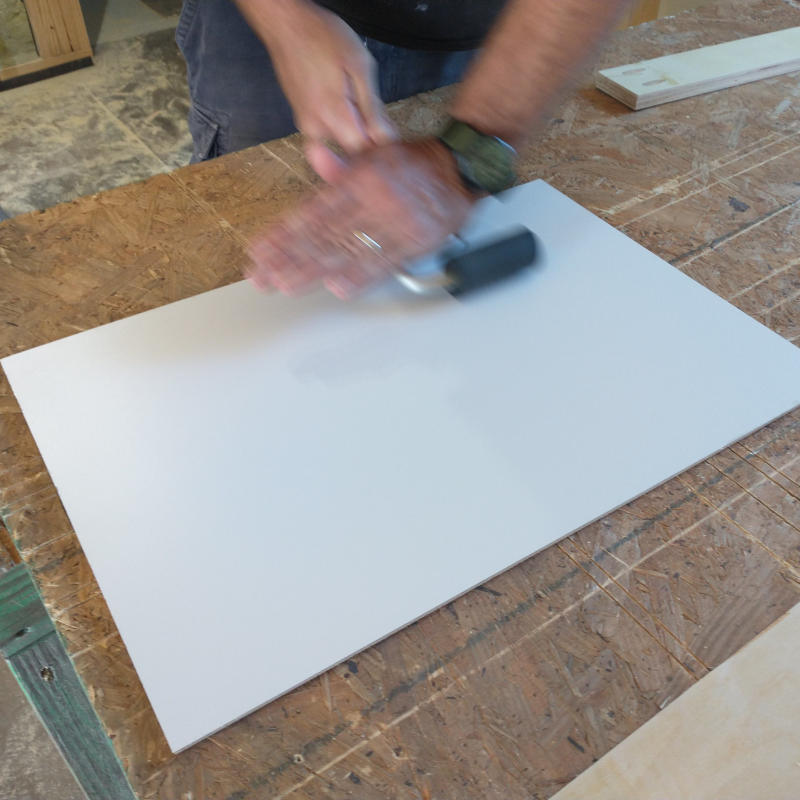
Laminate sheets are sold 4×8 or 4×10 and come rolled up in a 2×4 triple walled box. Once laid out, it must be weighted down to return to its flat position. After that it can then be cut using a skill saw, rolled with contact cement and pressed into place, trimmed with a router to desired size, and hand planned to remove sharp edges.

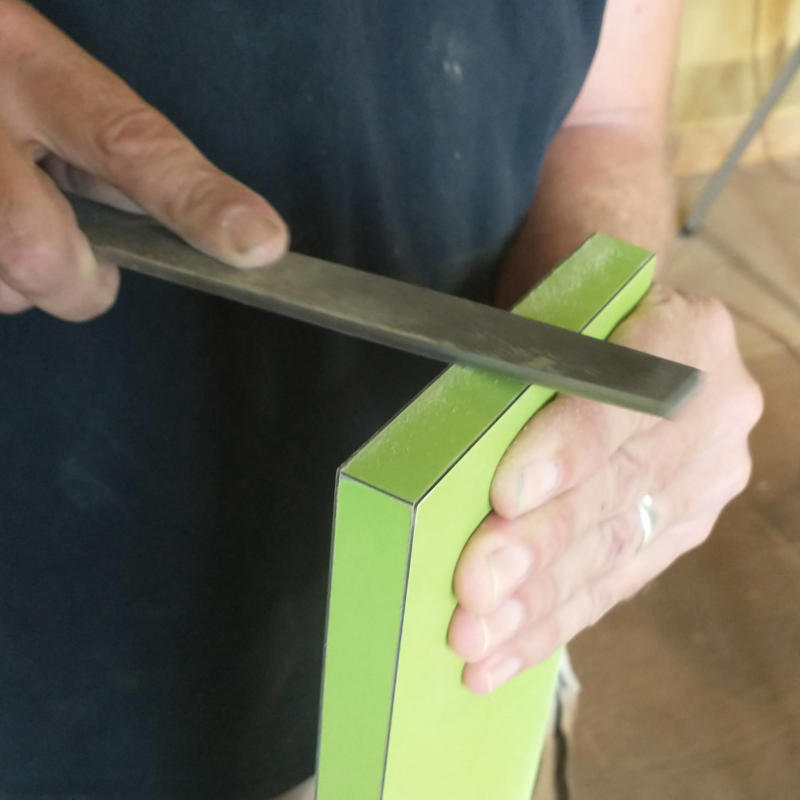
On the edges where the router could not used without chancing a burn mark the hand planner is the best choice. Working from the middle out, the planner is pushed outward trimming the tiny little plastic ribbons. The face is smooth enough when the laminate can be run across the forearm without snagging.
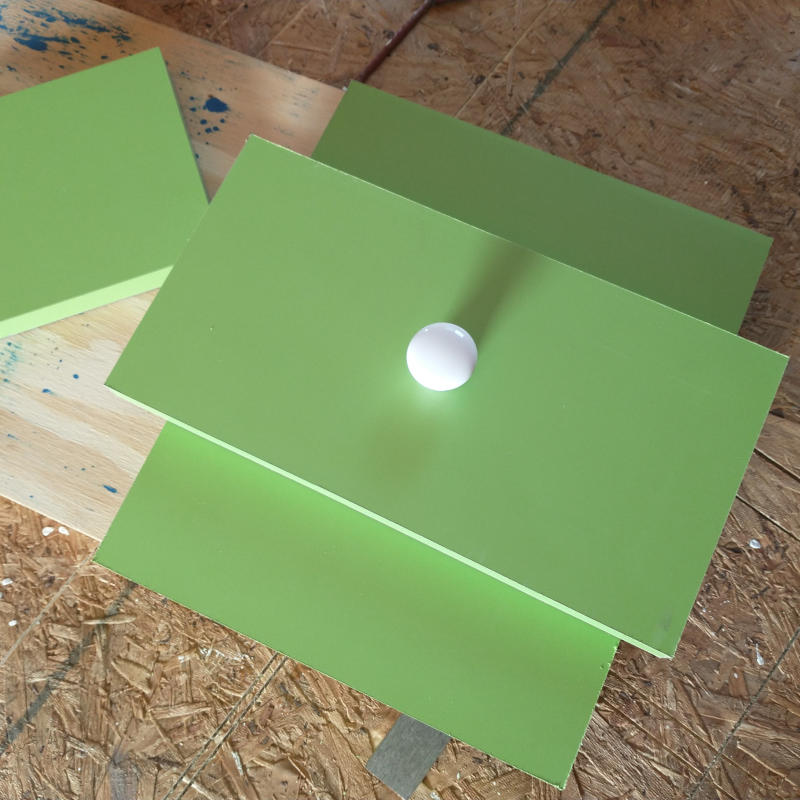
Drawer vs door knobs. Until this very moment in time I thought the only difference was application. This knob on a drawer, drawer knob. This knob on a door, door knob. Who knew the knob had nothing to do with the drawer or door but with the knob itself. A knob is a knob no matter the drawer or the door. Then there are pulls. A pull is not be confused with a knob. Both are interchangeable while both serve completely different purposes. Knobs vs Pulls. It really comes down to a personal choice. And this choice were classic little white knobs to accent the white walls. Nothing fancy, nothing flashy. Something easy to use, easy to clean.
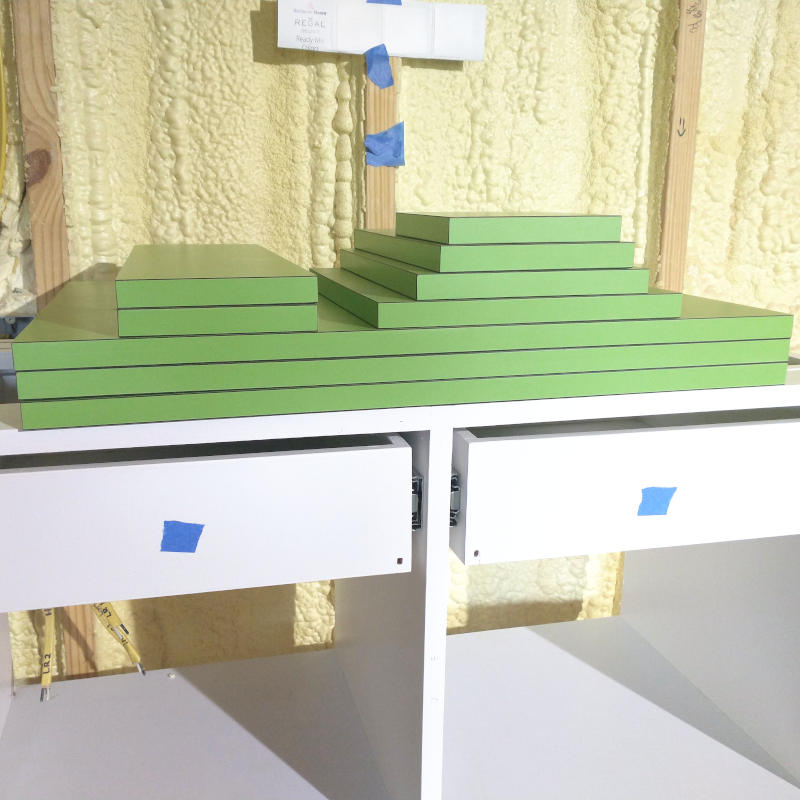
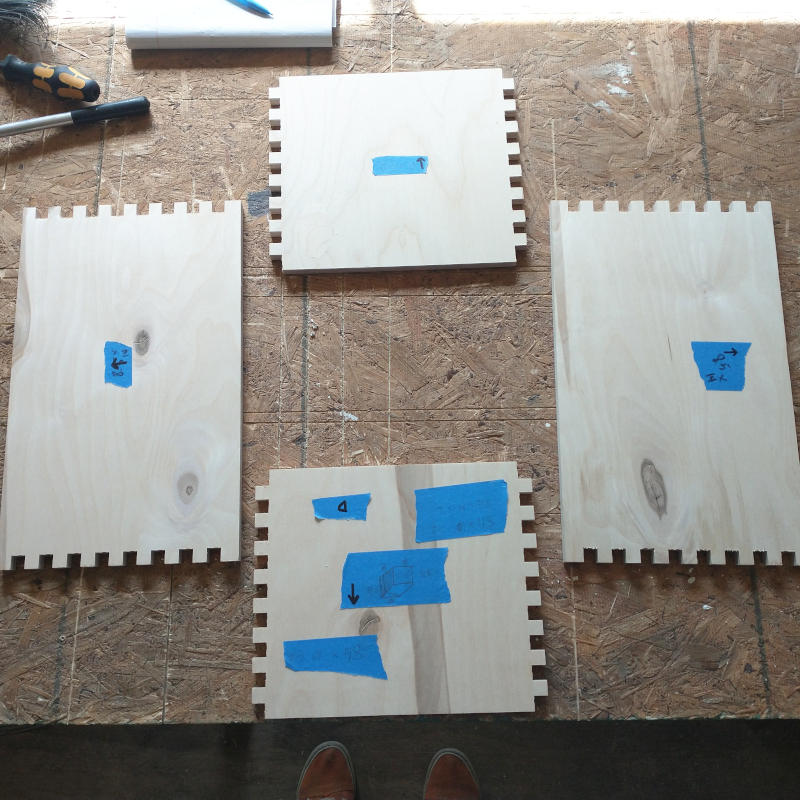
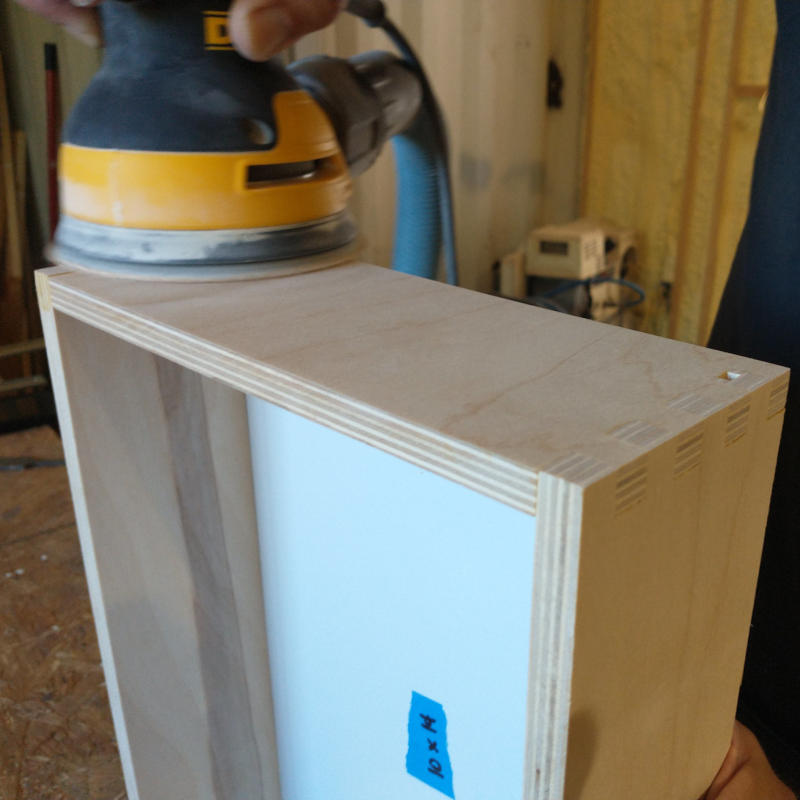
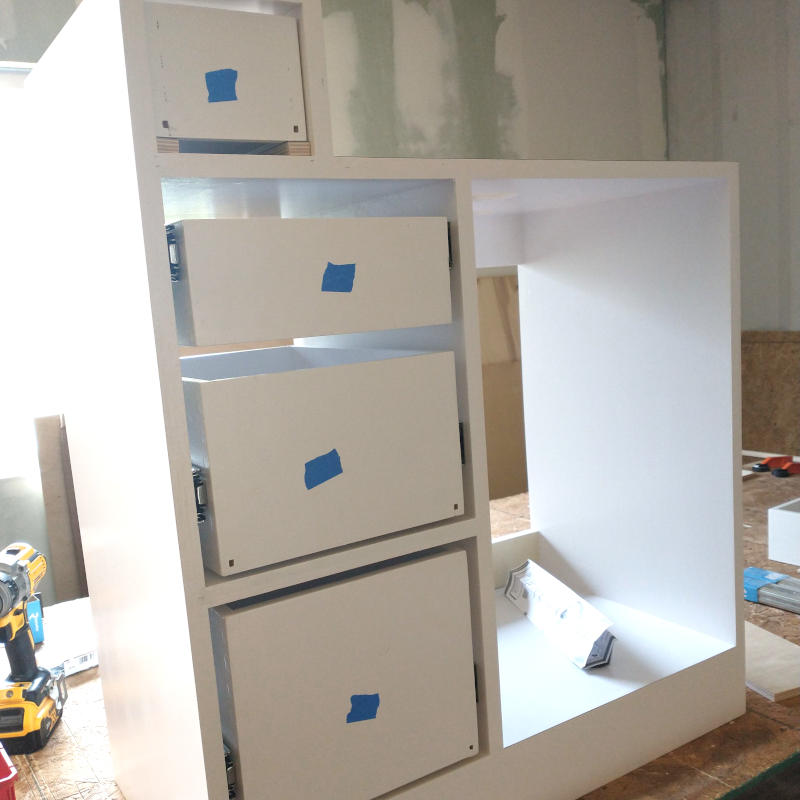
The last week of August was super busy. With all the drawers and doors laminated inside and out, and all the edges finally sanded smooth on the edges, the only thing left was to install them. This was the most nerve racking part. So much work and one little mismeasurement and the whole thing would have to be tossed as that part would need to be remade. . See the notes? Notes were placed on both sides of the drawer faces and cabinet doors. Every door, every drawer, every drawer face.
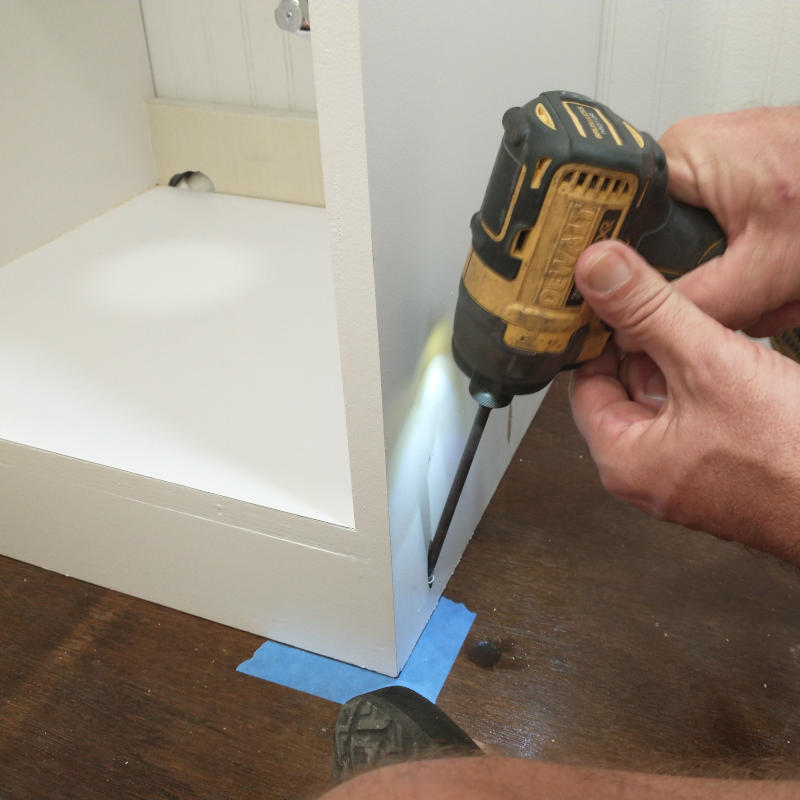
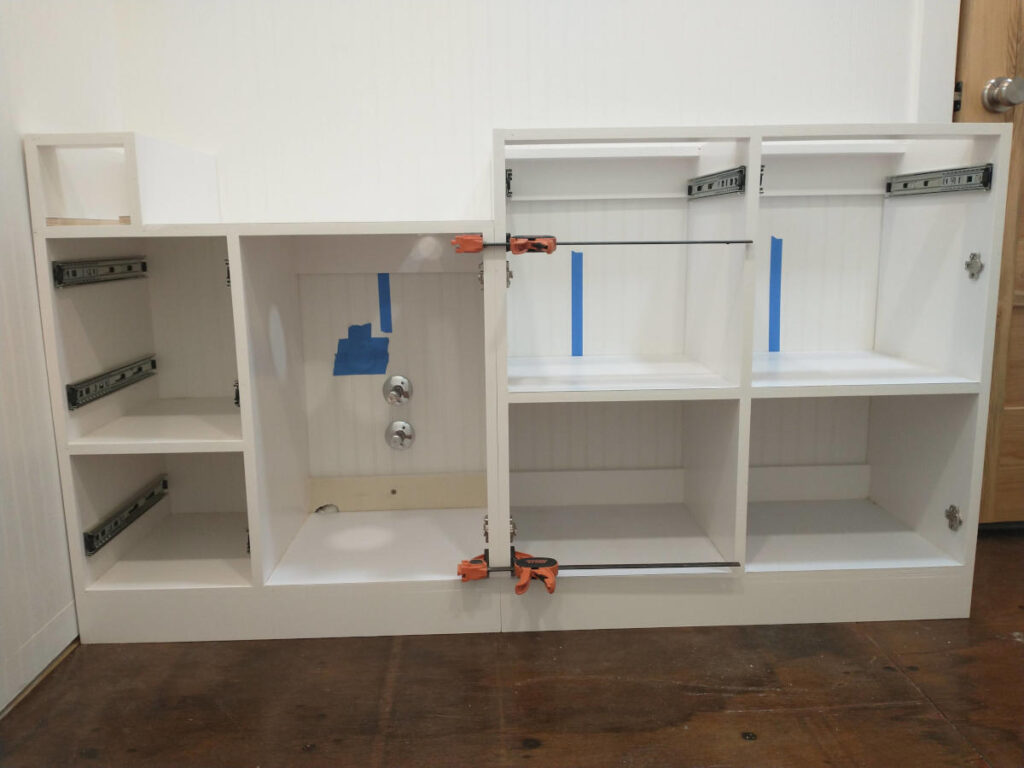
Knowing everyone who has ever had a bathroom counter big enough to sit on has therefore sat on the bathroom counter, the Planner decided the bathroom cabinets would be anchored to the floor. This was to help with the sitting situations as well as ensuring the cabinets don’t move during a hurricane. Each base was anchored and then the bases were anchored to each other.
Drawers were installed, door faces were wood taped to drawers. Lines were marked and holes were drilled. Each face was done one at a time checking after each installation for accuracy. Can’t have spacing between the third and fourth drawer thicker than the spacing between the first and second. Oh, wait. Crap. Sink resting in place as it needs major modifications before it will be ready to install.
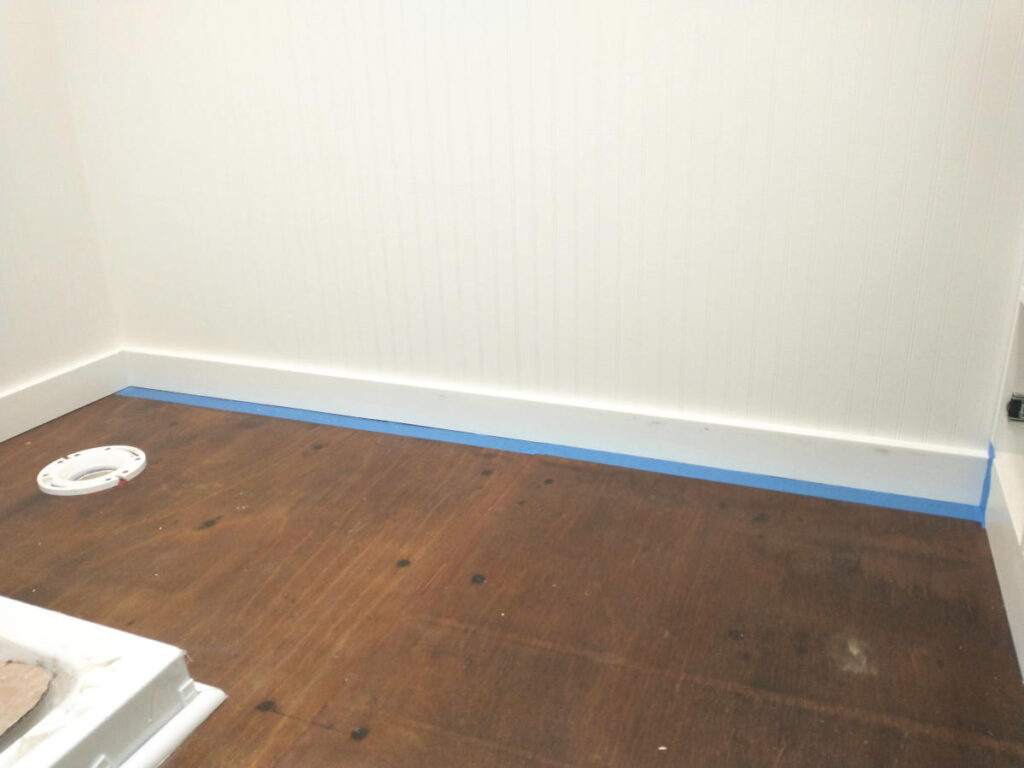
Ahh, September. Can you feel the cooler weather? Can you see the leaves changing colors? Can you hear the band playing at the local stadium? No, me either as I am inside with my air conditioner on full blast. The first day of the month the last piece of floor trim was installed and given its final coat of paint. This piece could not installed until the cabinet was placed in its final location. See the toilet drain?

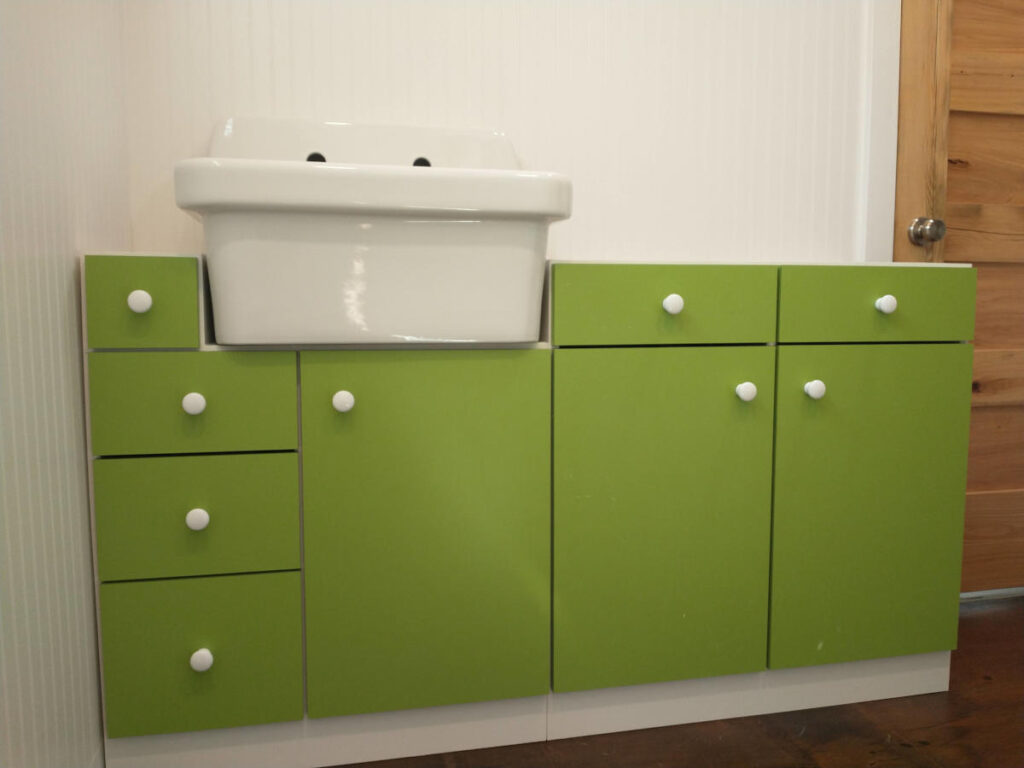
September 2. We almost finished the entirety of the bathroom cabinet in one month. Having to wait on the kitchen parts to arrive, again as the first set did not fit as expect, delayed the final day by two measly days. To keep the sink from vibrating on the counter a 1/4″ thick rubber gasket was installed between the sink base and the counter top.
The sink also had 1/16″ thick gasket squares placed the whole underside for the same reason. This gave the sink a nice feel when placing on the counter. Before that it felt dinky. Unsettled. Checking one last final time to ensure the heavily modified sink faucet did not leak, the sink was ready to install.
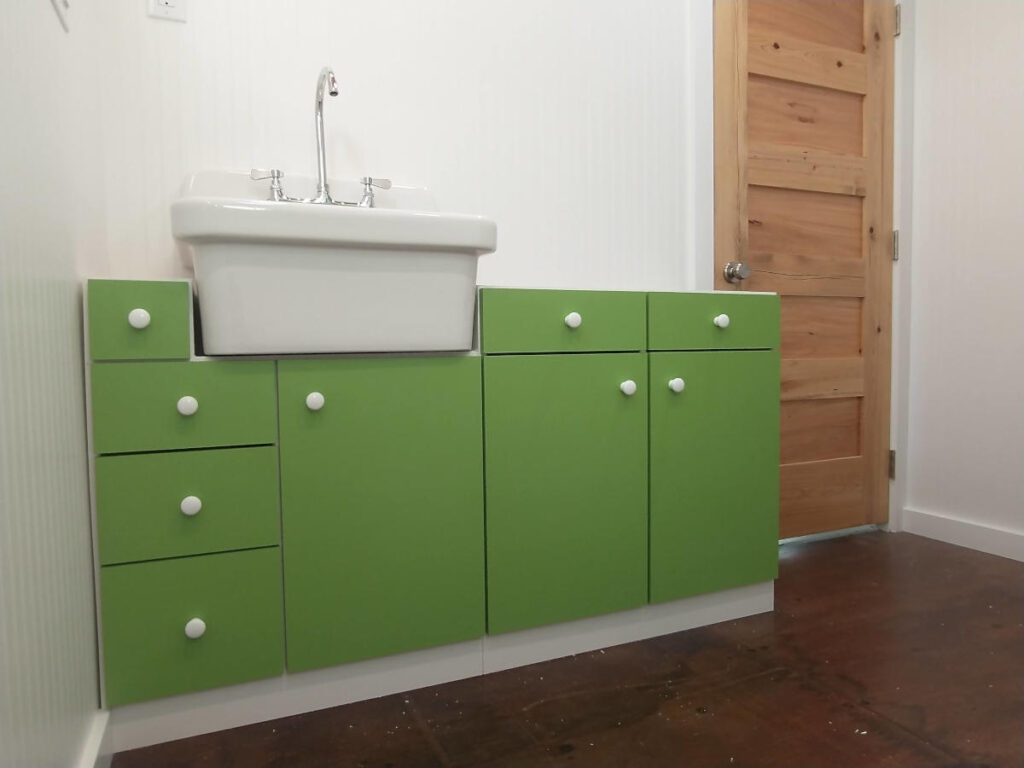
Installed, plumbed, anchored. Done. Almost. I still need the countertop. Doesn’t this bathroom cabinet just look absolutely amazing! The green is nice, not over bearing. The green is warm, not cold. The green is great. A great contrast to the floor. A great addition to the greatness of the room. It’s PERFECT.