
Toilet Showered In
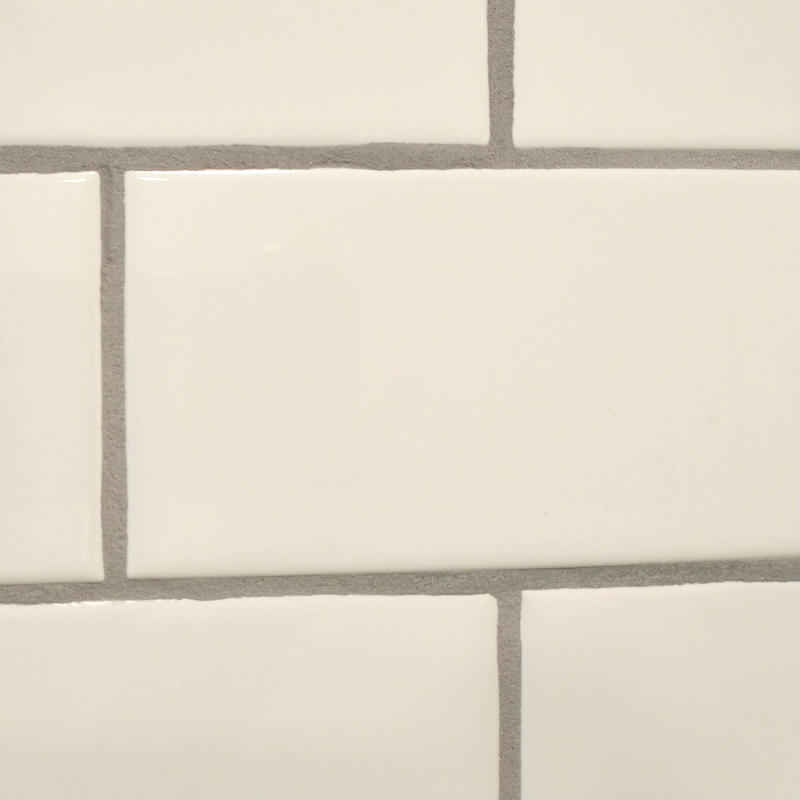
Floor, walls, ceiling, lights, and an almost complete vanity with sink. Bathroom is moving right along. Right along. With the cabinets done, we could return back to the shower. September shower sounds savy, right? If you are into those funny English literature things like that. Four full months have come and gone since installing shower tile. Somewhere around the middle of June all of the ceiling trim was reinstalled covering 99% of the paint overspray. The double layer of trim on the beadboard offers a better transition from the ceiling to the wall than the singular lay. The double layer trim also meant that the top layer was the same height as the showering resulting in the top trim running the entire way around the bathroom without breakage while complimenting the subway tile fabulously. Don’t worry there is a picture later showing this since there was not a post as trim pictures taken were blurry and too dark.


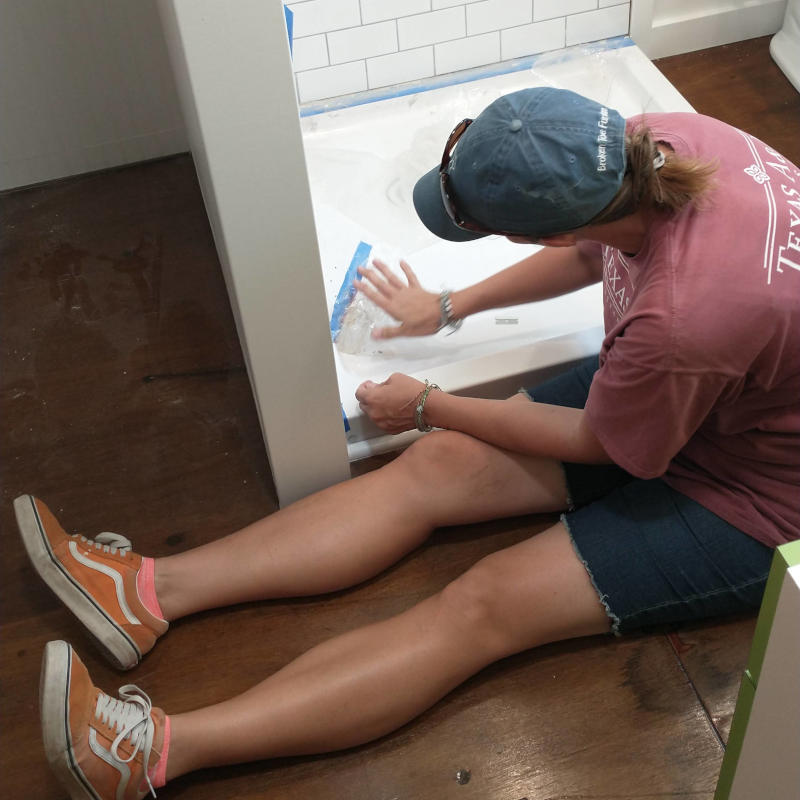
With this bathroom sink sitting outside getting its final water leak test I decided to start on the shower base. The specialty tiles ordered from a local tile outlet store has been sitting on the base for weeks on end. I was originally waiting while trying to decide how the tile was going to finish out against the beadboard. Then it was simply not conducive timing as the floor needed 24 hours of non interruption for the pink seal to set.


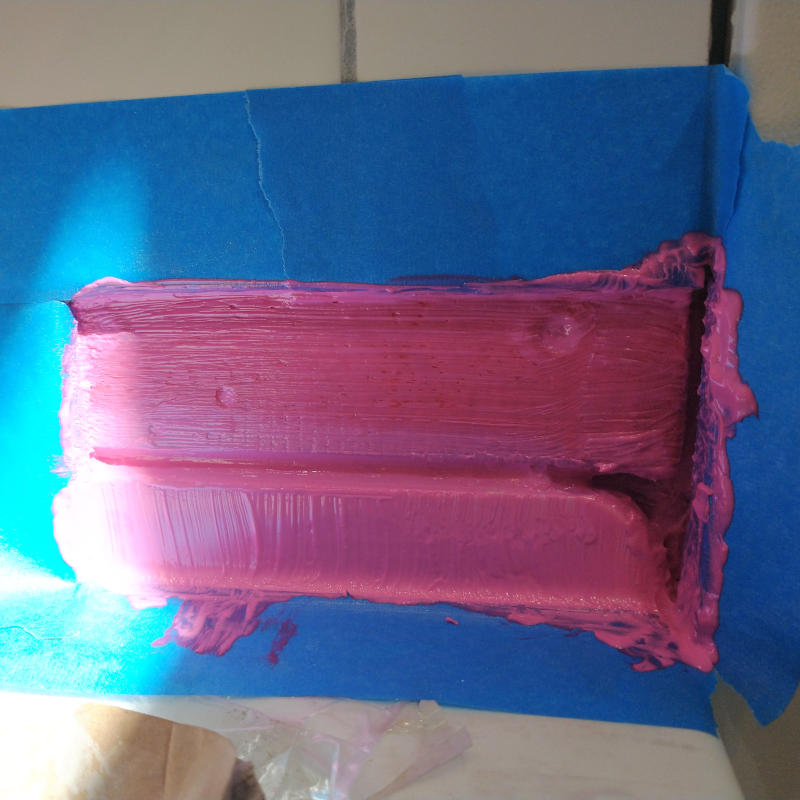
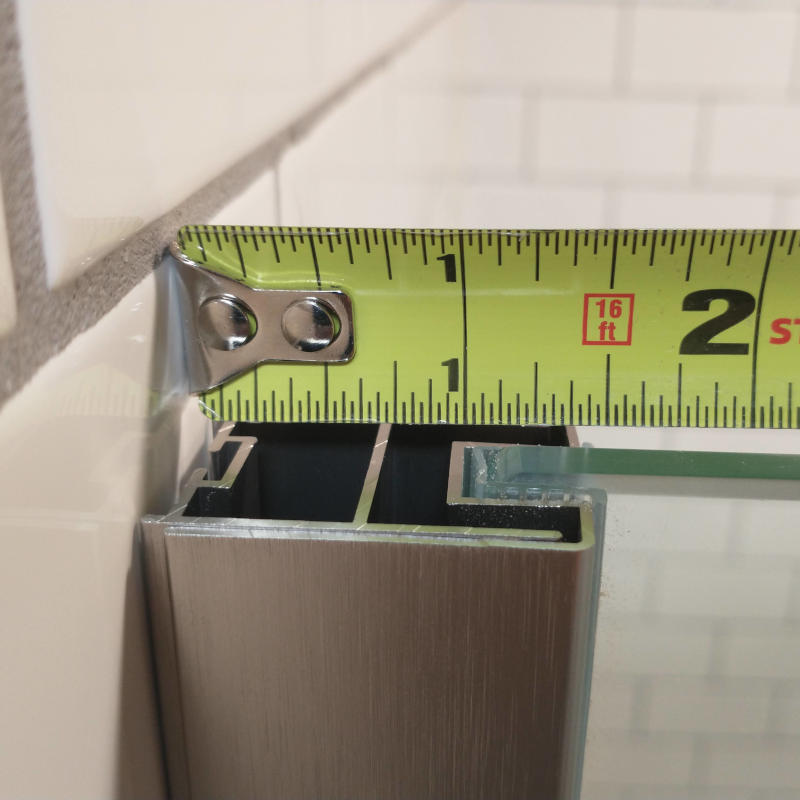
There is something about Red Guard I find satisfying to the soul. It happened when we installed the Shower Tile and it happened again when laying down this 2″ strip. Concerned about water dripping off the door, I doubled up on the Red Guard and left it extra thick just at the edge of pan. If it was so rubbery to the touch and dried clear, I would be tempted to Red Guard the entire floor against water damage.

Next a tiny batch of thinset was mixed and the shower base tiles were cut to length and installed. Everything was going well until the 45 corner pieces were cut. There is some serious math involved in getting those two corner pieces to match up snuggly. Not having an extra tile to play with the gap will just have to be.


Somewhere at the start of August when the sink water lines were installed the toilet water line and sewer floor flange were installed, too. If you look closely in the water line picture you can see my beloved fast food joint Styrofoam cup serving additional purposes. Needing a way to keep the critters out, the 32oz cup fit perfectly in the 3″ hole sealing off the outside world. Then during the end of August, UPS delivered our toilet. Like who knew a crapper could be delivered by the daily packager dropper offer. Not a freight truck or specialty hot shot driver. Nope, just the under paid, over worked residential delivery with a hand truck. Good grief. Guessing the maker knows all about how packages are tossed at the doors while driving, the potty was well package and arrived with no damage. I should have stopped right there and gone to buy a lottery ticket or something. No damage to a delicately heavy porcelain tank and bowl.

A real toilet. The Rainstream has a porcelain head but it compact both in seat size, in height, and in spacing around for shoulders. Good for little kids, horrible for grown adults suffering from O-L-D. Shh, we don’t try those words aloud but its true. Sometimes the knees just don’t want to bend early in the am. Another difference between a real pooper and the Rainstream model is that they are non interchangeable. This means this head is only designed for a real home with a real substructure. Not some particle board paperwood travel trailer or mobile home. Putting this throne in a mobile home would cause the floor to sag over time due to its weight. It really took me by surprise as to how heavy this was as the outside privy was not this heavy and it was an all in one unit. This commode bowl, lid aside, will handle being stood on if I was so inclined to dust the ceiling. Just saying….

Ever since installing the shelf liner on the shower base I have been waiting for the day it would be removed. Mostly because I find removing shelf liner very therapeutic and only a little bit because I worried it was going to leave a residue. If I removed it and a residue remained it would be my fault, if the Planner removed it I would worry if he had done it wrong. And YES, there is a correct way to remove liner. Teacher Tips 101. If the Kid removed it I would know with 100% certainty he would do it wrong as his patience for little things like this is 0%. Shelf liner removed like a dream. Blue tape on the other hand, not so much as it was stuck under the grout and had to be cut off in teeny tiny bits. Not too worried about the remaining blue bits as the caulk will cover it. Blue tape bit was the least of our concerns.

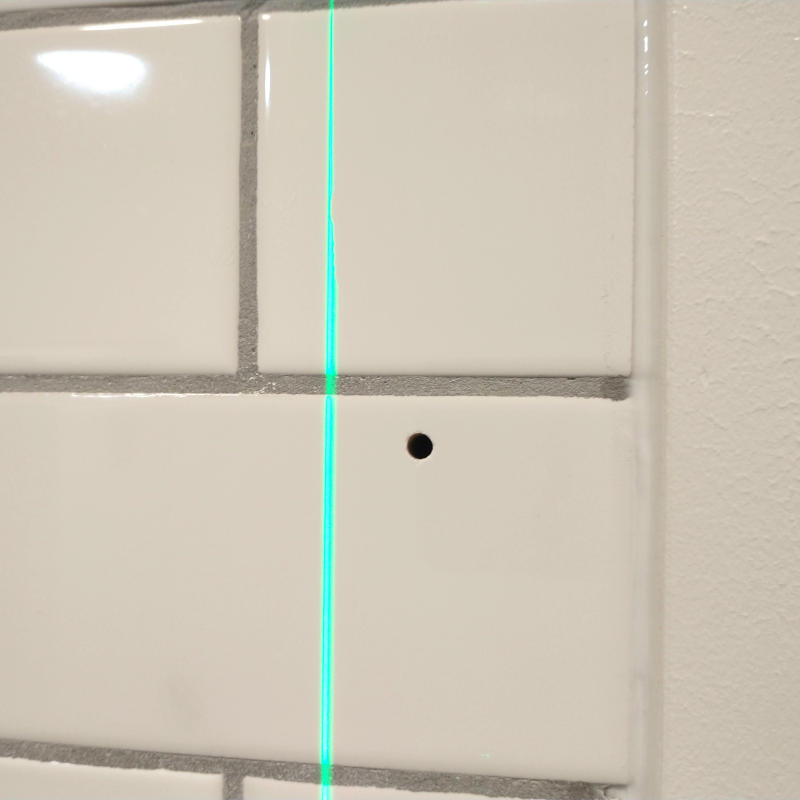
Broken tile on the other hand is all kinds of worrisome. Why, why, why? Was it not installed with the correct spacing, not enough thinset, too close to the base? Is the base not settled and popped up breaking the tile? Was it cheap tile?


Cheap tile it was not. After cutting out the grout around the broken tile the Planner used a hammer to break apart the tile so a new one could be installed. A fracture line running the entire distance seemed to appear out of nowhere. Removing the tile would take more than a just a few swings of the hammer. The tile was strong and refused to crumble. Not wanting to chance damage to other tiles in the swinging of a hammer, the Planner then applied the use of a punch to break the remaining tile apart. Pin point pressure and tile crumbled into removable sections.

All of the remaining thinset was removed and the exposed backer board was covered in Red Guard.


The next morning when removing the blue tape another crack appeared. By the time the tiles were removed all but two were removed for crack lines. The best we can assess is that not enough thinset was applied the first time around as there were chunks of tile removed without any thinset present.


New tiles were placed with extra thinset and allowed to dry overnight. Grout was applied and quickly removed. No fuss this times, we were practiced. The remaining grout was used to fill in any spots that were too low or had developed holes such as in the corner. Some grout was also placed at the tile edge against the trim line.


Replacing tiles even if they are in the middle of the shower turned out not the be that difficult. If the grout is removed methodically, slowing, in tiny sections, the remaining tile is not chipped on the edges. And since our grout work is not that great, matching the grout was very easy. A few more hours were used to clean up various grout lines that were still too thick from the first time around. Cutting grout is tiring work on the shoulders but the results are so worth the effort.

Giving the grout a couple of days to dry, the edges of the shower pan and the tile against the trim were caulked over. Installing tile, having a grout disaster, and repairing broken tiles never stressed me out. Didn’t know what I was doing but the act of placing tile seemed very straight forward. Hanging a solid glass shower door has stressed me out since the day the door arrived way back in April. First we had to get the shower door home laying flat in the truck bed against manufacturer suggestions. Then the doors were stored exposed to the world leaning against the nook wall slightly covered with a packing blanket. Ladders, chairs, step stools, movable yellow platforms, ceiling boards, and the Kid were potential door breakers.

According to the door instructions, hanging a door was not difficult, it was not rocket science, it was not quantum physics. It was designed so that the everyday worker could install the doors with the minimal of tools and skill set as the instructions even told me what a drill was. They lied. Hanging a door was rock science as the instructions were lacking steps and tools needed and directions were vague in description .

Measurements given did not match actual measurements on provided equipment. Measurements given would have resulted in drilling through the glass instead of the pocket next to it. Name brand shower with instructions written by a non shower installer. To me, all instructions should be written as well as LEGO. They are the golden ticket of instructions. Lego truck with 25 pieces or 2500 pieces every step is well indicated and beautifully laid out in step by step procedures. No verbiage needed.
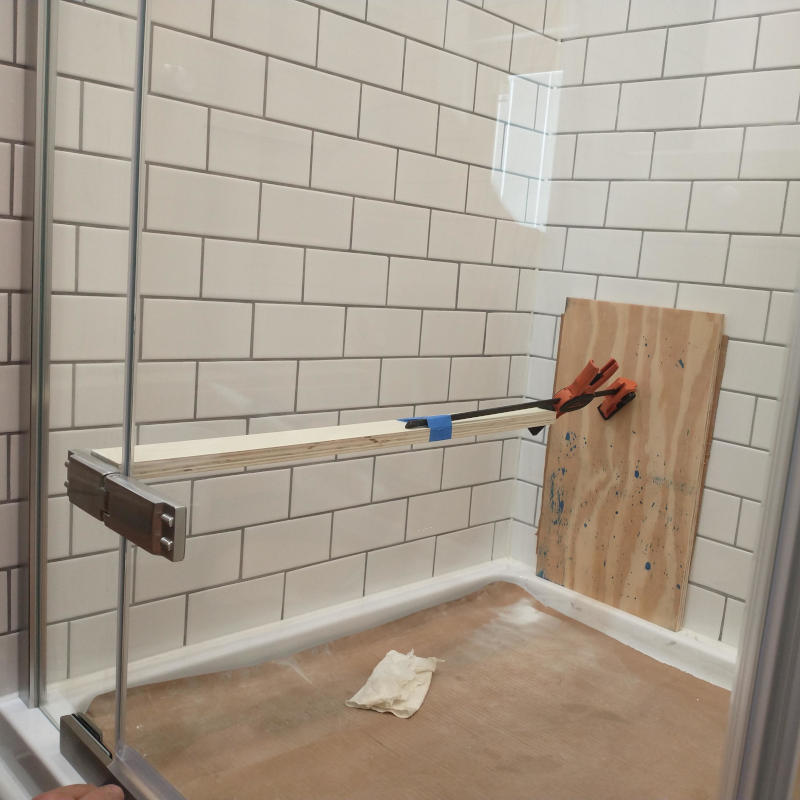
It was odd what sections on the shower door had to be installed and what sections did not. Take the hinges. They were installed at the factory and do not line up flat across the top as there is a slight difference between the door and the side section. It is almost not visible but yet it is there. The door knob that does not stick out any further than the hinges was not installed at the factory and had to be done upon installation and was given the worst how to instructions of all other sections.

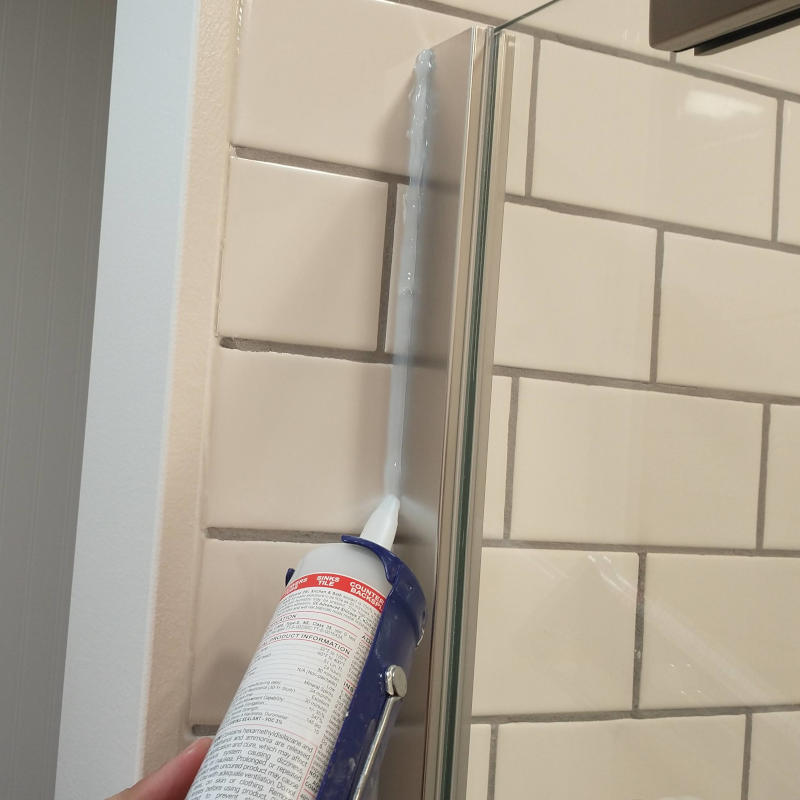
Well, the second worst instructions. Once the panels were hung and the knob installed the door was done. Umm…. what about the gap at the bottom of the panel? Is the water supposed to run straight down the panel, hit the shower base, and keep going without seeping under the panel gap? I think not. If there is a gap, the water will work its way out or in. This is know for sure. As you can guess there were no instructions for caulking the panels. Yet we did with clear caulk as to not be obtrusive to the glass panels. Upon reflections, we would have chosen gray to match the grout lines instead. Live and learn.


Finally four days after the glass paneled shower was installed, the shower faucet and head were completed. Shower faucets are so complicated for what they are. I wanted two handles, one for hot, one for cold. Having two handles is the only way to achieve a trickle of warm water. And I like trickles when showering. Now if I want warm water, the shower head has to run at full volume. With a single shower faucet, the water is either fully on or fully off and the only option available is for temperature. Sadly, I could not find a two handle shower faucet that was simple in design and reasonably affordable. Whereas I am most disappointed in the faucet I absolutely love the shower head. Coming out of the ceiling allows the Planner to stand fully underneath without hitting his head. It really is a wonderful shower head and if we lived in an area of the world where water could be wasted standing in a rain shower head is amazing.
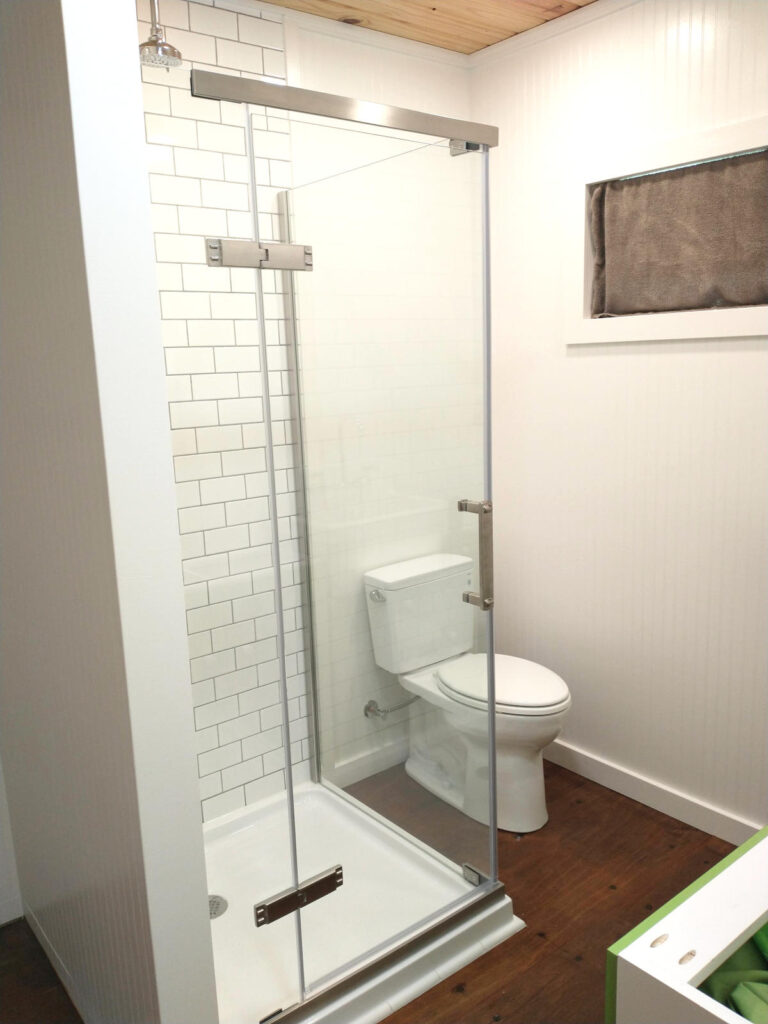
Floor, walls, ceiling, lights, an almost complete vanity with sink, toilet, and now a fully finished shower. All that is needed is a better curtain (not a portion of an old towel), the two countertops sections, and the washer/dryer and overhead cabinet. Gosh, when stated like that it makes it seem as though nothing has been done in the bathroom. Hopefully, the remaining portions take less time and are not as daunting to complete. Oh, and running water. How could I forget running water? We are getting closer and looker even better.